Installation – Desa GA3700 User Manual
Page 17
www.desatech.com
113109-01G
17
INSTALLATION
Continued
5. Correct all leaks at once.
6. Light fireplace (see Operation, page 19.
Check all other internal joints for leaks.
7. Turn off fireplace (see To Turn Off Gas to
Appliance, page 20).
INSTALLING LOGS
CAUTION: Do not remove the
data plates attached to the heater
base assembly. The data plates
contain important warranty and
safety information.
WARNING: Failure to posi-
tion the parts in accordance
with these diagrams or failure
to use only parts specifically
approved with this heater may
result in property damage or
personal injury.
WARNING: After installa-
tion and periodically thereafter,
check to ensure that no flame
comes in contact with any log.
With the heater set to High, check
to see if flame contact any log. If
so, reposition logs according to
the log installation instructions
in this manual. Flames contact-
ing logs will create soot.
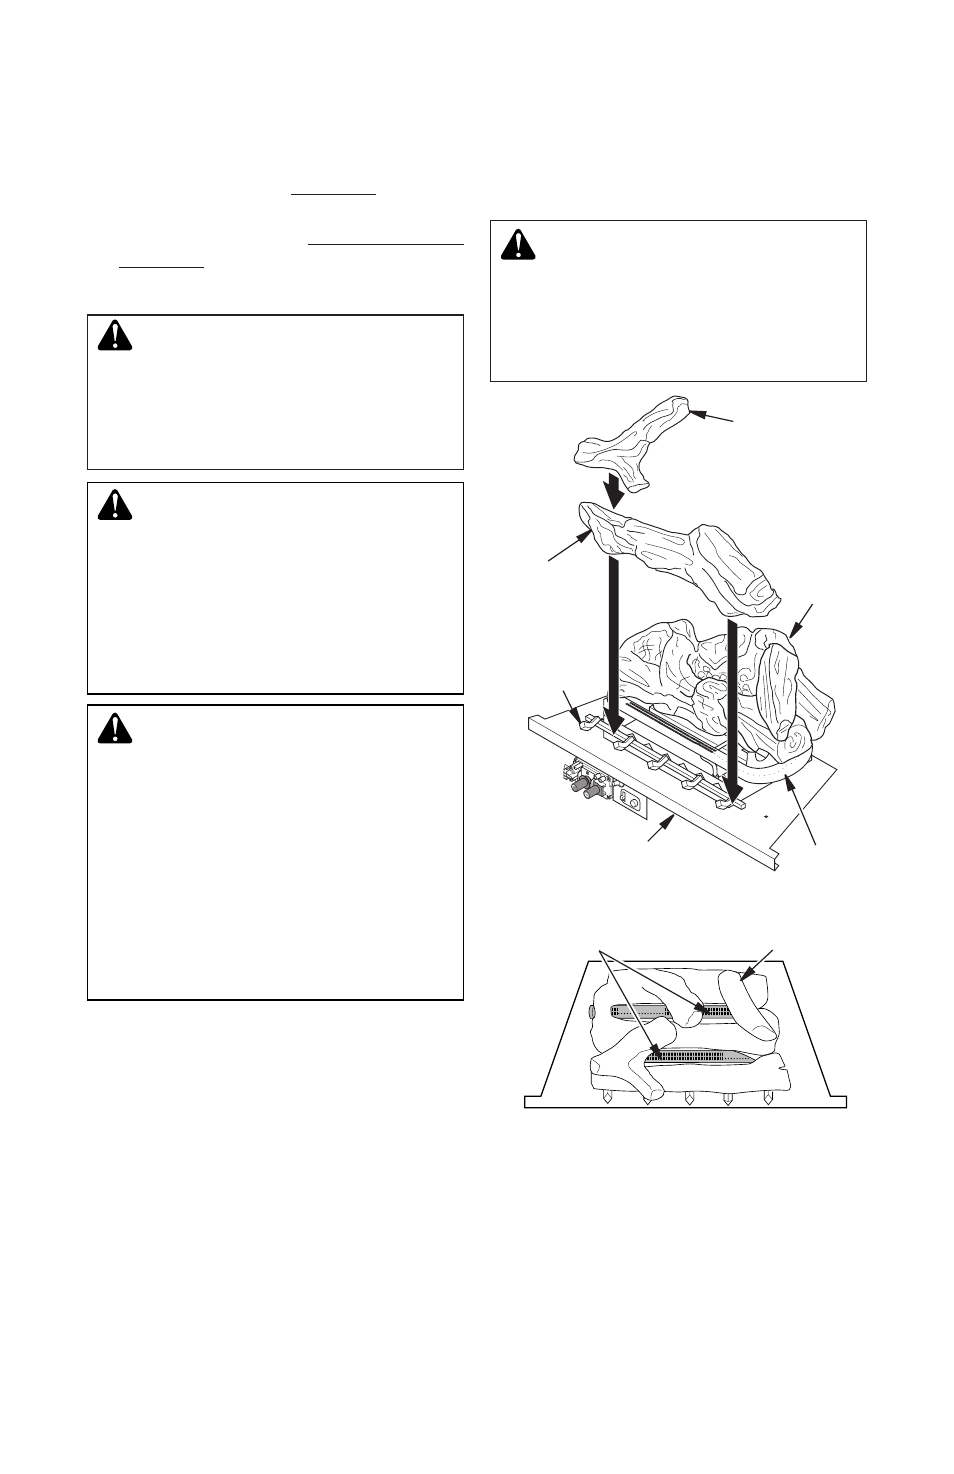
It is very important to install the logs exactly
as instructed. Do not modify logs. Only use
logs supplied with fireplace.
1. Place back log #1 on grate to fit as il-
lustrated in Figure 24. Make sure middle
section at bottom of log set is seated into
“U”-shaped cutout in center of chassis
(see Figure 24). IMPORTANT: Make sure
log does not cover any burner ports (see
Figure 25).
2. Place front log #2 against front grate
prongs as shown in Figure 24.
3. Place crossover log #3 on top of front and
back logs as shown in Figure 24.
Figure 24 - Installing Log Set
Chassis
Crossover
Log #3
Burner
Front
Log #2
Back
Log #1
Grate
Prongs
Figure 25 - Installing Log Set, Top View
Log Set
Burner Ports
4. Install fireplace screen by slipping notches
of fireplace screen over screws on front
of fireplace (see Figure 26, page 18).
WARNING: You must operate
this fireplace with the fireplace
screen in place. Make sure fire-
place screen is in place before
running fireplace.