Warning – ADLINK cBP-3204[R] User Manual
Page 21
Power Supply Unit
• 11
3.1.3
Installation
After inserting cPS-150R to a standard 3U CompactPCI system or the
standard 6U CompactPCI system, you can turn on the switch on the chassis.
Of course, you may turn on the power switch on the chassis first, and insert
cPS-150R, which delivers full safety redundant, hot-swappable function, and
provides the plug-able feature.
3.1.4
Specifications
u
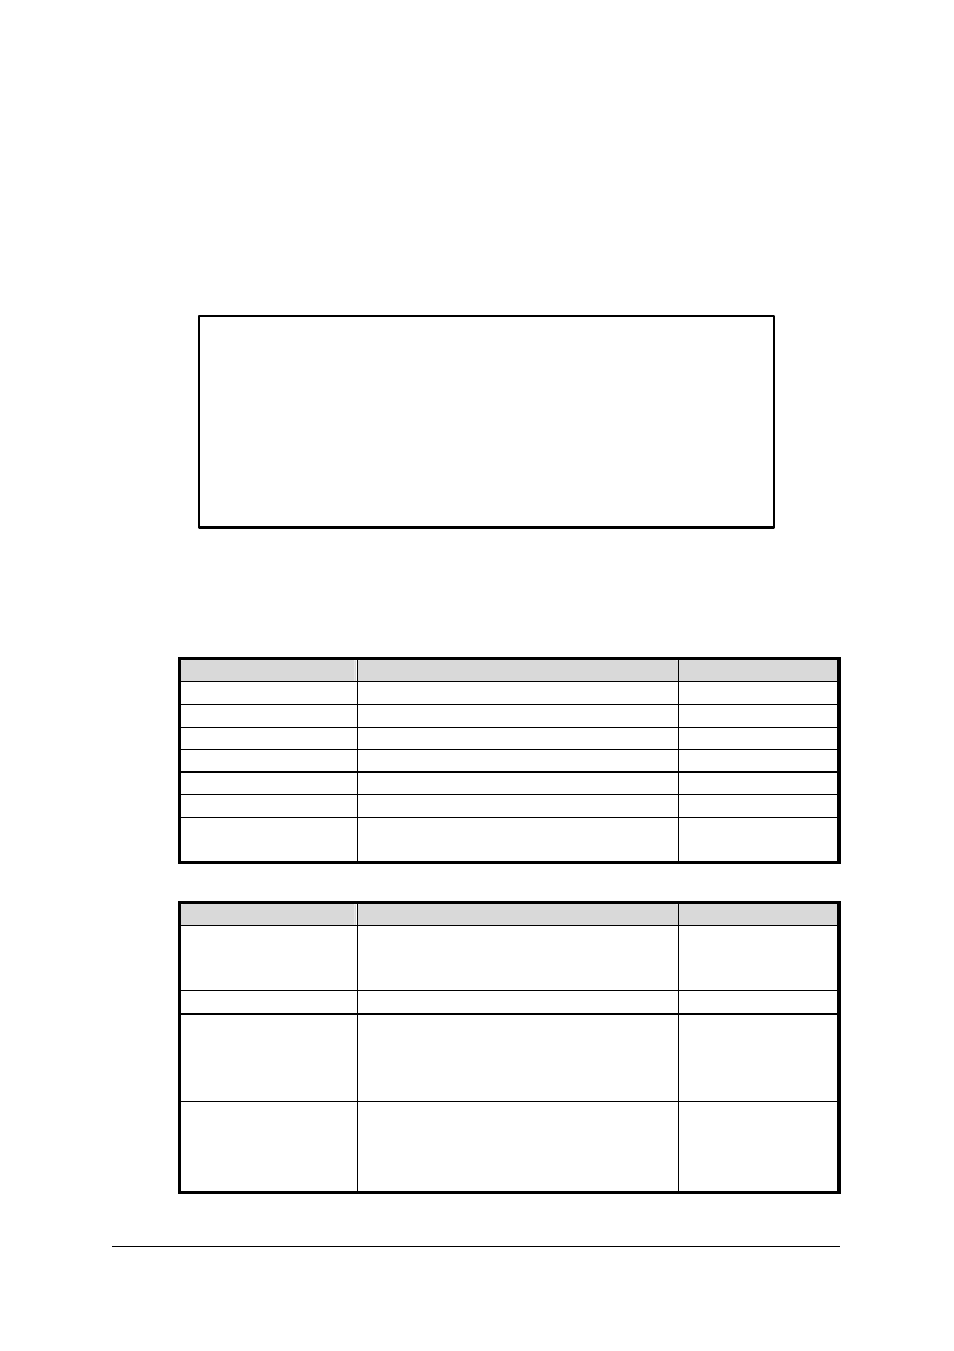
AC Input
Item
Specification
Test Conditions
Operating Voltage
90 - 264 Vac, single phase
Input current
3.1 A max
Inrush current
<40A
@ 240 Vac
Frequency range
45-440 Hz
Power factor
0.99 typical
Efficiency
typical 73%
Protection
over current, over voltage, under
voltage, and surge protection.
u
DC Output
Item
Specification
Test Conditions
Output power
175W max.
For working area
refer to figure
3.1.4
Output voltage
+5V, +3.3V, +12V,
−
12V
Output current
20A @+5V (2A min.)
12A @+3.3V
2A @+12V
1A @
−
12V
Voltage error
<
±
3% @+5V
<
±
5% @+3.3V
<
±
5% @+12V
<
±
5% @
−
12V
WARNING
Be sure that the socket of the backplane on the
chassis is ERNI part #914374; AMP#148370-1 or
#97-7200 defined by PICMG before inserting
cPS-150R to the chassis. If cPS-150R is forcibly
inserted, it and the connector of the chassis will
be damaged.