SINGER W4910 Euroflair User Manual
Page 42
Attention! The text in this document has been recognized automatically. To view the original document, you can use the "Original mode".
Maintenance
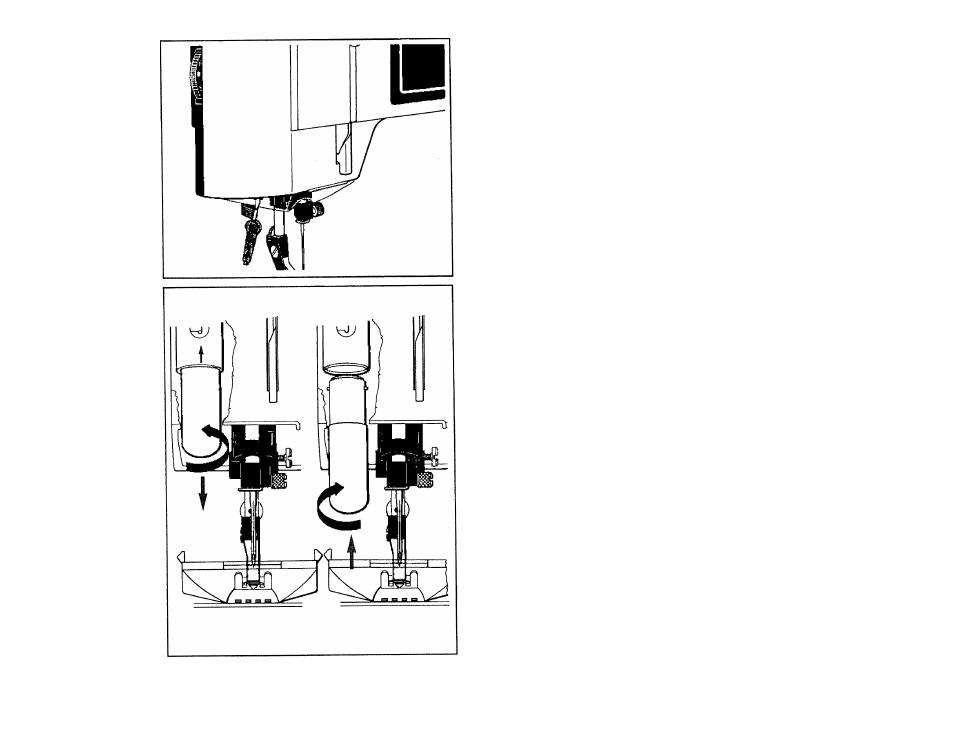
Changing the light bulb
The lamp is located to the left of the needle. First
remove the lamp guard. By inserting the small screw
driver in the recess at the left edge and applying slight
downward leverage, you can slide the guard down to the
stitch plate, as illustrated below.
To remove, press the light bulb upward, turn a quarter
turn in the direction of the arrow. To insert the new light
bulb, push it upward and turn it a quarter turn in the
direction of the arrow.
Use a light bulb of maximum 15 W, as indicated on the
rear of the machine.
40
See also other documents in the category SINGER Sewing machines:
- 401A (116 pages)
- Simple 3116 (94 pages)
- 1507 (88 pages)
- 1507WC (88 pages)
- 112W140 (32 pages)
- 147-2 (30 pages)
- 114-33 (43 pages)
- 119-3 (23 pages)
- 14K1 (10 pages)
- 147-104 (34 pages)
- 116-1 (20 pages)
- 115-2 (38 pages)
- 14U286 (40 pages)
- 14U286B (21 pages)
- 114-4 (29 pages)
- 142W25 (10 pages)
- 147-81 (28 pages)
- 118 (16 pages)
- 136W105 (22 pages)
- 114-41 (20 pages)
- 147-4 (28 pages)
- 105-3 (30 pages)
- 1027 (36 pages)
- 147-26 (37 pages)
- 12W208 (25 pages)
- 128-4 (25 pages)
- 109-320 (14 pages)
- CP17 (47 pages)
- 147-6 (56 pages)
- 132B26 (9 pages)
- 114-2 (36 pages)
- 1371A3 (86 pages)
- 14CG754 (53 pages)
- 147-50 (39 pages)
- 14T967DC (3 pages)
- 109-520 (13 pages)
- 14SH654 ULTRALOCK (48 pages)
- 147-86 (30 pages)
- 105-20 (23 pages)
- W303 (13 pages)
- 147-38 (53 pages)
- 114-22 (45 pages)
- 1375A1 (33 pages)
- 107-2 (31 pages)
- 1200A (4 pages)