Repair & adjustment – Sears 917.254710 User Manual
Page 24
Attention! The text in this document has been recognized automatically. To view the original document, you can use the "Original mode".
REPAIR & ADJUSTMENT
mum 3S
mum 37
7. Mower Ramami
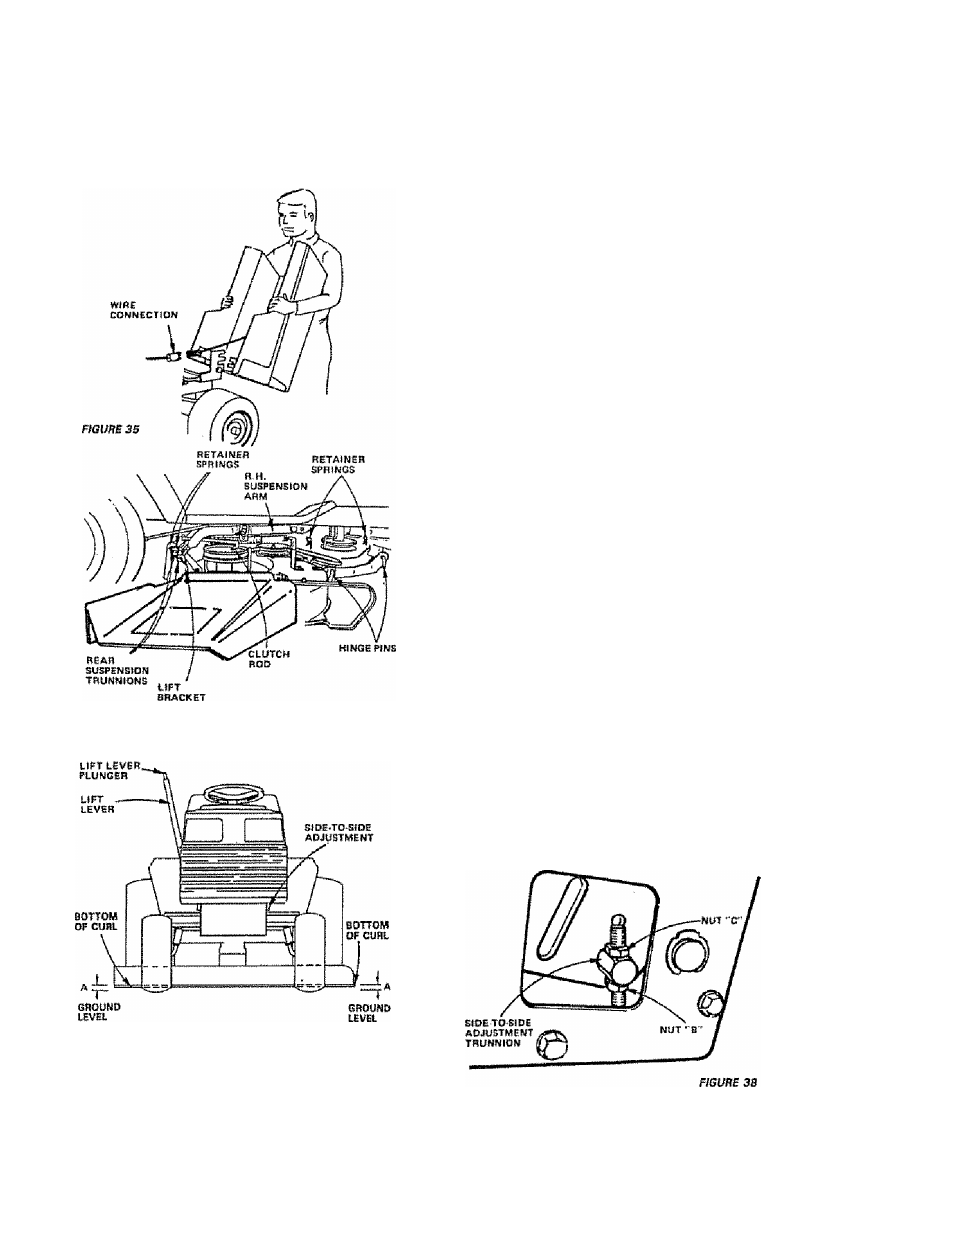
a.
Remove mower belt per instructions under
"Mower Drive Beit Removal" through stepfc).
b. Remove retainer spring from clutch rod; puli
clutch rod out of clutch bracket.
c.
Pulì retainer springs out of rear suspension
trunnions. Remove rear suspension trunnions
from lift brackets (Fig. 38).
d. Pull reternsr spring out of rear hinge pin. Remove
rear hinge pin fPlg. 36).
e. Puli retamer spring out of front hinge pin. Remove
front hinge pin (Fig, 3S).
f.
Use lift lever fo reise suspension arms. SU'de
mower out from under tractor,
NOTE: }E AN ATTACHMENT OTHER THAN THE
MOWER DECK IS TO BE MOUNTED ON THE TRACTOR,
THE LH, AND R.H, SUSPENSION ARMS {FIG. 36)
SHOULD BE REMOVED FROM TRACTOR,
8. Leve! Mower Housing
Adjust the mower while tractor is parked on level
ground or driveway. Make sure tire pressures are 14
PSl in front tires end 12 PS! in rear tires. If tires are
over or under inflated, you wHI not properly adjust
your mower.
Sida-to-SIda Mower Adjbsiimortr '
s. Depress lift foyer plunger end use lift lever to
raise mower to maximum cutting height.
b. Measure height from bottom of curt to ground
level at frantoimower. Distence "A" should be
the same on both sides of mower (Fig, 371.
£?, If distance "A " needs ft? be changed, snap out
access hole cover on L.H. side above footrest.
Use 11/W wrench on mts "B" and "C" at
sida-to-side adjustment trunnion (Fig, 38}.
d. To miss leftside of mower, loosen nut "B"and
tighten nut "C".
e. To lower ieft side of mower, loosen nut "C" and
tighten nut "B".
NOTE: ONE ROTATION OF ADJUSTMENT NUTS
IS EQUIVALENT TO APPROXIMATELY 3/16"^
HEIGHT CHANGE.
f. Be sure eil nuts are securely tightened.
24