Assembly, Mower drive belt adjustment, Final assembly – Sears 917.254710 User Manual
Page 11
Attention! The text in this document has been recognized automatically. To view the original document, you can use the "Original mode".
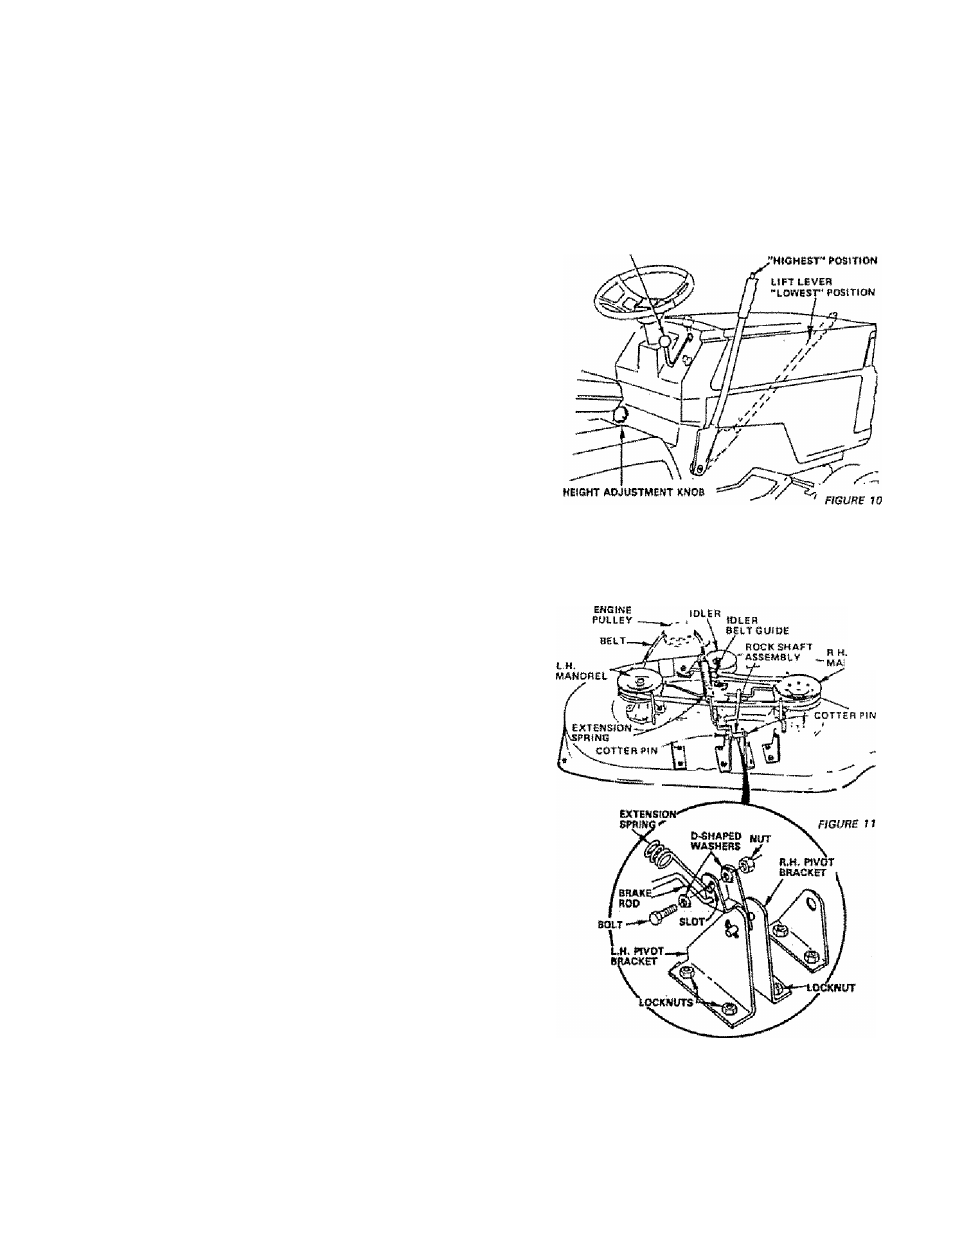
Mower Drive Belt Adjustment
Your tractor ñas been manufactured with the
abiiity to ra-adfust the mower drive belt to pro
vide you with longer belt Ufa.
If the attachment dutch lever (Fig, lOj travels
3- Í/2" up the slot In the dash before spring tension
resistance is evident, adjustment is necessary.
NOTEi CHECK EOR PROPER SPRING TENSION
WITH ENGINE OFF AND LIFT LEVER IN HIGHEST
POSITION.
a. Lower or remove the mower deck for easier
access,
b. Usingi2) 7/16" wrenches, remove the 0-shaped
washers from the rock shaft assembly (Fig 11 -
inset/.
c. Move extension spring from lower end of slot
to upper end in rock sha ft assembly and install
the D-shaped washers (Fig. 1 i • Inset}.
d. Tighten bolt and nut to secure the D-shaped
washers.
NOTE! WHEN
installing
A NEW SELT. 6XTEN
SION SPRING MUST BE RETURNED TO THE LOWER
END OF THE SLOT ON ROCK SHAFT ASSEMBLY-
ASSEMBLY
ATTACHMENT CLUTCH tfVER
"DISENGAGED" POSITION
10. Check the Cutting Level
The blade housing \ms set at rite factory to cut
level. After mowing a short distance, look at the
area that was cut If the blade bousing cuts
uneven; see the Instructions an "Slde-to-Side and
Front-to-Rear Mower Adjustment" (pages 24 and
251
11. Final Assembly
a. Make sure at! fasteners are tight
b. Read end Miow the operation instructions
(page 12j. Know the location and purpose of
ail controls,
c. Check oH and gasoline (page 13) before starting
the tractor.
NOBEL
n