Elevation lock, Maintenance, Elevation lock maintenance – Sears 113242502 User Manual
Page 26
Attention! The text in this document has been recognized automatically. To view the original document, you can use the "Original mode".
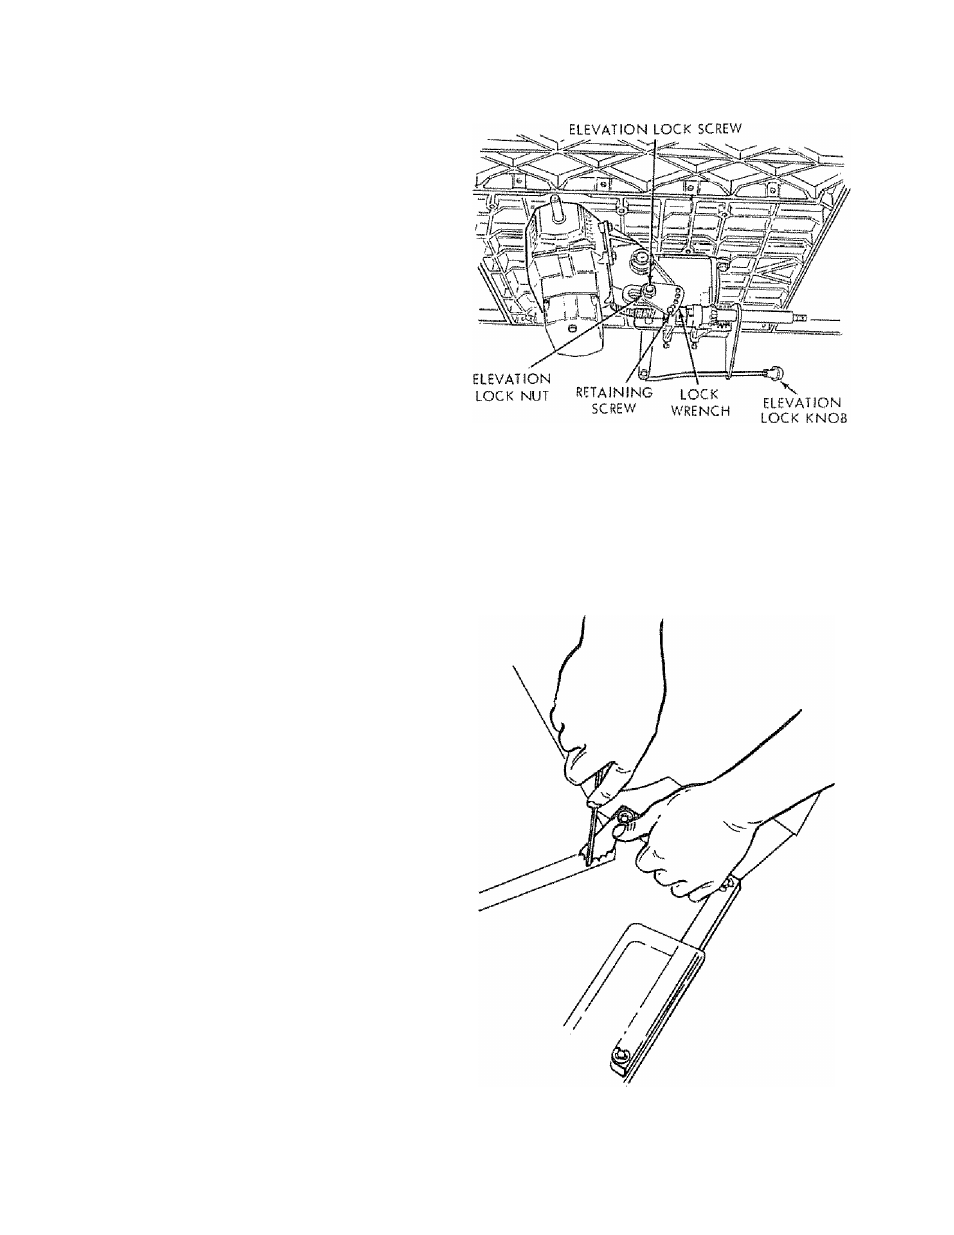
ELEVATION LOCK
When correctly adjusted, the elevation mechanism is locked
securely when the ELEVATION LOCK KNOB is approx,
one inch from the front of the saw.
After extended use, the ELEVATION LOCK SCREW and
NUT may wear, which wilt cause the lock to slip.
1, Tilt blade to 45°.
2. Remove retaining screw, using a 3/8 in wrench,
3. Move LOCK WRENCH in the direction of the arrow
(this will tighten the LOCK NUT) only enough to
replace the retaining screw in the next hole
4, If retaining screw Is in last hole as shown, lift LOCK
WRENCH off of LOCK NUT and reposition it by
rotating it CLOCKWISE
MAINTENANCE
WARNING; FOR YOUR OWN SAFETY, TURN SWITCH
"OFF" AND REMOVE PLUG FROM POWER SOURCE
OUTLET BEFORE MAINTAINING OR LUBRICATING
YOUR SAW
Do not allow sawdust to accumulate inside the $aw„
Frequently blow out any dust that may accumulate inside
the saw cabinet and the motor.
Frequently dean your cutting toots with Craftsman Gum
and Pitch Remover
A coat of automobils'type wax applied to the table and the
rip fence guide bar will help to keep the surfaces dean and
allow workpieces and the fence to slide more freely.
If the power cord is worn or cut, or damaged in any way.
have it replaced immediately.
Make sure the teeth of the ANTIKICKBACK pawls ere
always sharp. To sharpen:
1- Remove blade guard.
2
Rotate pawl toward rear of spreader so that teeth are
above top of spreader
3
Hold spreader with left hand and place pawl over corner
of workbench.
4, Using a small round fils (Smooth Cut) sharpen the
teeth,
26