Assembly – Sears 113.24907 User Manual
Page 9
Attention! The text in this document has been recognized automatically. To view the original document, you can use the "Original mode".
assembly
SET SCREW WRENCH
c.
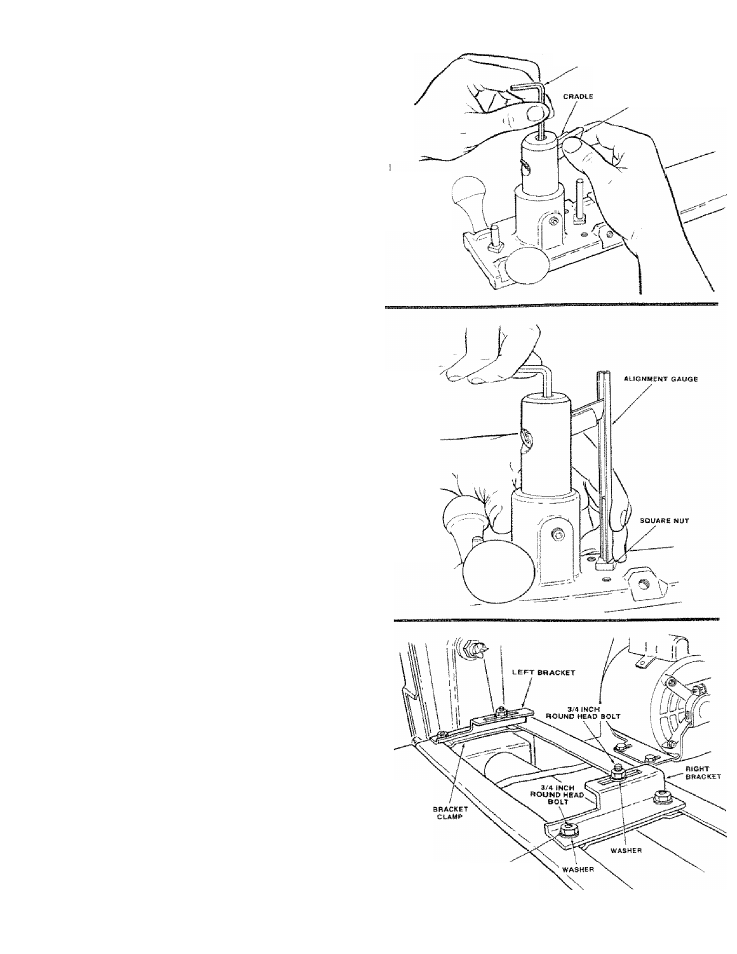
Remove protective costing from the tip of the
Cutting Tool and place it in the Cradle.
d.
Insert the Cutting Tool and Cradle into the Too
Post and rotate it back and forth while turning the
Set Screw in the top of the Too! Post. The Set
Screw should seat into cove in the top of the
Cutting Tool.
h.
Hold Alignment Gauge tightly against Follower Pin
. . .make sure it is resting on top of Square Nut.
Push Cutting Tool gently against Gauge making sure
that it touches both inside surfaces of Gauge by
rotating Tool Post.
This will align the tip of the Cutting Tool with the
Follower Pin.
While still holding Gauge firmly against Follower
Pin, raise Tool Post until tip of Cutting Tool is even
with scratch mark on Gauge. Tighten Setscrew in
Tool Post Base.
Tighten Setscrew in top of Tool Post. The tip of the
Cutting Tool should now be directly above the
•Follower Pin as high as the centerline of the lathe.
BRACKETS
Assemble the right and left Brackets using 3/4 inch
long Round Head Bolts, Washers and Plain Hexagon
Nuts.
Install on the bed as shown.
CUTTING TOOL
PLAIN
HEKAQON !NUT