Getting to know your copÿ‘-gràfter, Operation – Sears 113.24907 User Manual
Page 14
Attention! The text in this document has been recognized automatically. To view the original document, you can use the "Original mode".
getting to know your copÿ‘-Gràfter
11/«« INCH blAMiTER HOLE
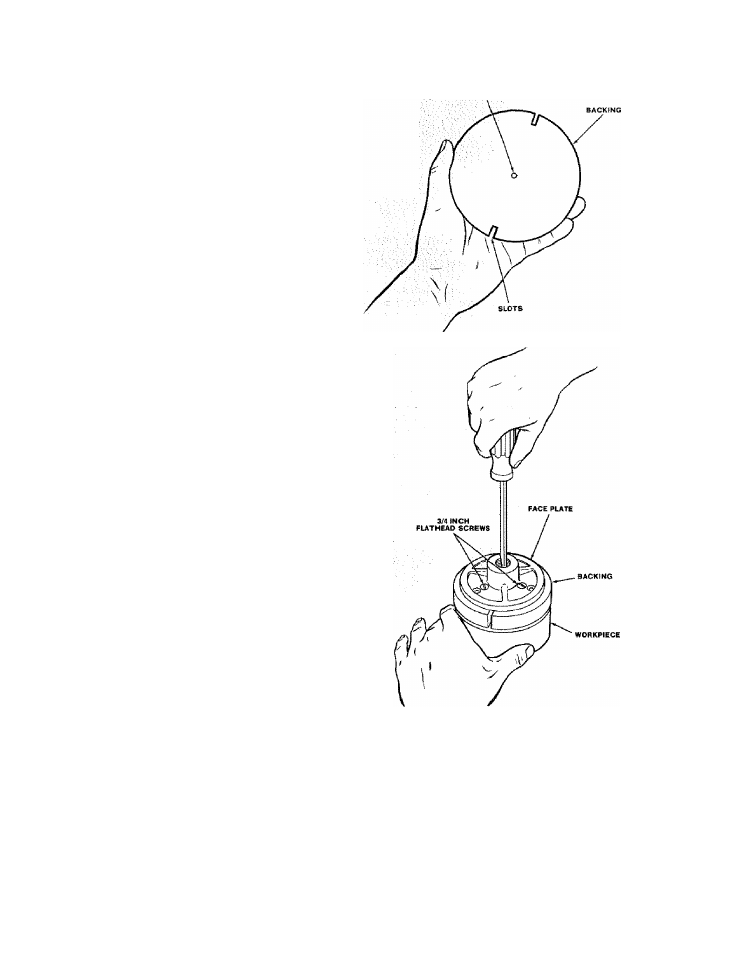
Cut two
slots 180“ apart to fit the tip of the
screwdriver. This will allow you to hbld the Faceplate
While unscrewing thé workpiece.
Attach the Backing: to the Faceplate with three #12 or
#14 X 3/4 inch ftathead wood screws.
Turn the backing round and true up the face so that it
is approximately 1/32 inch low in the center.
With the Lathe running at 2250
E.PM.
make a mark in
the center and drill a 11/64 inch diameter hole all the
way through. Jf you do not have a chuck for your wood
lathe, drill the hole with a drill press ora portable drill.
DO
NOT
REMOVE
THE
BACKING
FROM
THE
FACEPLATE. If you do, it will be difficult to replace it
in exactly the same position on the Faceplate.
Screw the CENTER SCREW tightly into the center hole
in the backing. :
To make sure that the workpiece does not rotate
around the Center Screw, drill a 3/16 inch diameter
hole through the backing at one of the vacant screw
holes in the Faceplate. Insert a #B or #8 wood screw, 1
inch long, and screw it into the workpiece. When
turning the workpiece, do not hit the screw with the
Cutting.Tool. . : :
operation
MAKING PRACTICE CUTS
1. Duplicating a turning is done in three stages:
a. Rough turning to the general shape using the Gouge
and the Tool Rest.
b. Finish turning on the Copy-Crafter
c. Cleaning up sharp corners using the Parting Tool,
Spear Point, or Skew, and the Tool Rest.
Before starting, a project, first gain some experience by
making practice cuts on a piece of scrap wood. . .say a
piece of hardwood 2 inches square and 12 inches long.