Carrier 38HQ User Manual
Page 6
Attention! The text in this document has been recognized automatically. To view the original document, you can use the "Original mode".
REPLACE
THE
ACCURATER™
REFRIG
ERANT CONTROL PISTON IN THE INDOOR
AND OUTDOOR COIL AS REQUIRED before
connecting refrigerant lines. See Table 3 and the
notes under the table for the pistons used in the
different system combinations. For piston replace
ment
instructions,
see
AccuRater
Servicing
on
page 16.
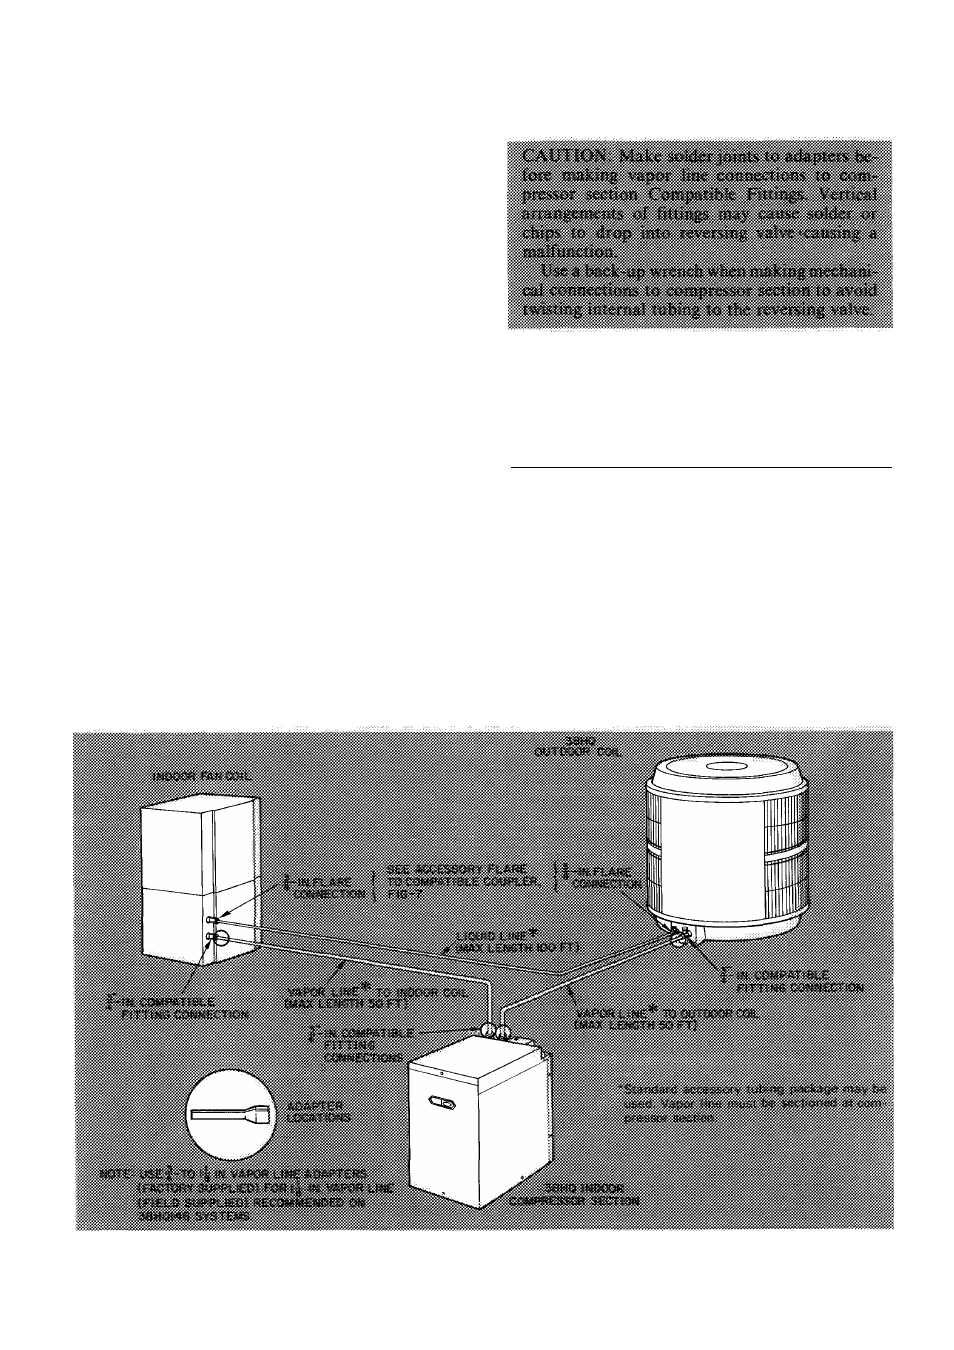
CONNECT REFRIGERANT LINES to fittings on
indoor and outdoor sections, Fig. 1,2 and 6. Indoor
compressor section has 2 Compatible Fitting vapor
line connections. Outdoor coils and indoor fan coils
have Compatible Fitting vapor line connection and
liquid line flare connection.
Connect vapor line from outdoor coil to indoor
compressor section, and from compressor section
to indoor fan coil. Section vapor line as required
(Fig. 6). Use correct compressor section vapor line
connection to indoor fan coil and outdoor coil.
Unit Compatible Fitting(s) permits mechanical or
sweat connection as described below.
When using 1-1/8 in. field-supplied vapor line
(38HQ146 Systems^ remove vapor line adapters (4)
shipped in compressor section. Sweat connect 1-1/8
in. end of adapter to each end of vapor lines. Con
nect 3/4-in. end of adapters to vapor line Com
patible
Fitting(s)
on
outdoor
coil,
indoor
compressor section and indoor fan coil.
When a 7/8-in. field-supplied vapor line is used
on 38HQ140, 4 field-supplied 3/4-in. to 7/8-in.
vapor line adapters must be provided (not required
if 7/8-in. 38CQ accessory tubing is used).
Flare
and
connect
liquid
line
from
outdoor
coil
to
indoor
fan
coil.
(Do
not
disassemble
AccuRater.) It is not necessary to flare system
liquid
line
if
an
accessory
flare-to-Compatible
Fitting Coupler is used for liquid line connec
tion. See Accessory Coupler, Fig. 7.
Mechanical
Connection
to
Compatible
Fitting
(Mate one set of connections at a time.)
1. Loosen nut on Compatible Fitting one turn. Do
not remove.
2. Remove plug and be sure O-ring is in the groove
inside the Compatible Fitting.
3. Cut tubing to correct length.
4.
Insert tube into Compatible Fitting until it
bottoms.
5.
Tighten nut until it bottoms on back coupler
flange.
Keep
tube
bottomed
in
Compatible
Fitting while tightening nut.
Fig. 6 — Refrigerant Piping Connections