Carrier 50CD/CH User Manual
Page 13
Attention! The text in this document has been recognized automatically. To view the original document, you can use the "Original mode".
ф
ф
for cooling and outdoor ambient temperature is
above outdoor air thermostat setting. The econo
mizer damper moves to VENT position.
Evaporator fan starts and economizer damper
opens fully upon a first-stage call for cooling when
outdoor ambient temperature is below the outdoor
air thermostat setting. Compressor remains off.
Compressor is energized and mechanical cooling
integrates with economizer cooling upon a second-
stage call for cooling.
Mechanical cooling is locked out when ambient
temperature is below 50 F.
Economizer damper modulates when mixed air
temperature is below mixed air thermostat (non-
adjustable) setting.
An economizer control thermostat (ECT) is
located on the evaporator coil. This thermostat
guards against abnormally low suction tempera
tures while operating mechanical cooling in con
junction with economizer. Low suction tempera
tures can lead to frosting on the evaporator coil.
If frost buildup is detected, thermostat turns off
economizer, thus closing the outdoor air damper.
This raises air temperature entering the evaporator
coil and melts frost. Once frost is melted, the
economizer is re-energized.
During unoccupied periods, if a field-supplied
night switch is used and is opened, the outdoor air
damper closes.
HEATING MODE — Outdoor air damper stays at
VENT position while evaporator air fan runs. If
field-supplied night switch is used, the outdoor air
damper closes when switch is open.
SERVICE
Cleaning — Inspect unit interior at the beginning of
each heating and cooling season or as operating
conditions require. Remove unit side panels for
access to unit interior.
EVAPORATOR COIL
1. Turn unit power off.
2.
Disconnect evaporator motor and electric
heater(s) from main control box.
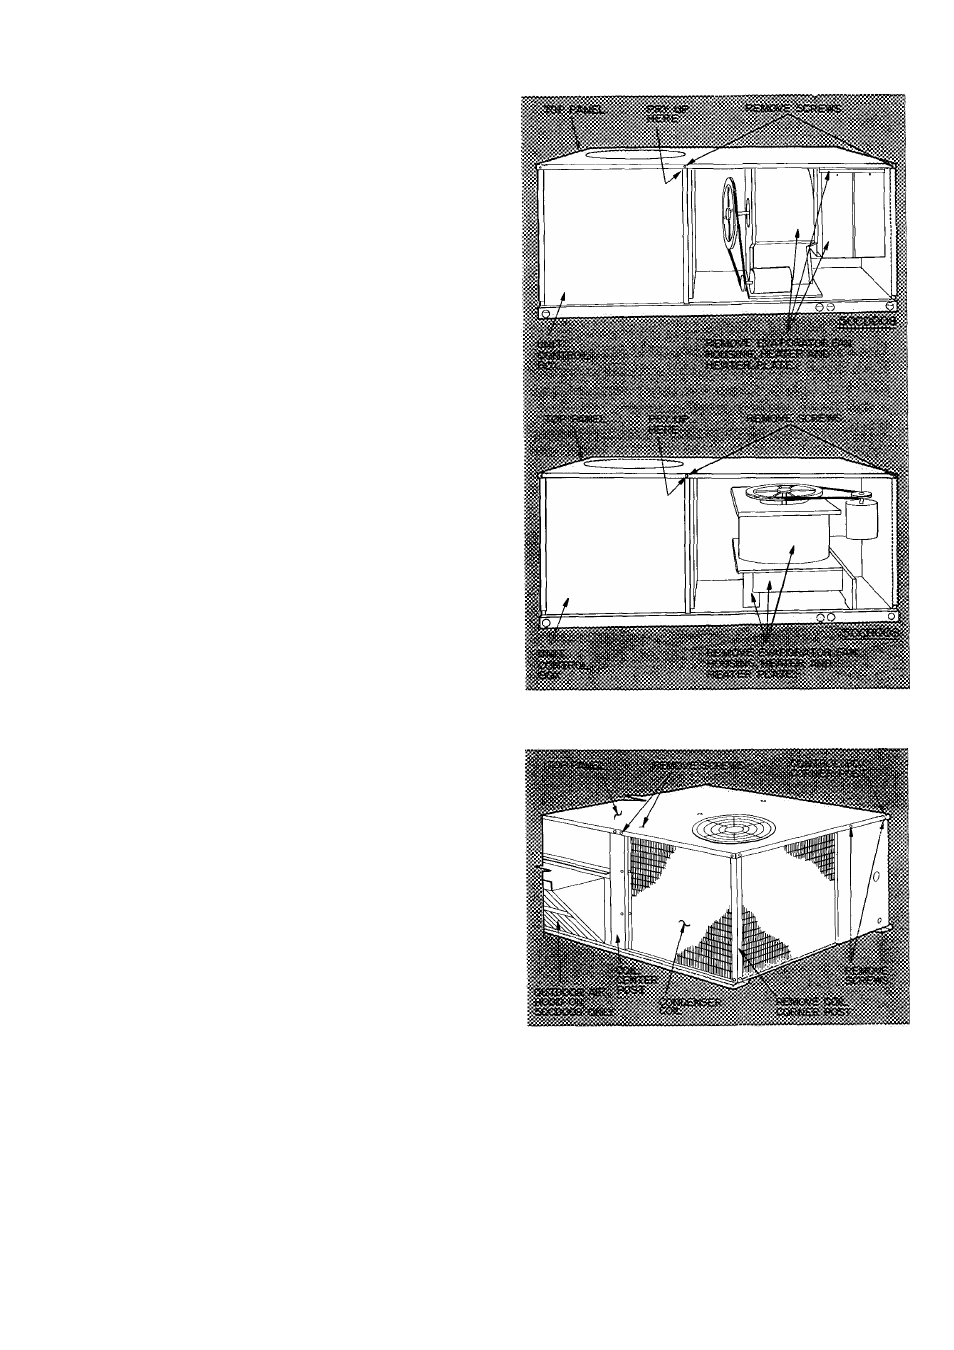
3. Remove top panel screws shown in Fig. 23.
4. Remove screws from base of evaporator fan
housing and electric heater plate.
5. Pry up top panel to clear top of evaporator fan
housing. See Fig. 23.
6. Remove evaporator fan housing, heaters and
heater plate from unit.
7. Use commercial coil cleaner (Oakite 164), or
dishwasher detergent in a pressurized spray
cannister. Wash both sides of coil and flush with
clear water. For best results, backflush towards
return air section to remove foreign material.
Flush condensate pan after completion.
8. Replace evaporator fan housing, electric heater(s)
and all wires.
Fig. 23 — Removing Top Panel
Fig. 24 — Cleaning Condenser Coil
CONDENSER COIL —^ Inspect coil monthly.
Clean condenser coil annually, or as required by
location or outdoor air conditions.
Fins are not continuous thru coil sections. Dirt
and debris may pass thru first section, become
trapped between the 2 rows of fins, and restrict con
denser airflow. Shine flashlight thru coil to deter
mine if dirt or debris has collected between coil
sections.
13