Maintenance and storage – YSI ProDSS User Manual
Page 60
58
Maintenance and storage
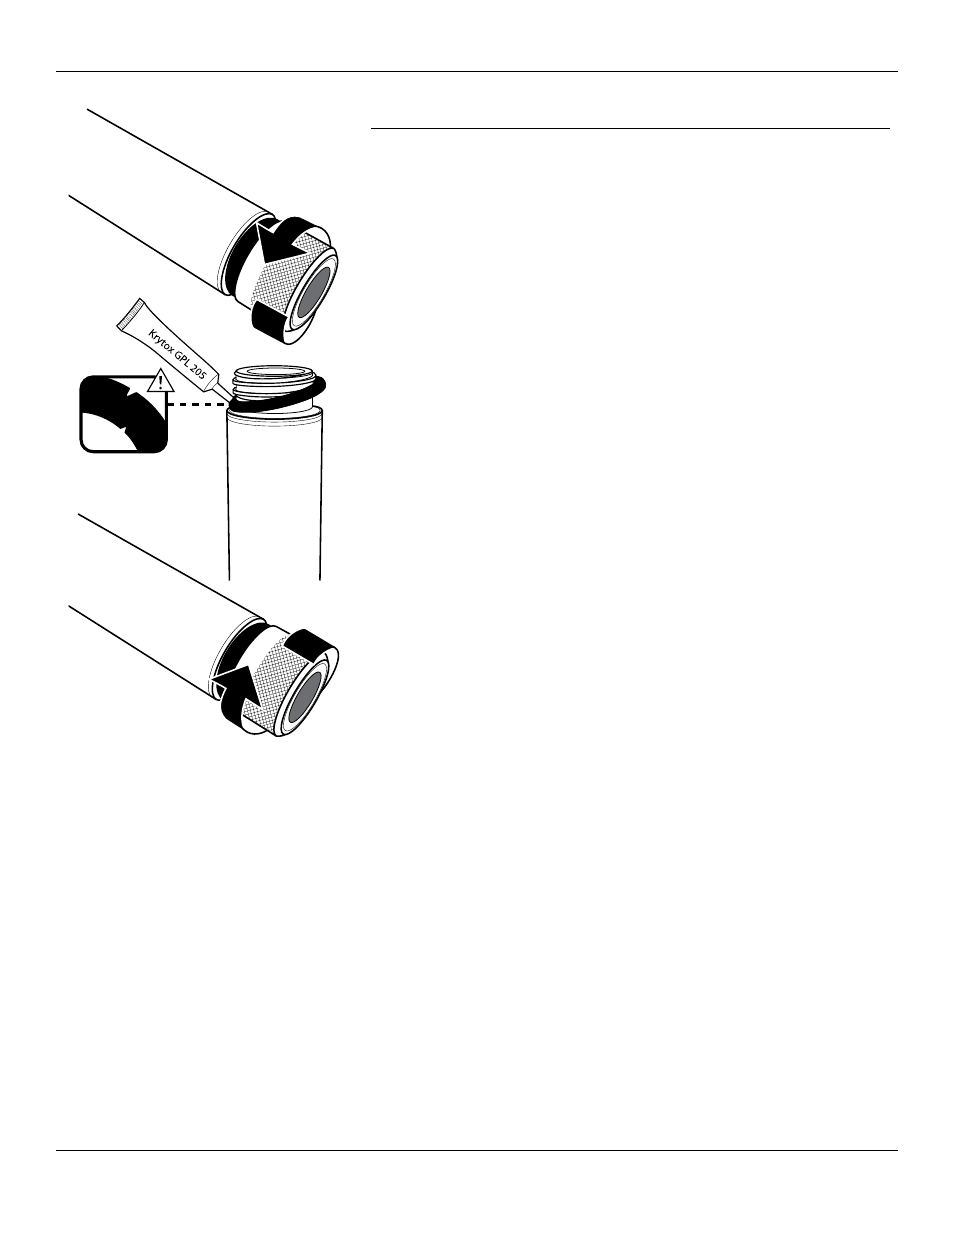
Figure 65 ODO cap replacement
ODO sensor cap replacement (continued)
1. Turn the used sensor cap counterclockwise to remove it from the
sensor.
NOTE: If possible, do not use a tool to remove the cap
from the sensor. If necessary, carefully turn the cap
counterclockwise with pliers until it breaks loose. Do
not use the pliers on the sensor body. Make sure to not
damage the sensor cap threads.
2. Without using tools, remove the used o-ring from the sensor body
(pinch the o-ring out, then roll it upward over the threads), then
discard it.
3. Clean the sensor threads with a clean, lint-free cloth.
4. Visually inspect the new o-ring for nicks, tears, contaminants or
particles. Discard damaged o-rings.
5. Without twisting it, carefully install the new o-ring over the threads
and into the o-ring groove.
6. Apply a thin coat of Krytox to the o-ring only. Wipe any excess
from the threads and sensor body.
7. Clean the sensor window with a clean, lint-free cloth.
8. Make sure the new sensor cap cavity is completely dry, then
carefully finger-tighten the cap clockwise onto the sensor. The
o-ring should be compressed between the sensor cap and body,
not pinched.
NOTICE: Do not over-tighten the sensor cap. Do not use tools.
9. Store the ODO sensor in a moist environment.
NOTE: If the o-ring is pinched, remove and discard it. Repeat
steps 3 to 8.