Glue together in pairs – Top Flite KittiWake User Manual
Page 8
7. Cut, fit and glue the 1/4" balsa cross piece that fits
against the rear face of former FL-5, between the
bottom longerons of the float sides (see plans).
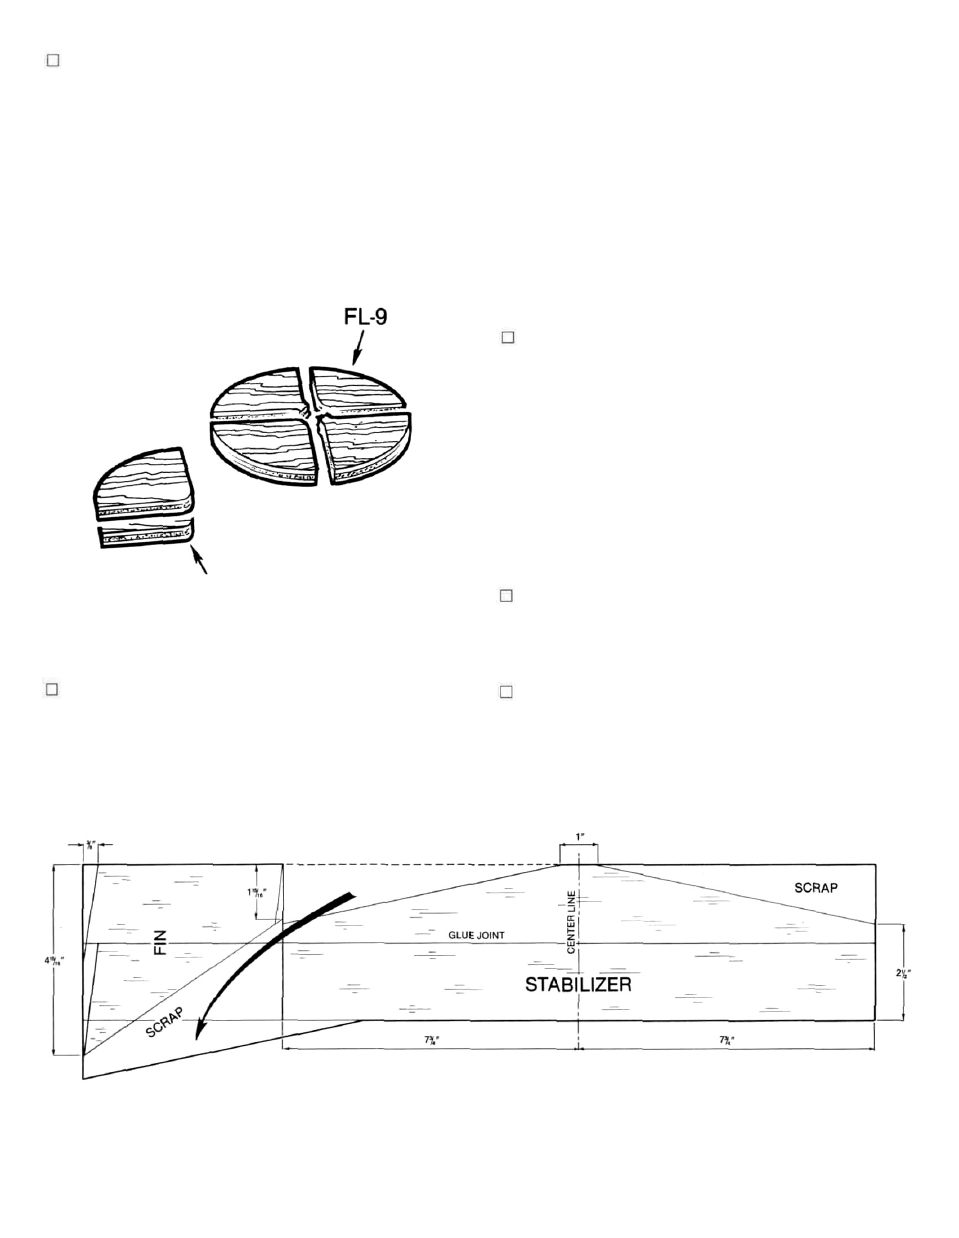
Locate and remove the two FL-9 "discs" from
their die-cut sheet. As diagramed, these discs
break down to four pieces each. Glue these
quarter-round pieces to each other to make four
1/4" thick parts. Sand to 90° at the corners. As
shown on the plans, these four parts are glued in
place to form the "hard points" for attaching the
aluminum float legs. Do this now.
float. Start by laying one end of this piece on the
bottom, rear of the main float, from FL-5 back to
the tail block. Use a pencil to draw the outline of
the float on the ply. Use a jigsaw to now carefully
cut-out this rear sheeting. Use the remaining
plywood for the forward, bottom float sheeting.
Use the same process to mark and cut-out this
piece of sheeting. Once again, lay the float
assembly upside down on your flat work surface.
Glue the rear ply sheet accurately in place and
use weights to hold it firmly to the float until dry.
The forward ply piece is glued in place next. This
piece requires bending to match the bottom curve
of the float, so use all necessary weight to hold
this piece in place until dry.
9. Remove the float from your bench and take the
time to inspect your work. We've made it a habit to
go back at this time and re-glue all of the joints.
Once satisfied, use your sanding block to now
sand the ply bottom flush with the float sides and
front and rear blocks.
The main float assembly is now as complete as it
needs to be. Top sheeting and final sanding will
be done in the Final Assembly phase of these in-
structions.
STABILIZER AND FIN
GLUE TOGETHER
IN PAIRS
8. From your kit, locate the 1/16" x 3-1/2" x36" piece of
plywood. This is the bottom sheeting for the main
1. Both the fin and stabilizer are cut from the two
3/16" x 2" x 21" balsa sheets provided in your kit.
These two pieces of wood should now be edge-
glued together on your flat work surface to obtain
a single 4" wide piece.
2. Using the dimensional diagram provided,
measure, mark and cut-out the stabilizer and fin.
8