Top Flite TOPA0220 User Manual
Page 29
❏ ❏
38. Cut, fit and glue cap strips for the bottom
of ribs W4, W5, W8, W9 and W10 from a 1/16" x 1/4"
x 30" [1.6 x 6.4 x 762mm] balsa stick.
❏ ❏
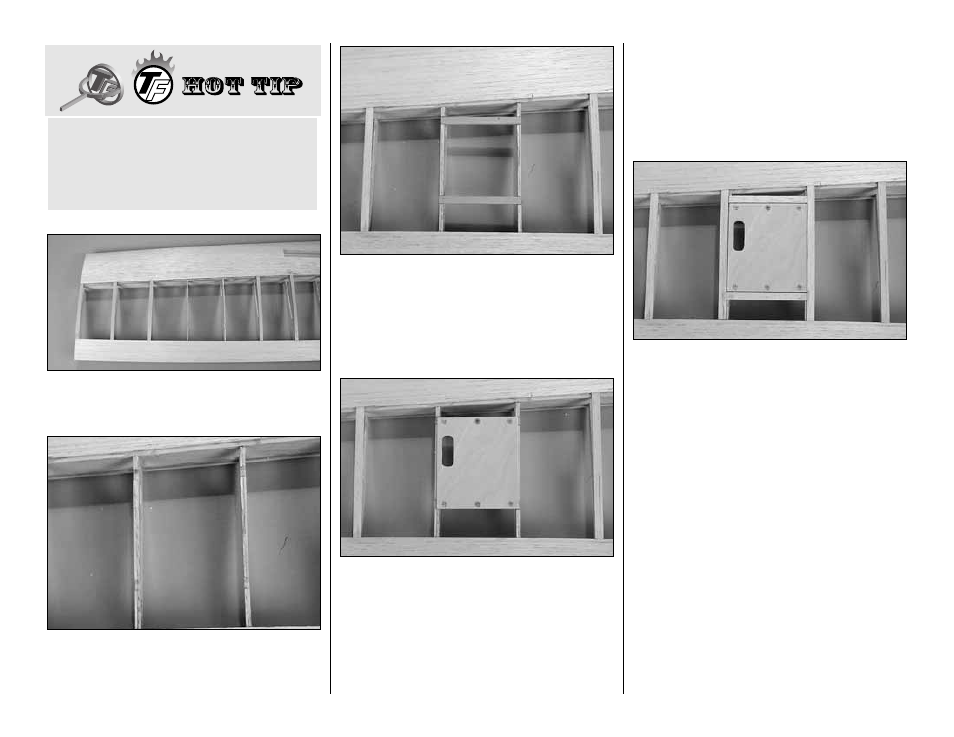
39. Glue die-cut 1/16" [1.6mm] balsa W6D and
W7D into position on ribs W6 and W7. W6D is glued
to the root side of W6 and W7D is glued to the tip
side of W7.
❏ ❏
40. Cut two 2-3/4" [70mm] servo hatch mounting
rails from a leftover 1/8" x 1/4" [3.2 x 6.4mm] basswood
stick. Glue them to the notches in W6 and W7 with 6-
minute epoxy. Do not use the two 1/8" x 1/4" x 24" [3.2 x
6.4 x 610mm] basswood spars left for the other
wing panel.
❏ ❏
41. Center the die-cut 1/16" [1.6mm] ply aileron
servo hatch on the servo rails. Make sure the hatch
is centered on W6 and W7 and that the cutout in the
hatch is closest to the tip. Drill 1/16" [1.6mm] holes
through the hatch and servo rails at the six punch
marks. Remove the hatch and enlarge the holes
in
the hatch only with a 3/32" [2.4mm] drill. Use a
countersink, or a 3/16" [4.8mm] drill, to countersink
the holes in the hatch, for the #2 x 3/8" [9.5mm] flat
head sheet metal screws. Mount the hatch to the
rails with six #2 x 3/8" [9.5mm] screws. Remove the
hatch and harden the holes with a couple of drops of
thin CA. After the CA has cured mount the hatch to
the rails.
❏ ❏
42. Cut, fit and glue cap strips to W6D and W7D
using a 1/16" x 1/4" [1.6 x 6.4mm] balsa stick. Be careful
not to get any glue on the hatch. Fit and glue cap strips
at the front and rear of the hatch as well.
❏ ❏
43. Remove the aileron servo hatch. Remove
the wing panel from the building board. Securely
glue any of the cap strips to the ribs if any require it.
Trim the sheeting even with W1 and W10.
❏ ❏
44. Turn the wing panel over. Snap the jig tabs
off of the TE spar/jig. Use your sanding bar to sand
the trailing edge and TE spar even with the ribs. Be
careful not to alter the shape of the ribs.
❏ ❏
45. Using the plan as a guide, cut seven TE
hinge blocks for the aileron and flap hinges from a
1/8" x 1/4" x 24" [3.2 x 6.4 x 610mm] balsa stick.
Glue the hinge blocks into place with thin CA.
If some of the glue joints were loose when you
glued the first leading edge skin on, you may
want to use aliphatic resin glue for this skin. Most
aliphatic resin glues can be heat activated after
the glue has dried, allowing a loose skin joint to
be ironed back into place.
-29-