Top Flite TOPA0220 User Manual
Page 27
front of each rib with thin CA. The top of the leading
edge should be even with the tops of the ribs. Use a
straight edge along the sides of W1 and W10 to
insure that they are straight.
Note: You will need to carefully sand the front of W2,
W3 and W4 at an angle to match the sweep of the
LE if those ribs have a ply doubler installed.
❏ ❏
22. Use your bar sander with 150-grit sandpaper
to lightly sand the top of the leading edge to blend it
evenly with the tops of the ribs.
❏ ❏
23. Using medium CA, glue one of the leading
edge skins that you prepared in step 2 into place on
the ribs and the top spar. The skin should extend
forward from the center of the spar. Refer to the
HOT
TIP that follows.
Note: Make sure you glue the skin in place with the
smooth side facing out. Position the 1/2" [12.7mm]
strip that was glued to the sheeting at the spar.
❏ ❏
24. Remove the wing panel from the building
board. Glue the wing skin to the tapered leading
edge with thin CA. Checking from the bottom of the
wing panel, insure that the leading edge skin is
securely glued to the tops of all the ribs.
❏ ❏
25. Carefully check all of the glue joints
between the spar web, top and bottom spars and the
wing ribs. Fill in any glue joints that don’t look solid
with thin CA.
❏ ❏
26. Trim the leading edge, leading edge
sheeting, spars and trailing edge even with W1 and
W10. Trim the leading edge sheeting even with the
front of the tapered leading edge.
❏ ❏
27. Snap the bottom of the TE spar/jig off even
with the bottom of the ribs. The TE spar/jig has an
embossed cut line where it is to be snapped off. OK,
so you got too much CA on the TE spar/jig when you
glued the ribs in place. Use a razor saw to cut along
the embossed line.
Important: Use caution not to break any of the short
jig tabs off of the top of the TE spar/jig.
❏ ❏
28. Use your sanding bar to sand the bottom of
the tapered leading edge even with the bottom of the
ribs, following the contour of the ribs. Do not change
the shape of the ribs. Also sand the trailing edge, TE
spar/jig and bottom spar even with the ribs.
❏ ❏
29. Turn the wing panel upside down and place
it on your building board. Pin the TE spar/jig to the
board and use weights to hold the front of the wing
panel on the building board.
Retracts go to step R33.
Use the following photo for the next two steps.
❏ ❏
F30. If you are installing fixed landing gear on
your model, glue the 7/16" x 5/8" x 5-5/8" [11.1 x
15.9 x 142.9mm] basswood grooved landing gear
rail into the notches in W2, W3 and W4 using
6-minute epoxy. The groove in the rail should face the
bottom surface of the wing. Glue the 7/16" x 5/8" x
7/8" [11.1 x 15.9 x 22.2mm] maple torque block to
the top surface of the rail against W2, as shown on
the plan.
Note: Before gluing the rail in place check the fit of
the rail in the notches. The rail should protrude 1/16"
[1.6mm] from the bottom of the ribs so as to be level
with the 1/16" [1.6mm] balsa sheeting when the
wing is sheeted.
❏ ❏
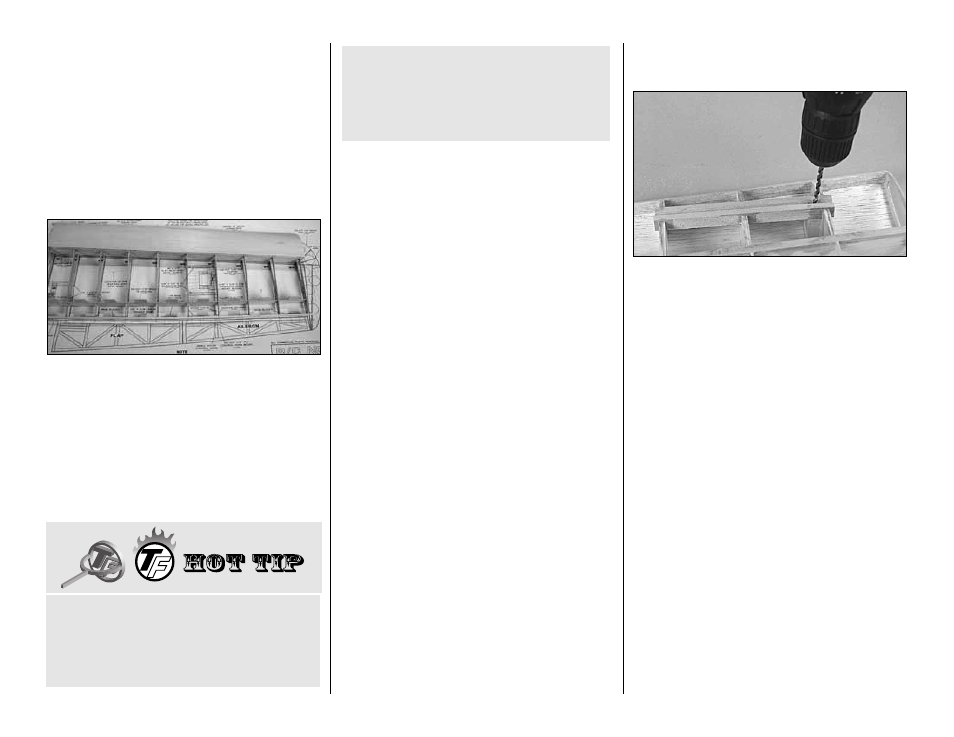
F31. Mark the bottom of the groove in the
landing gear rail 3/16" [4.8mm] from the edge of W2.
Drill a 5/32" [4mm] hole through the landing gear rail
and the torque block at the mark. As you drill, make
sure you hold your drill at a 90 degree angle to the
landing gear rail.
Note: The hole should go into the middle of
the torque block. Be careful not to drill through the
top skin.
After you remove the wing from the building
board, use thin CA to glue the skin to the tapered
leading edge. Working one section at a time
between two ribs, hold the skin to the tapered
leading edge and wick in some thin CA. Firmly
hold the skin in place until the CA cures.
It can be difficult to get a tight glue joint between
the leading edge skin and the tapered balsa
leading edge while the wing panel is still on the
building board. Do not apply any CA to the
tapered leading edge until after you remove the
wing from the building board in the next step.
-27-