Top Flite TOPA0220 User Manual
Page 12
❏
3. Use a soft 1/16" x 3" x 24" [1.6 x 76 x 610mm]
sheet of balsa to sheet the top of both elevators. Cut
a piece from the sheet for each elevator. Then, glue
it in place with medium CA or aliphatic resin. Save
the leftover sheeting for use later.
❏
4. After the glue dries, remove both elevators from
the building board and trim the sheeting along the
TE, LE and tips.
❏
5. Turn the elevators over and use a sanding block
to sand the un-sheeted side of them flat. Locate
another soft sheet of 1/16" x 3" x 24" [1.6 x 76 x
610mm] balsa and cut a piece from the sheet for
each elevator. Use medium CA or aliphatic resin to
glue the sheet to the elevators.
❏
6. After the glue dries, remove the elevators from
the building board and trim the sheeting along the
TE, LE and tips.
❏
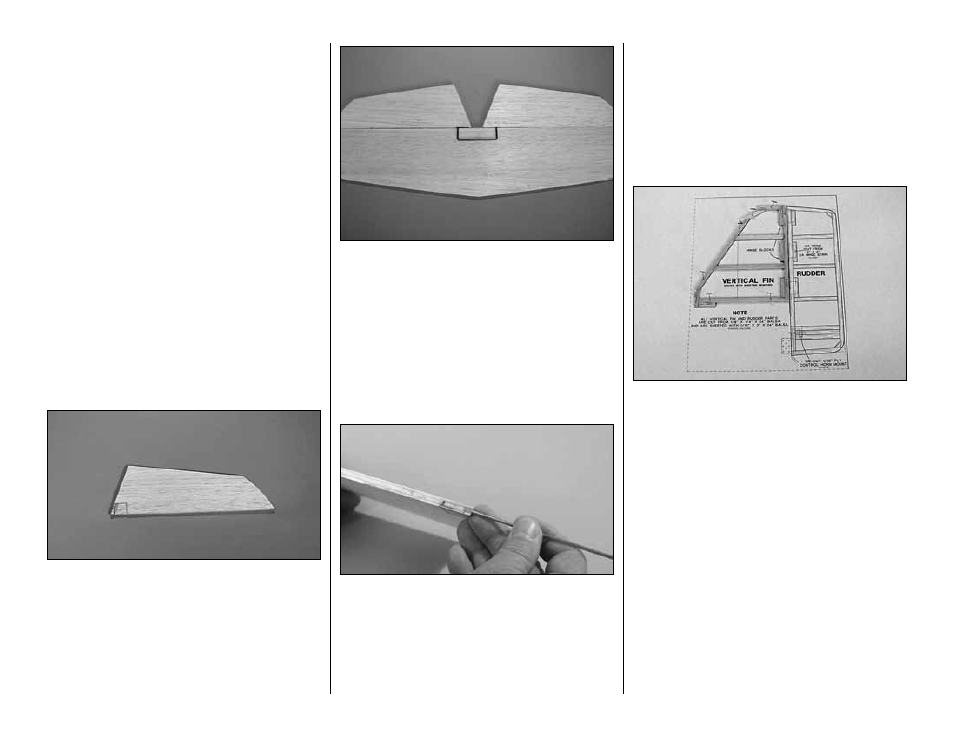
7. Locate a die-cut 1/16" [1.6mm] ply control
horn mount. Using the plan as a reference, position
the control horn mount on the bottom of the right
elevator and mark its location. Cut along the lines
you marked and remove the balsa to inset the
mount. Glue the mount into the elevator.
NOTE: Be sure to make a right elevator as shown in
the above photo.
❏
8. Use a file or a rotary tool with a cut-off wheel to
remove sharp edges or burrs on the ends of the
elevator joiner wire. Position the elevator joiner wire
on the top of the stab as shown in the photo. Align
the elevators with the stab and mark the leading
edge of the elevators where the
arm portion of the
joiner wire will enter the elevators. The joiner wire
should be centered between the elevators as shown
on the plan.
❏
9. Drill a 3/32" [2.4mm] hole into the leading edge
of both elevators at the marks you made. Be sure to
drill the hole on the centerline of the leading edge.
Cut a groove in the leading edge of both elevators to
accommodate the joiner wire.
Hint: Use a 3/32" [2.4mm] brass tube sharpened at
one end to cut the grooves.
BUILD THE VERTICAL FIN
❏
1. Cut the vertical fin plan along the dashed line
and tape it to your building board. Cover the fin plan
with Plan Protector or wax paper.
❏
2. Cut the fin TE from a hard 1/8" x 1/4" x 24" [3.2
x 6.4 x 610mm] balsa stick and pin it in position over
the plan.
❏
3. Cut the fin LE and the top and bottom parts
from the remainder of the balsa stick and pin them in
position. Do not glue until later.
❏
4. Cut the fin ribs and hinge blocks from soft
1/8" x 1/4" x 24" [3.2 x 6.4 x 610mm] balsa sticks and
place them into position. Glue all of the parts
together with thin CA where they join each other.
❏
5. After the CA has cured, remove the pins from
the fin. Use a sanding block with 150-grit sandpaper
to sand the fin flat.
-12-