Top Flite TOPA0305 Part 1 User Manual
Page 29
SHEET THE TOP CENTER SECTION
1.
Sand the top of the leading edge, spars and
ribs
so they blend together. You may remove the
center section from your building board
if
necessary, but pin it back down after you're done
sanding.
2.
Make sure the center section accurately
aligns with the plan. If necessary, pin two more
balsa blocks to the building board near the fronts of
the ribs.
3.
Use
two
3/32"
x
3"
x
30"
balsa sheets to make
one
7" x 9" forward top center section wing skin
and one
11"
x 9" aft top center section wing skin.
4.
Sand the sheets so they are flat and smooth.
Trim the forward skin
so the aft edge aligns with
the center of the top spar and the front extends
past the
LE
by approximately
1/8". If
you find it
necessary, wet the top of the forward top skin first,
before gluing it to the center section of the wing.
You're an expert at sheeting now,
so this should
be
easy.
5. Trim the aft skin
so the front edge joins the
forward skin and the aft edge extends past the
ends of the ribs
1/2".
Trim the ends of the aft top
skin
so
it extends past the
W1
ribs by
approximately
1/16"
to allow for sanding later.
Glue the aft skin to the center section.
7. After the glue dries, remove the center section
from the plan. Trim, then sand the bottom spar and
the top sheeting flush with the end ribs.
Do
not
sand off the tabs on the ends of the aft spar
W20.
They will key into ribs
W2
and align the outer
panels with the center section.
8. Remove the jig tabs and sand the bottoms of
the ribs and spars
so they all blend together. Bevel
the trailing edge of the top sheeting the same way
you did for the outer panels.
1/8"
W21
A
1/4"
HOLES
9.
Drill
1/4"
holes through the
LE
of the center
section (W21A) where shown on the sketch.
Slightly round one end of both
1/4"
x
2-1/2"
wing
dowels. Test fit, then glue the wing dowels into the
center section with 30-minute epoxy.
10.
Reinforce all glue joints that don't look
strong.
Do
not build up any glue fillets where the
dihedral braces will be fitted.
Beech Fact: The T-34 evolved from the Beech
designated Model 45 which began as a converted A35
Bonanza. Although Walter Beech did experiment with
the V-tail for military purposes, he thought that the
conservative military would prefer the conventional
straight tail which
is what emerged for the final design.
It
is named the Mentor.
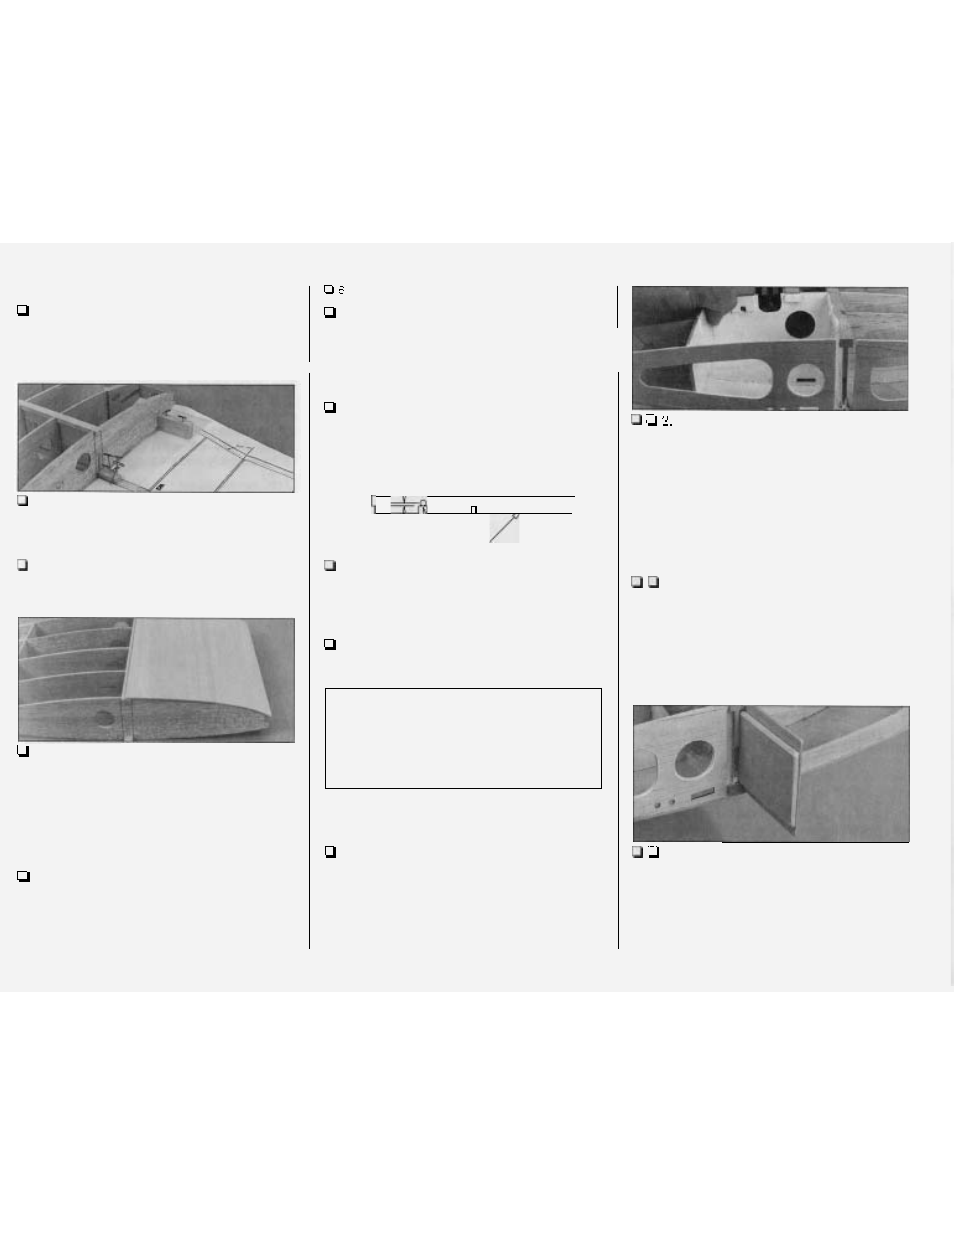
PREPARE THE
BOTTOM OF THE
WING FOR SHEETING
1 .
If you are installing retracts, build a
partition
on both wing panels from leftover
3/32"
balsa to
seal the wing aft of the wheel well compartment.
Fuelproof the
nooks and crannies of the wheel well
inside the wing that you will not be able to reach
after the bottom sheeting is in place. You can see
the partitions in the following photo.
Remember where you cut
partway through
ribs
W2
on both wing panels
1/16"
ahead of and
behind the spar notches? Use a hobby knife or a
fine razor saw to cut the rest of the way through rib
W2
on the right wing panel and remove the balsa
within the area you cut.
3.
Cut away the portion of balsa on rib
W1
between the spars on the right side of the
center
section the same way.
4.
Test fit the die-cut
1/16"
plywood
dihedral
braces W23 and the die-cut
1/8"
plywood
dihedral
braces W22 in the outer wing panel. If necessary
chamfer the corners of the braces to accommodate
small glue fillets in the wing.
Note: Make certain
you fit the braces
right side up the same as the
dihedral of wing.
-
28
-