Top Flite TOPA0305 Part 1 User Manual
Page 13
-
ST4. Use a small square to align the stab
TE
spar at rib
S2S over the plan. Pin rib S2S over its
location on the plan with a T-pin about
in front
of the TE spar.
ST5. Use the same method to align the TE spar
and pin the rest of the ribs on both sides of the stab
to your building board over the plan.
ST6. Pin the fronts of the ribs to your building
board over the plan.
ST7
Add botn d e-cut
1
8"
balsa elevator LE
spars (S8) to the assembly.
ST8. Make sure all the jig tabs
of all the ribs are
contacting your building board. Glue the stab TE
spar and elevator LE spar to the ribs with medium
CA. Don't use large amounts of CA or build up
fillets of glue. Later we will instruct you to reinforce
glue joints that don't
look strong.
ST10. Glue the die-cut 1 / 1 6 plywood straight
tail
TE doubler to the front of the TE brace (it's
the one with straight edges).
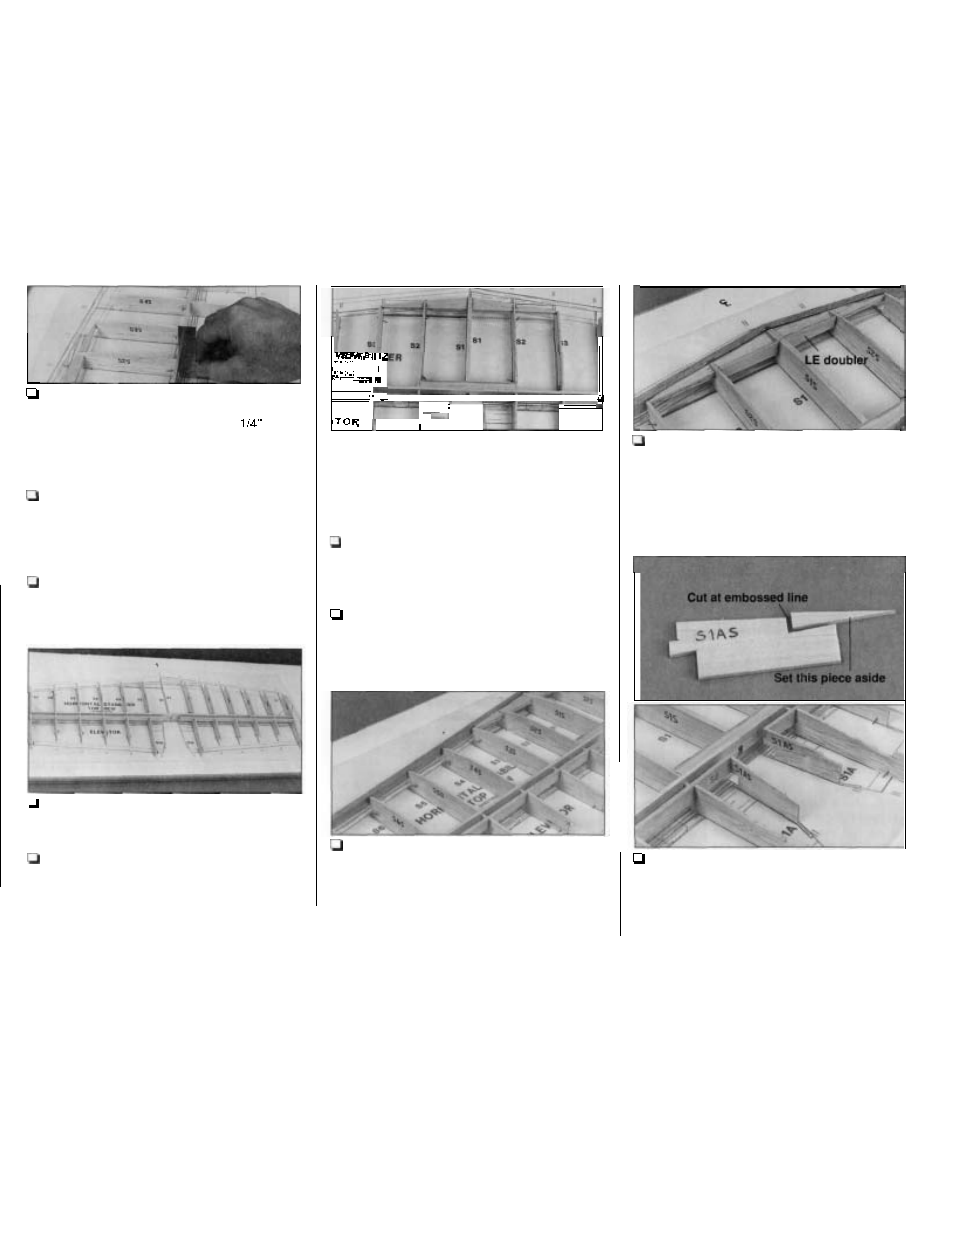
S T I 1. Add the center rib S1
S and glue it into
position.
ST12. Sand the fronts of the ribs to match the aft
sweep of the leading edge. Cut two shaped 5/16" x
15" balsa stab/fin leading edges to a length of
13-314" and bevel the joining ends to match the
plan. Glue them to the ribs and the LE joiner
so
the
top is even with the top of the ribs. The bottom will
extend below the ribs but will be sanded flush later.
- 1 2 -
ST13. Cut a 1 / 1 6 notch in center rib S1S behind
the LE brace. Test fit the die-cut 1/16" plywood
straight tail
LE doubler in the notch. Deepen the
notch as necessary
so the top of the doubler is
even with the top of rib
SIS.
Glue the doubler to
the LE brace and glue rib S1
S to the doubler.
ST14. Cut the end off both S l A S ribs at the
embossed line and set those little pieces aside.
They will be used later to glue the aft end
of S1AS
into position. Fit the
to the elevator LE
spars, pin them to the plan, and then glue them to
the elevator LE spars.