Toa SR-PB5 User Manual
Page 19
19
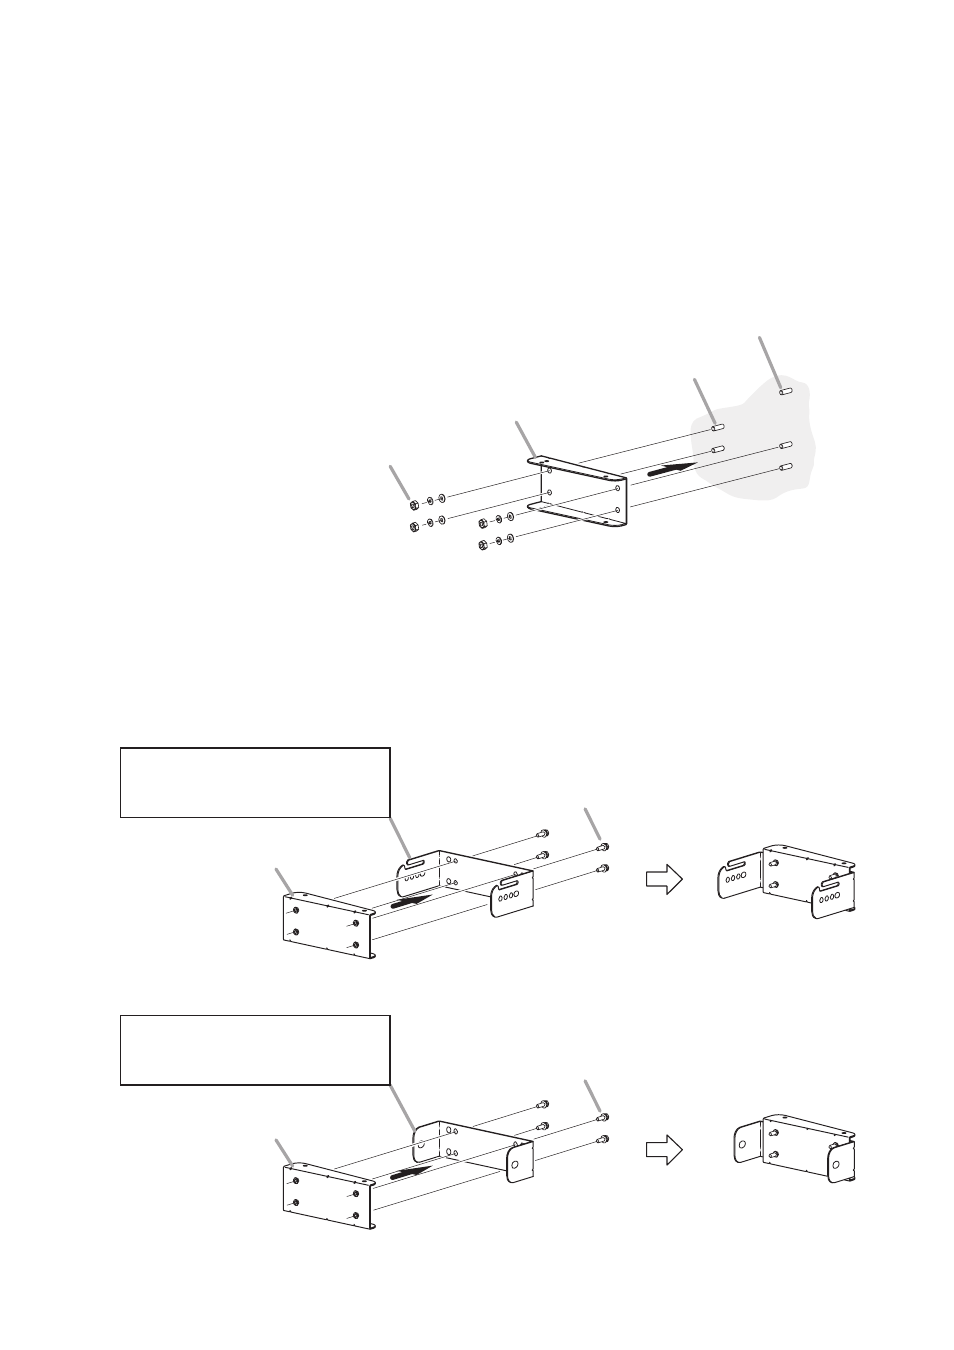
Step 2. Install 2 SR-PB5’s Pan brackets A on the wall.
Note
When installing the speaker on the right side wall as viewed toward the stage, position the Pan
bracket A upside down.
Tips
• The figure shows an example when installing the Pan Bracket A to the upper anchor bolts installed
on the wall surface.
• Follow the same procedure to attach the Pan Bracket A to the lower anchor bolts.
Pan Bracket A (supplied with the SR-PB5)
Nuts and washers (required separately)
M10 mounting bracket anchor bolt (required separately)
M10 safety wire anchor bolt (required separately)
1
2
Step 3. Attach 2 SR-PB5’s Pan brackets B to the Mounting Brackets A and B supplied with the SR-T5.
Note
When installing the speaker on the right side wall as viewed toward the stage, position each Pan
Bracket B upside down.
Pan Bracket B
(supplied with the SR-PB5)
Pan Bracket B
(supplied with the SR-PB5)
Mounting Bracket A
(supplied with the SR-T5)
Install to the upper side of the speaker.
Mounting Bracket B
(supplied with the SR-T5)
Install to the lower side of the speaker.
Hex bolt M8 x 25
(supplied with the SR-PB5)
Hex bolt M8 x 25
(supplied with the SR-PB5)
[Assembly view]
[Assembly view]