Warning – Toa SR-PB5 User Manual
Page 18
18
9.2. When Installing the Speaker in Conjunction with the Optional SR-PB5
(Both horizontal and downward angles adjustable)
Speaker's horizontal angle can be adjusted to 5° or 10° left or right using the supplied mounting bracket in
conjunction with the optional SR-PB5 Wall Pan Bracket.
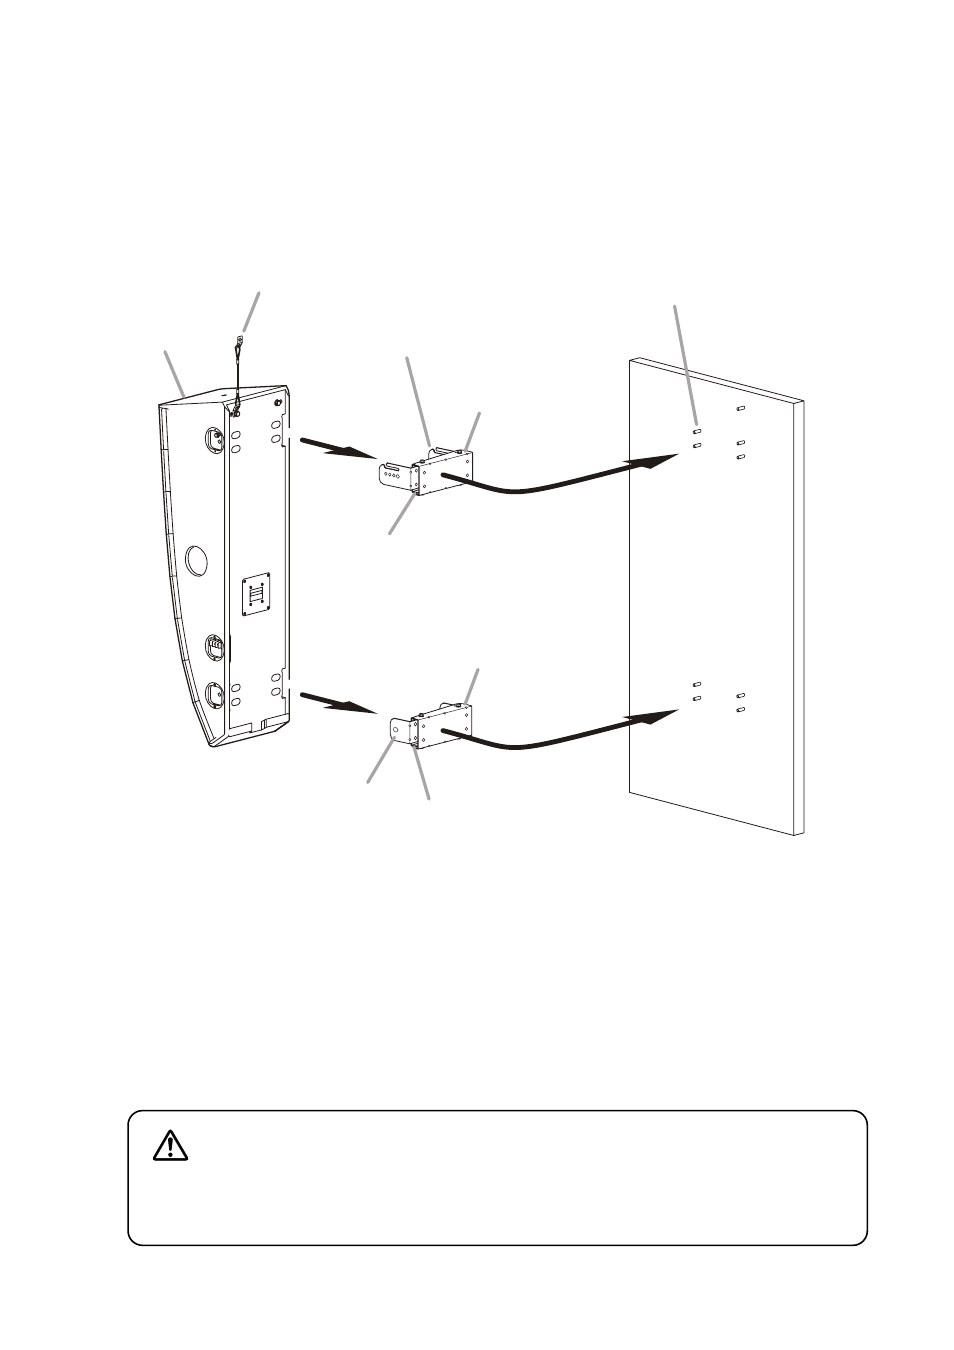
9.2.1. Rough installation plan
Mounting Bracket A
(supplied with the SR-T5)
Mounting Bracket B
(supplied with the SR-T5)
Pan Bracket A
(supplied with the SR-PB5)
Pan Bracket A
(supplied with the SR-PB5)
Pan Bracket B
(supplied with the SR-PB5)
Pan Bracket B
(supplied with the SR-PB5)
Anchor bolt (required separately)
Wall surface
Speaker
Safety wire (accessory)
9.2.2. Installation procedure
The example here shows the procedure to install the speaker on the left side wall as viewed toward the stage.
Step 1. Install the anchor bolts for the brackets and safety wire into the wall.
Use the M10 anchor bolts.
Note: For the anchor bolt mounting position, refer to p. 12, “Anchor Bolt Mounting Dimensions.”
Anchor bolts driven into a wall and their suited nuts are not included. Use bolts and nuts that are
appropriate for the wall's material and construction.
Failure to do so may cause the unit to fall, resulting in personal injury.
WARNING