Toa SR-PB5 User Manual
Page 17
17
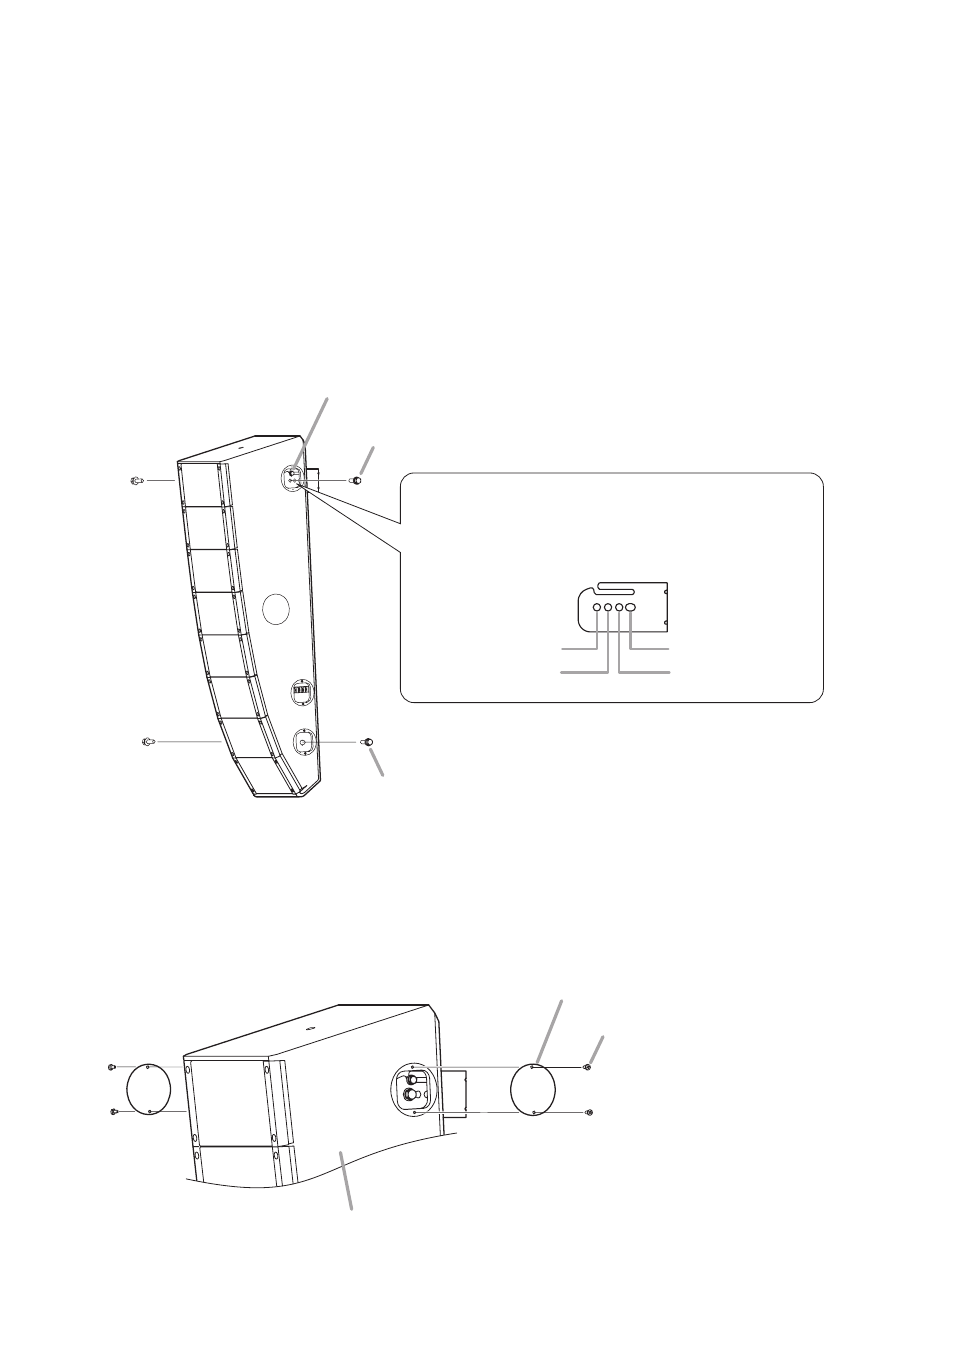
Step 8. Determine the speaker’s downward angle, then fix the speaker with the supplied hex bolts.
8-1. Fix the Mounting Bracket B (lower side of the speaker) loosely with the supplied hex bolts.
Fix it loosely to the extent that the speaker can be inclined when adjusting the speaker angle.
8-2. Adjust the speaker’s downward angle with the Mounting Bracket A (upper side of the speaker).
Note: Refer to p. 13, “Coverage area” to determine the downward angle that corresponds to the
mounting height of the speaker to be installed.
8-3. Tighten all 6 hex bolts loosely screwed into the Mounting Brackets A and B.
Note: Check that all bolts are securely tightened.
Hex bolt M10 x 40 (accessory)
Hex bolt M8 x 40 (Bolt loosely screwed in Step 4)
Hex bolt M10 x 40 (accessory)
8
-1
8
-2
Downward angle: 0°
Downward angle: 3°
Downward angle: 1°
Downward angle: 2°
8
-3
About downward angle settings
Angle adjustment holes are provided in both sides of the
Mounting Bracket A as shown in the figure below.
Set the speaker’s downward angle using the desired hole.
Speaker
(side panel)
Machine screw M4 x 10 (accessory)
Side cover (accessory)
Note
The figure above shows an example for attaching the
covers to the upper side (Mounting Bracket A side).
Follow the same procedure to attach other side covers.
Step 9. Attach the supplied side covers.
Attach the supplied side covers to the upper side (Mounting Bracket A side), the lower side (Mounting
Bracket B side), and the input terminal section. (5 points)