Initial equipment setup – Sonics X-Press Integrated Welder User Manual
Page 23
• • • • • • • • • • • • • • • • • • • • • • • • • • • • • • • • • • • • • • • • • • • • • • • • • • • • • • • • • • • • • • • • • • • • • • • • • • • • • • • • • • • • • • • • • • • • • • • • • • • • • • • • • • • •
I N S T R U C T I O N M A N U A L • M O D E L X - P R E S S
22
I N I T I A L E Q U I P M E N T S E T U P
ASSEMBLING AND MOUNTING CONVERTER, BOOSTER,
AND HORN
If the converter, booster, and horn are not already assembled, follow these
instructions:
1. Clean the mating surfaces of the converter and booster, as well as the
threaded stud and hole. Check that the stud is tight (see recommended
torque requirements on page 23).
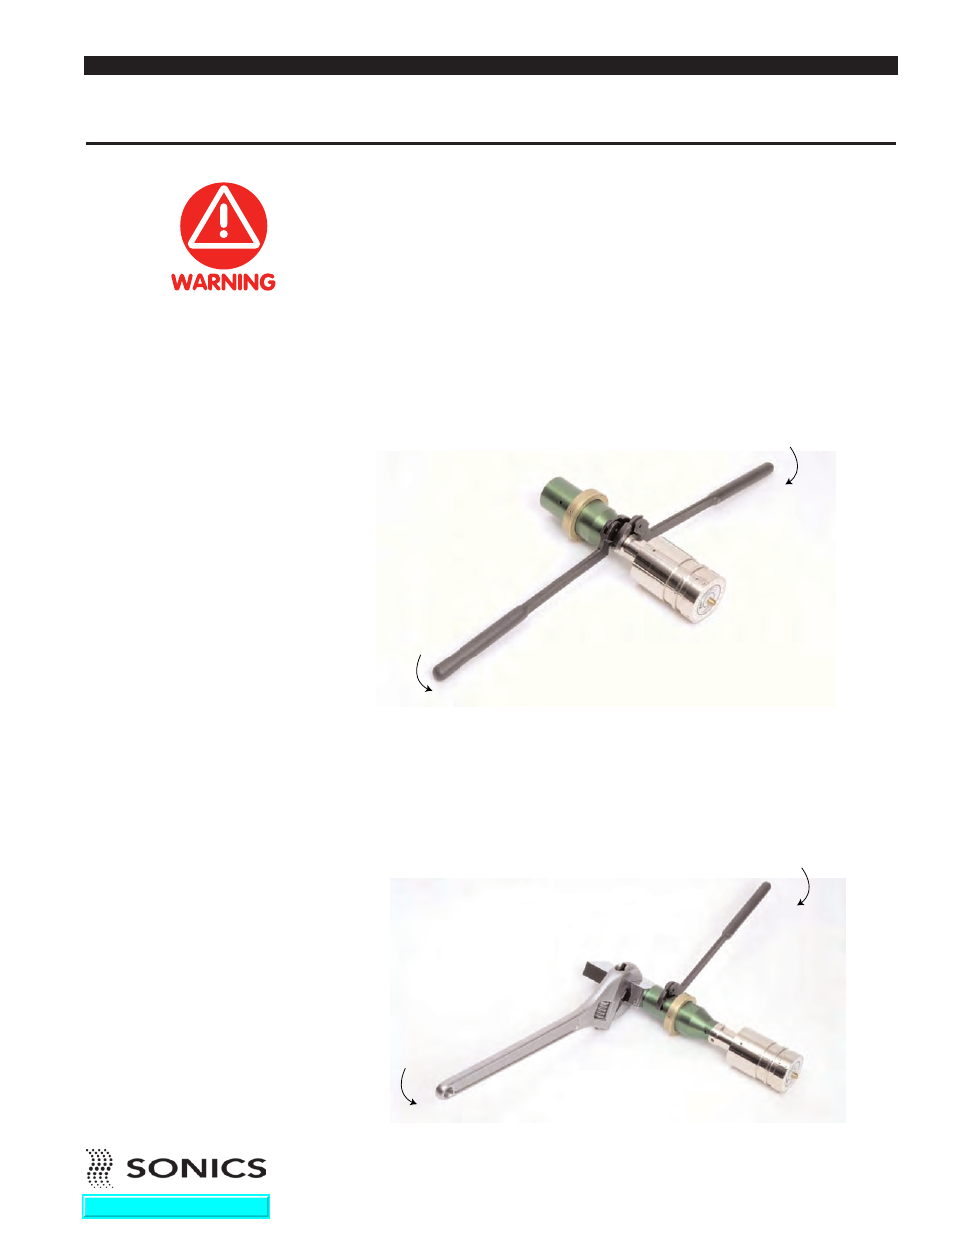
2. Hand assemble the converter and booster together. Using spanner
wrenches as shown below, tighten until snug. Then, using a torque
wrench, tighten to 25-35 foot-lbs. (34-47 newton-meters).
Do not force or overtighten.
3. Clean the mating surfaces of the booster and horn, as well as the
threaded stud and hole. Check that the stud is tight. (See recommended
torque requirements on next page.)
4. Hand assemble the horn to the booster. Using a spanner and an open-
ended wrench as shown below, tighten securely. Then, using a torque
wrench, tighten to 25-35 foot-lbs. (34-47 newton-meters).
Do not overtighten.
CONVERTER/BOOSTER
CONVERTER/BOOSTER/HORN
Never tighten the horn to
the booster using the
housing door as the upper
wrench as this may cause
damage to the booster
and/or converter.
Go To Top Of Document