1 ipbrkt bracket installation – SilentKnight IP Communicator User Manual
Page 4
4
IP Communicator Series Installation Document — P/N 53109:I 4/26/2010
2.1 Mounting IPDACT Series in the Fire Alarm Control Panel Enclosure
Install the IPDACT Series in the FACP backbox using the IPBRKT bracket or the IPCHSKIT, as described below.
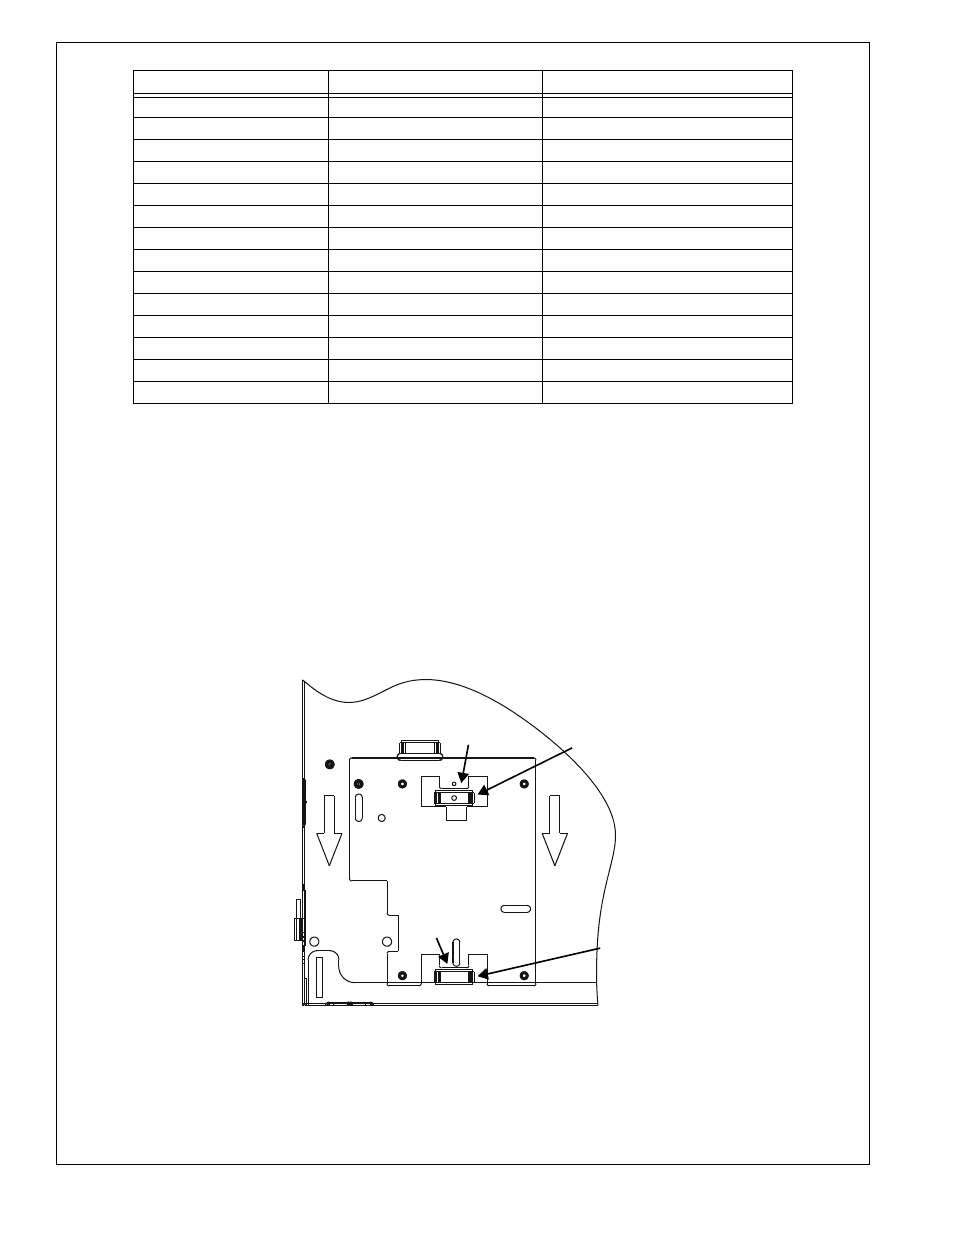
2.1.1 IPBRKT Bracket Installation
1.
Position the two tabs in the IPBRKT bracket over the two embossed protrusions in lower left corner of the backbox
and slide the bracket down with tabs going under embossed protrusions as illustrated in Figure 1.
IFC-400
FACP Enclosure (IPCHSKIT)
IPENC Enclosure
Unimode 640
FACP Enclosure (IPCHSKIT)
ADT-NCA
FACP Enclosure (IPCHSKIT)
Unimode 300/400
FACP Enclosure (IPCHSKIT)
Unimode 2020/1010
FACP Enclosure (IPCHSKIT)
IQ-636X(E)
FACP Enclosure (IPCHSKIT)
ANSUL-NCA
FACP Enclosure (IPCHSKIT)
IQ-396X
FACP Enclosure (IPCHSKIT)
IPENC Enclosure
MICRO-640I(E)
FACP Enclosure (IPCHSKIT)
MICRO-NCA
FACP Enclosure (IPCHSKIT)
MICRO-300I/400I
FACP Enclosure (IPCHSKIT)
MICRO-200I
IPENC Enclosure
1 Use of the UDACT Universal Digital Alarm Communicator/Transmitter is required for this
application. (For more information, see the UDACT Manual #50050.) This panel is only
compatible with the IPDACT-2 model.
2 If the system configuration does not support installation of the IPCHSKIT, use the IPENC enclosure.
Application (Power Source)
Mounting Location
Refer to Mounting Instruction Section
Table 2 IPDACT Series Mounting/Wiring Options for Retrofit Applications
Figure 1 IPBRKT Installation
Backbox
tab
backbox
embossed
protrusion
IPBRKT bracket
tab
backbox
embossed
protrusion
IP
BRK
T
in
stall
1
a
.wmf