Warning – Reznor B Option - Power Venter Installation User Manual
Page 8
Form I-F/B-PV, Page 8
Blocked Vent Switch -- Model F and B heaters manufactured beginning April 1991 are equipped with a
blocked vent switch. The optional power venter is designed to function with the blocked vent switch.
Do
not disable the blocked vent switch when installing the power venter. The blocked vent switch is an
important safety device.
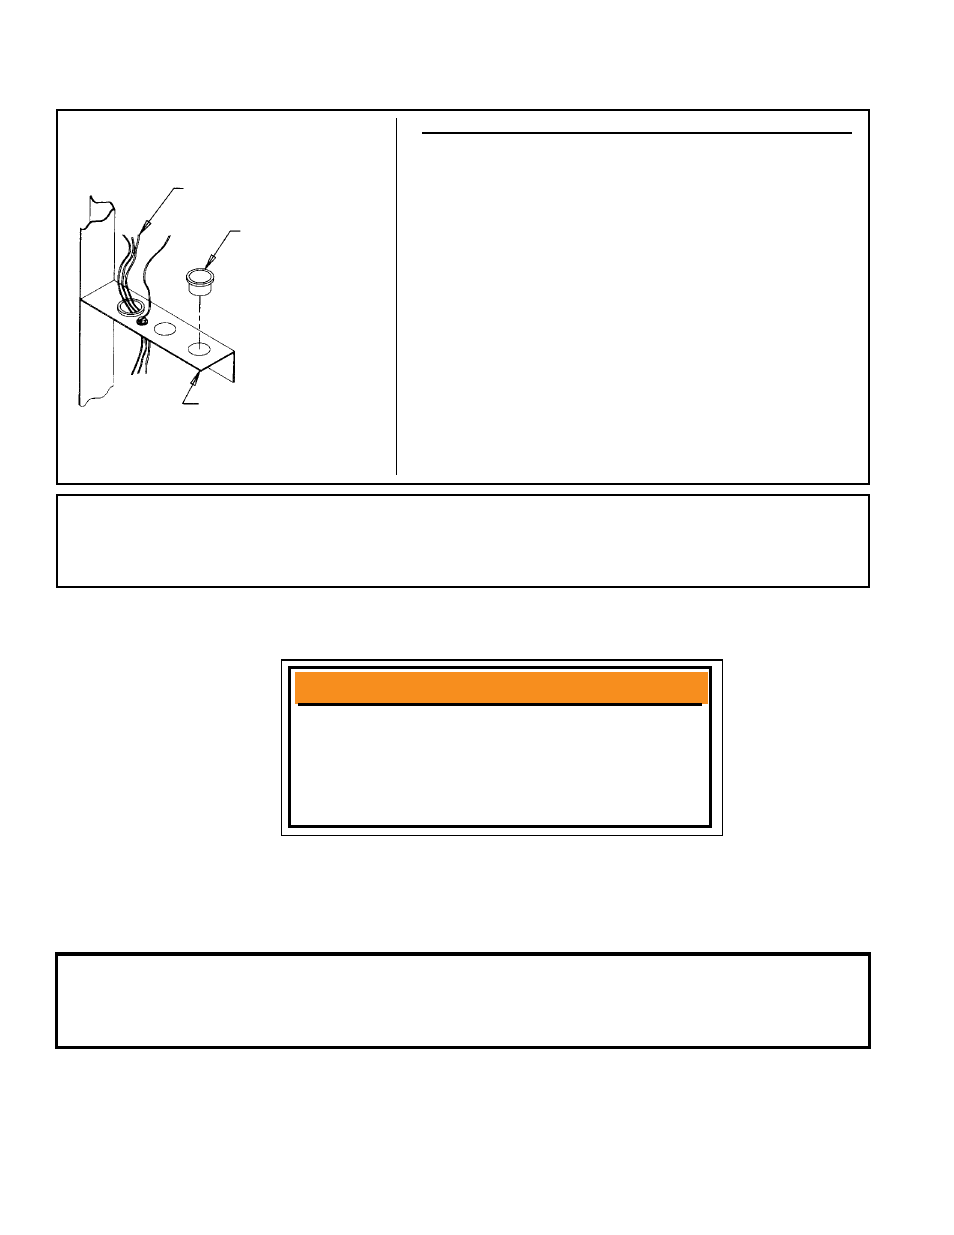
FIGURE 12 - Install Bushing(s) in
Horizontal Metal Partition(s)
Installation
Instructions (cont'd)
Existing Wiring
Open/Closed
Bushing
Horizontal
Partition
Low Voltage Wiring (orange, brown, blue, and yellow)
- Route the low voltage wires down the side of the heater
and make connections to the heater wiring. Refer to the
wiring diagram in
FIGURE 14, page 9.
To be routed down the side of the heater, the wires must
pass through the horizontal partitions or be attached to
cable holders. Locate the upper horizontal partition in the
inner side panel (See
FIGURE 11). In the vacant hole,
insert the black open/closed bushing (See
FIGURE 12).
If the heater has a lower metal partition, insert the second
bushing.
Run the four low voltage wires down the side of the heater,
through the new bushing(s) and wire cables. Connect
the wires according to the wiring diagram in
FIGURE 14,
page 9.
Be sure to connect the brown ground wire.
Either replace the heater side panel(s) now or after you
have tested the venter operation (Paragraph 9).
6. Connect Power Venter and Heater Wiring (cont'd)
7. Adhere Warning
Label
Remove the self-adhesive warning label from the parts bag.
FIGURE 13 - Warning
Label
Select a place on the fan back panel or the blower adapter back to adhere the
label. Do not put the label on a hot surface. Wipe the area with a clean, dry
cloth. Peel the adhesive backing from the label and adhere it to the selected
heater surface.
WARNING
This heater has been converted for operation
with a power exhauster.
Do not operate as a gravity-vented heater.
To do so could result in property damage,
personal injury, and/or death.
IMPORTANT INSTALLATION NOTES: If the heater is not installed, be sure to support the bottom with
plywood or other appropriate material. The bottom access panel could be damaged if the bottom is not
supported. Install the heater in accordance with the installation instructions supplied with the heater and
the venting, testing, and warning instructions in this booklet.