Prepare and install the flue adapter assembly – Reznor B Option - Power Venter Installation User Manual
Page 3
Form I-F/B-PV, P/N 97967R2, Page 3
FIGURE 3 - Suspend the Heater from
the Two New Suspension Points
Add Nut to Lock to Inner Panel.
NOTE: Do not lock to outer panel. This may
prevent the outer side panel from being
removable for future service.
FIGURE 2 - Hanger Bracket Location
Align Clearance Hole and Cage Nut
Use Sheetmetal Screw
Removed from Heater
Position bracket, push
upward, insert screw in
slotted hole and tighten.
(Models 25 - 125 use upper
slotted hole; Models 130 -
400, use lower slotted hole.)
2. Prepare and
Install the
Flue Adapter
Assembly
Heater Size Restrictor Size
P/N
25 - 50
2-3/4" x 6"
98665
75 - 100
2" x 6"
98664
125
1" x 7"
97943
130
1-1/2" x 7-3/4"
97944
165
1" x 7"
97943
200
None
250 - 300
1-1/2" x 7-3/4"
97944
400
None
(a) Select and Attach the Flue Restrictor
WARNING: For proper and safe operation, the correct restrictor
must be installed where required. Measure the restrictor before
installing to be certain of the correct size.
There are four restrictors (rectangular pieces of sheetmetal from 1" to 2-3/4"
wide and 6" to 7-3/4" long) included in your option package. The flue restrictor
which controls the volume of dilution airflow through the drafthood and vent
pipe
must be installed on units where required to maintain safe and efficient
operation.
Using the chart on the right, determine
whether or not a restrictor is required, and
if so, which one to use.
Select the appro-
priate restrictor from the option kit. On
the
inside of the adapter assembly (See
FIGURE 4A or 4B), position the restrictor
across the flue opening. Attach the restric-
tor using two sheetmetal screws.
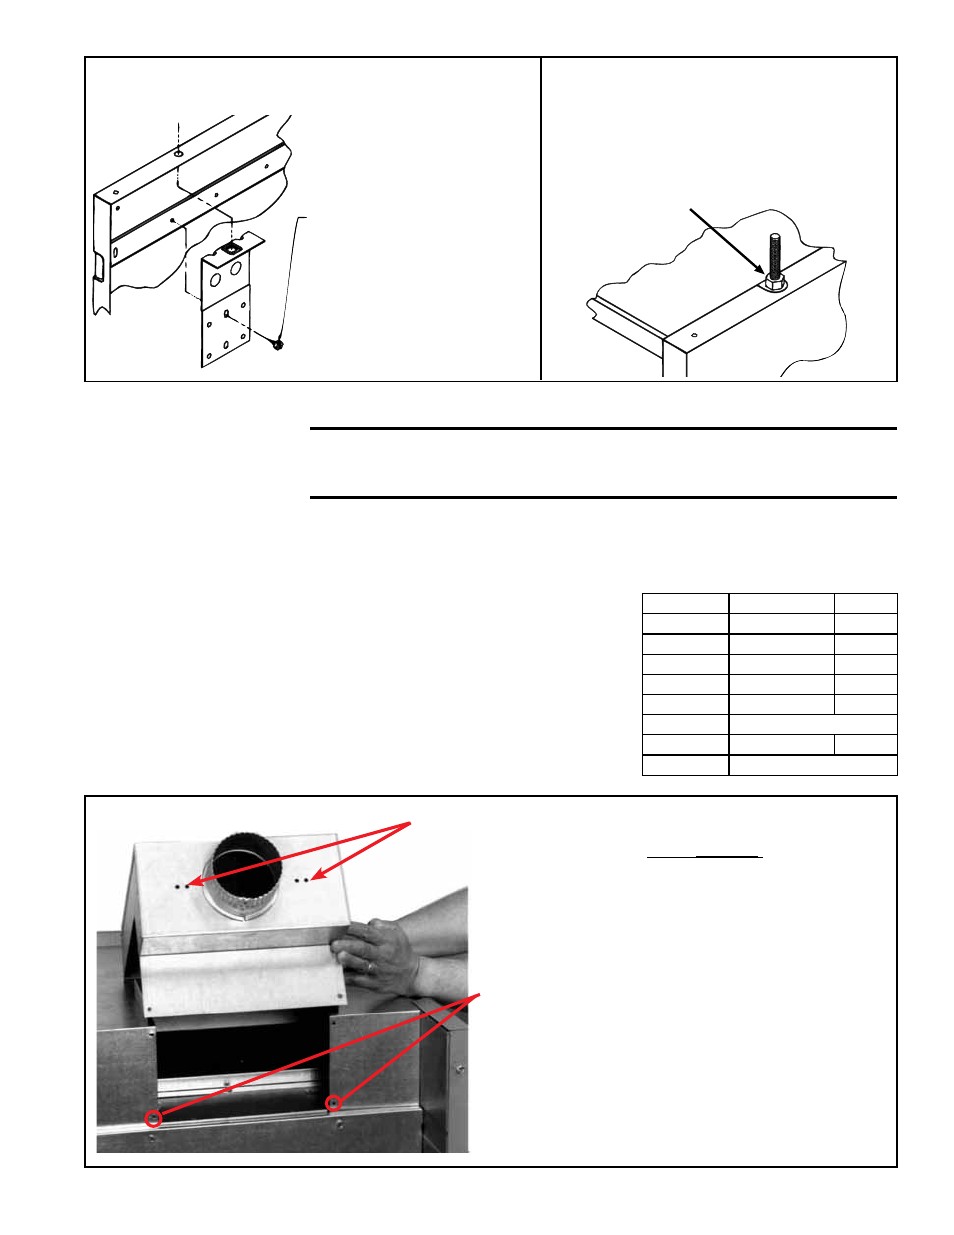
FIGURE 4A - Installing
a Flue Adapter Assy
(Applies to all sizes except
Size 125; see
FIGURE 4B.)
NOTES:
• The flue adapter assembly
for a Size 125 is not the
same as illustrated here;
see
FIGURE 4B, page 4.
• Heaters manufactured
prior to 10/89 have a fixed
vertical vent outlet. If the
heater being serviced has
a fixed vertical vent outlet,
install the adapter assembly
with restrictor attached over
the fixed vent outlet.
Line adapter
up with these
two holes
when marking
for holes to
drill.
(See instructions
on page 4.)
Holes for attaching restrictor
(Attach the restrictor on the inside
before installing
the flue adapter assembly.)
Flue Adapter Assembly