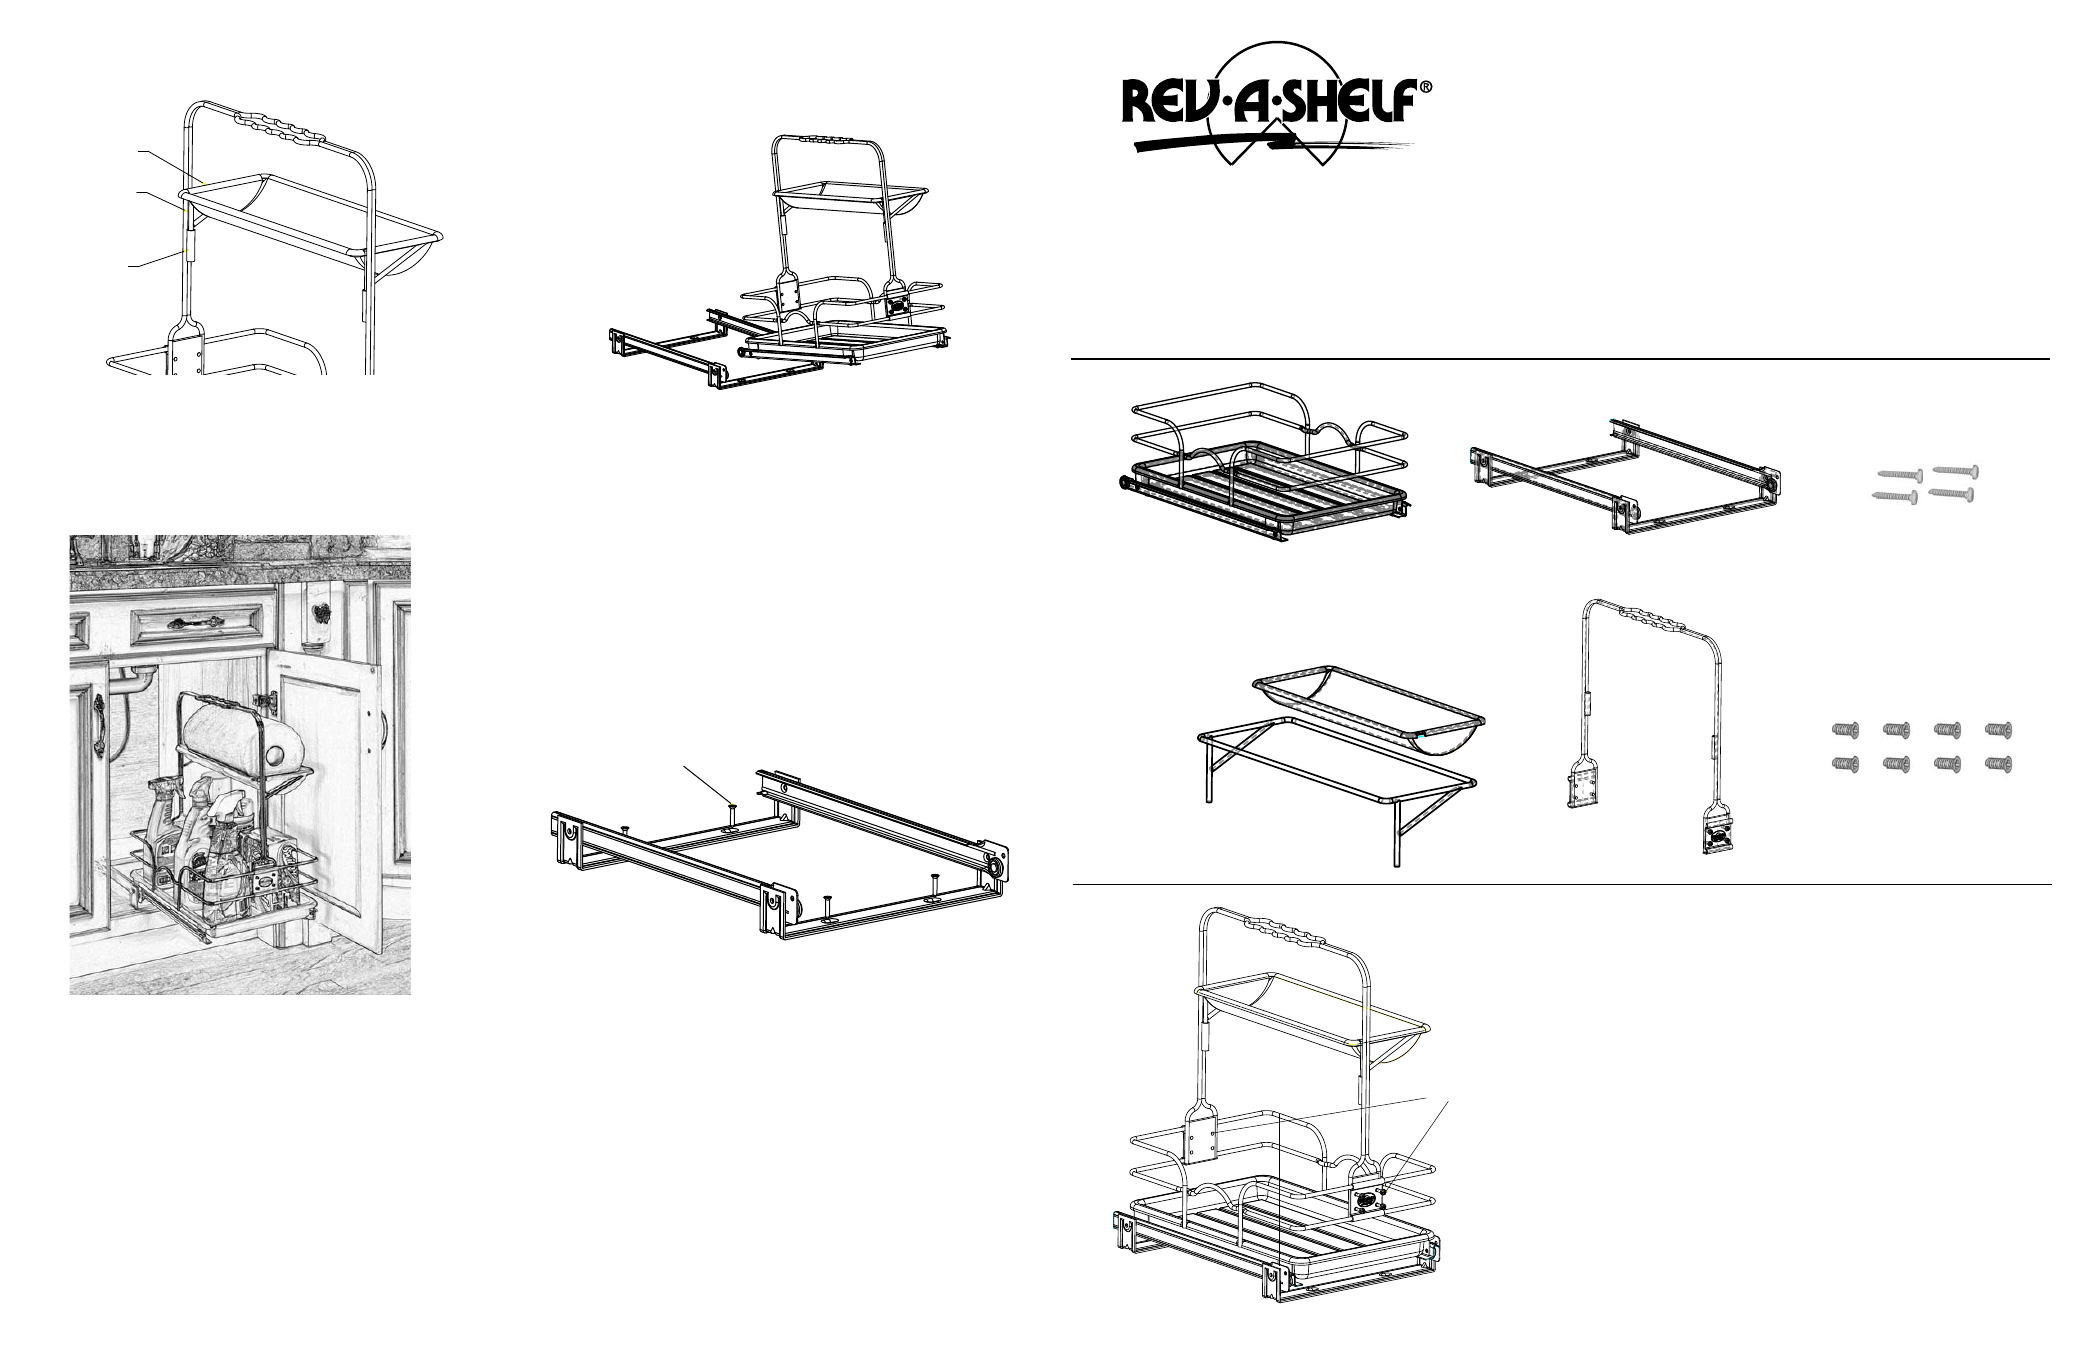
Piezas incluidas: pièces incluses – Rev-A-Shelf 544-10C-1 User Manual
Page 2
Instrucciones de Instalación 544-10C
Instructions d’installation 544-10C
La canasta del fregadero debe ser instalada en el lado del gabinete que tiene la menor cantidad de
obstrucciones (por ejemplo, plomería o un triturador).
Votre panier pour évier doit être installé sur le côté du caisson qui a le moins d’encombrement (dы а la
robinetterie ou au vide déchet par exemple)
Paso 1: Sujete la canasta en sentido vertical en el
centro de la canasta inferior y apriete libremente los
tornillos M4 x 12mm (como se muestra en la Figura 1).
Etape 1: Attacher le panier verticalement au milieu
du panier du bas et serrer, sans les fixer
définitivement, les vis M4 x 12mm (voir Figure 1).
M4 x 12mm
FIGURA 1
FIGURE 1
Cesta inferior
Panier inférieur
Sistema que resbala
Système qui glisse
Tornillos de montaje
Vis de Montage
Bandeja Superior
Tablette du Dessus
Carrito
Chariot
Piezas incluidas:
Pièces incluses:
Step 4: Make sure that the unit will slide in-and-out
without any interference. Adjust the upright to the
left or right side, if necessary, and proceed by
tightening the caddy upright screws in the front and
rear of the unit. (as shown in Figure 4). (Note: The unit
is more balanced if upright is centered.)
Step 5: Pull the caddy out of the slides about 2” and
fasten rear mounting strap to the cabinet floor with
mounting screws provided. Remove the caddy from
the frame and then attach the front mounting strap to
the cabinet floor (as shown in Figure 5).
Step 3: Place assembled unit in the slide system (as
shown in Figure 3), and place inside the cabinet.
FIGURE 3
MOUNTING SCREWS
FIGURE 5
Step 2: Insert top tray and frame into the handle (as
shown in Figure 2).
HANDLE
TOP TRAY FRAME
TOP TRAY
FIGURE 2
Marco superior
Armature supérieure
Tornillos de máquina
Vis de machine
FIGURE 4