Rev-A-Shelf 4-WLS-MAT-XXX User Manual
Center cut template, 31 & 32” d-shape template
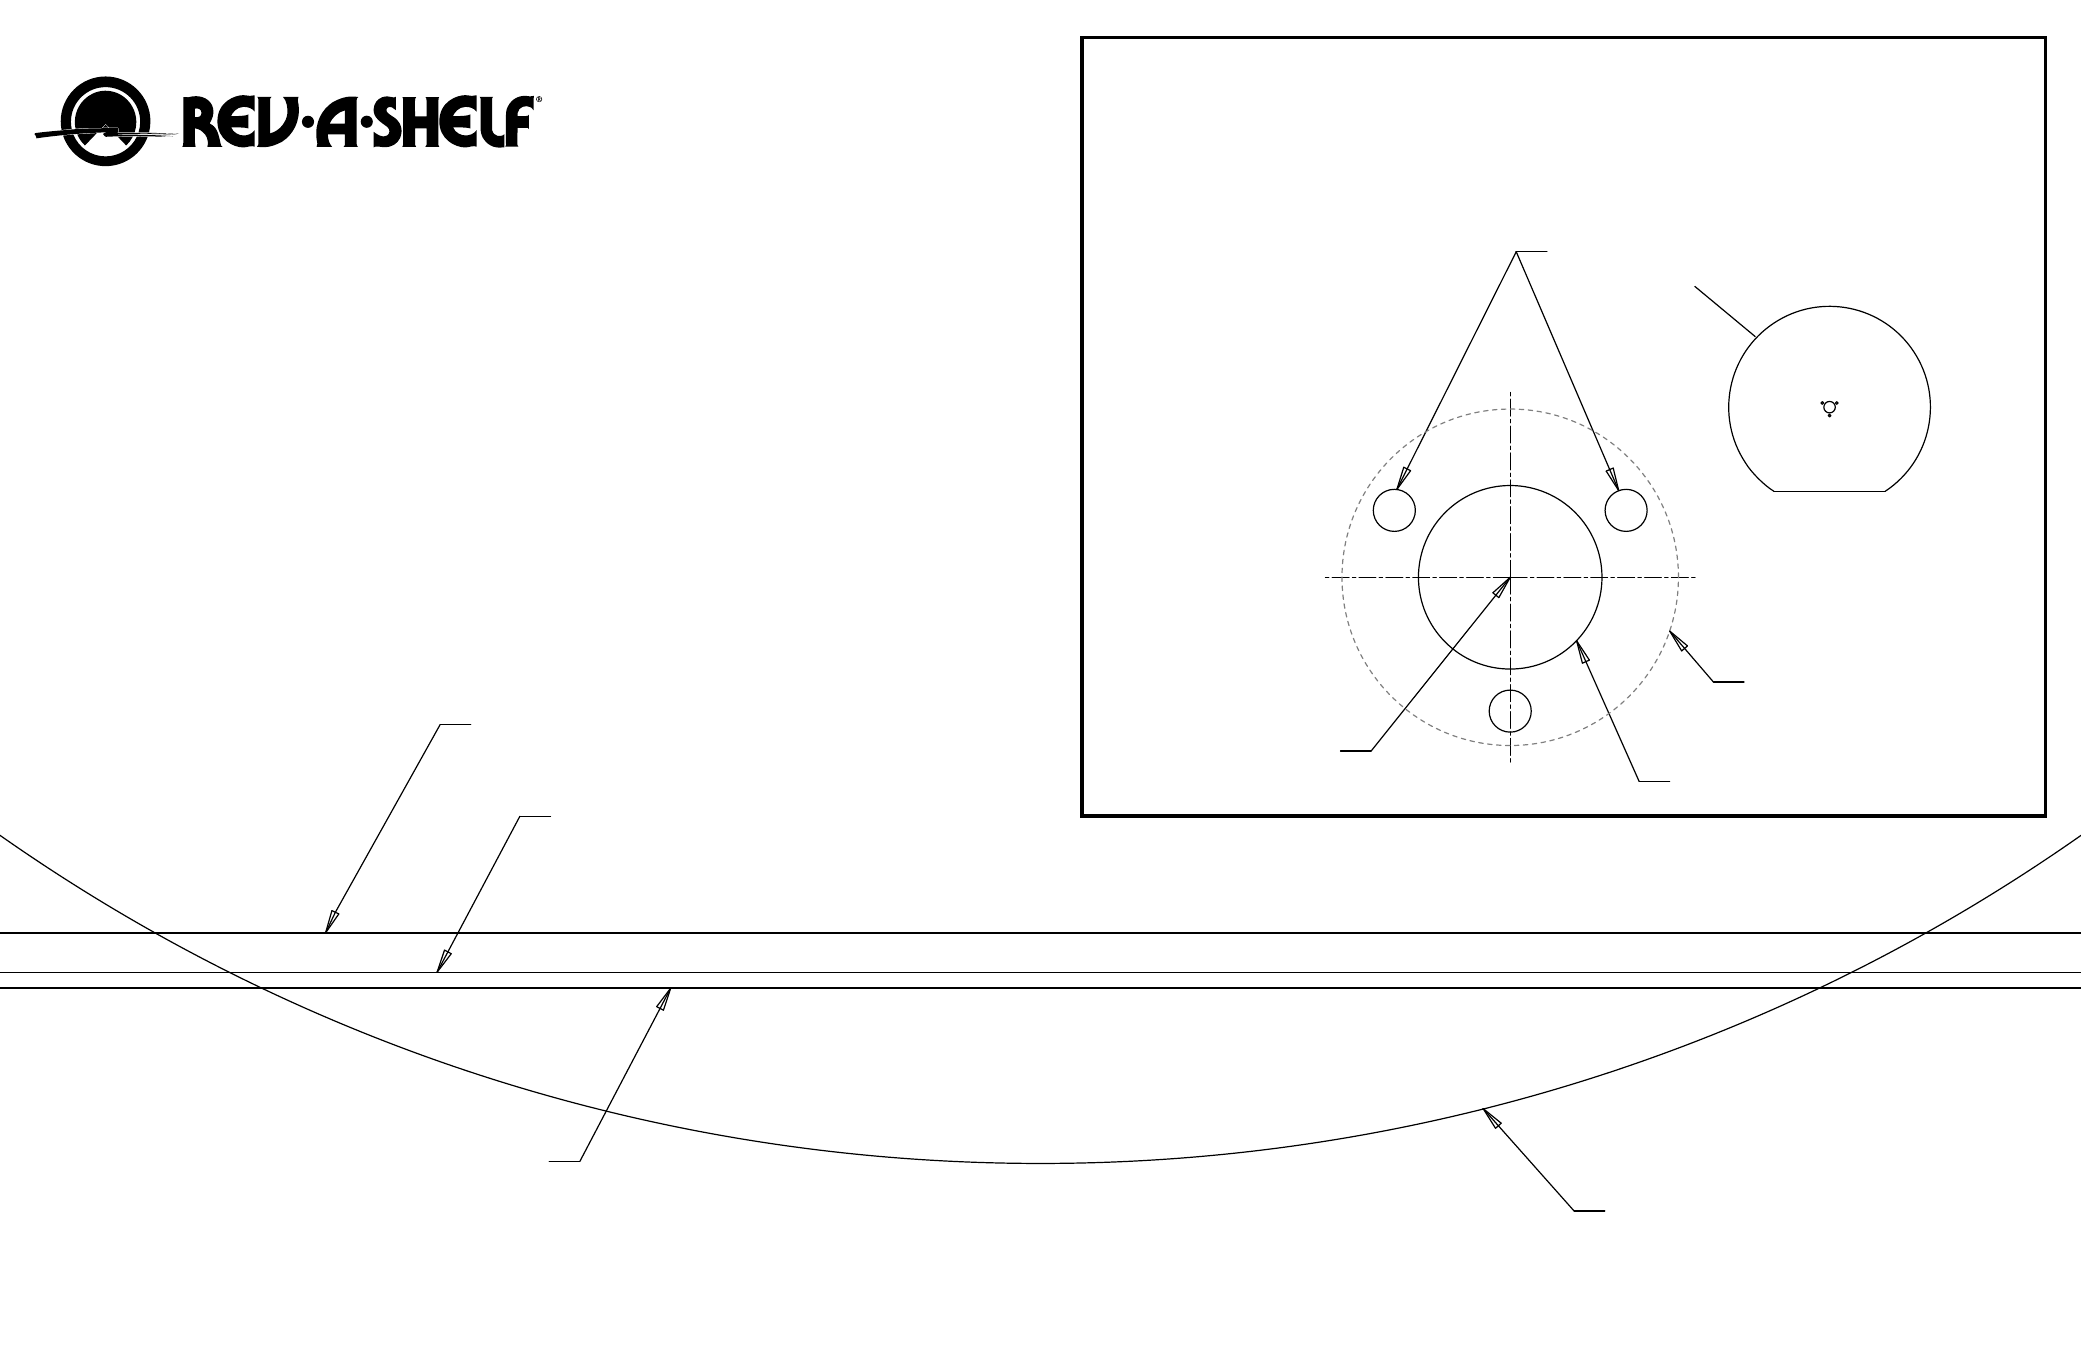
THESE 2 OUTER HOLES TOWARDS
BACK OF MAT
CENTER OF MAT
CENTER HOLE
INSTALLATION FOR 31 & 32” D AND FULL CIRCLE TRAY MATS
Determine your application and then follow the steps listed.
BEARING MOUNTED TRAYS
FULL CIRCLE
1.
No trimming is necessary.
Simply place mat on tray.
D-SHAPE
1.
Use “D-Shape Cut Template”
to cut off excess from round mat.
2.
Place mat on tray.
POST MOUNTED TRAYS
FULL CIRCLE
1.
Place mat on tray.
2.
Use “Center Cut Template”.
3.
Install hub hardware.
D-SHAPE
1.
Use “D-Shape Cut Template”
to cut off excess from round mat.
2.
Place mat on tray.
3.
Use “Center Cut Template”.
4.
Install hub hardware.
1. Place mat on tray and locate 1” hole by applying pressure to the center of the tray.
2. Using a sharp knife cut the 1” hole in the mat.
3. Cut the profile from the template provided and remove the 1” center hole from template.
4. Align 1” hole from template and orient according to diagram (no radial orientation needed for full circles).
5. Use paper template to locate the (3) holes and use an awl or screwdriver to punch holes in the mat.
6. The hub can be installed to the tray, the mat should be pinched between the tray and the top hub.
CENTER CUT
TEMPLATE:
31/32
I-M
AT
-32-R
DO NOT CUT OUTSIDE
OF THIS DIAMETER!
CUT LINE FOR:
32" D-SHAPE NATURAL WOOD (LD-4NW) TRAYS
CUT LINE FOR:
32" D-SHAPE BANDED WOOD (LD-4BW) TRAYS
CUT LINE FOR:
31" D-SHAPE FINGER JOINT (4WLS) TRAYS
TEMPLATE CURVE
31 & 32” D-SHAPE TEMPLATE:
1.
Set template down on flat surface.
2.
Set mat on template and align edge to template curve.
3.
Lay ruler/straight edge across cut line and mark mat.
4.
Cut mat. (note: after cut for banded wood trays it
may be necessary to trim edges to match rounded corners)
12400 EARL JONES WAY • LOUISVILLE, KY 40299 • (800) 626-1126