PRG Mbox Mini Manual 3.9 User Manual
Page 122
114
MBOX
®
MINI USER MANUAL
Step
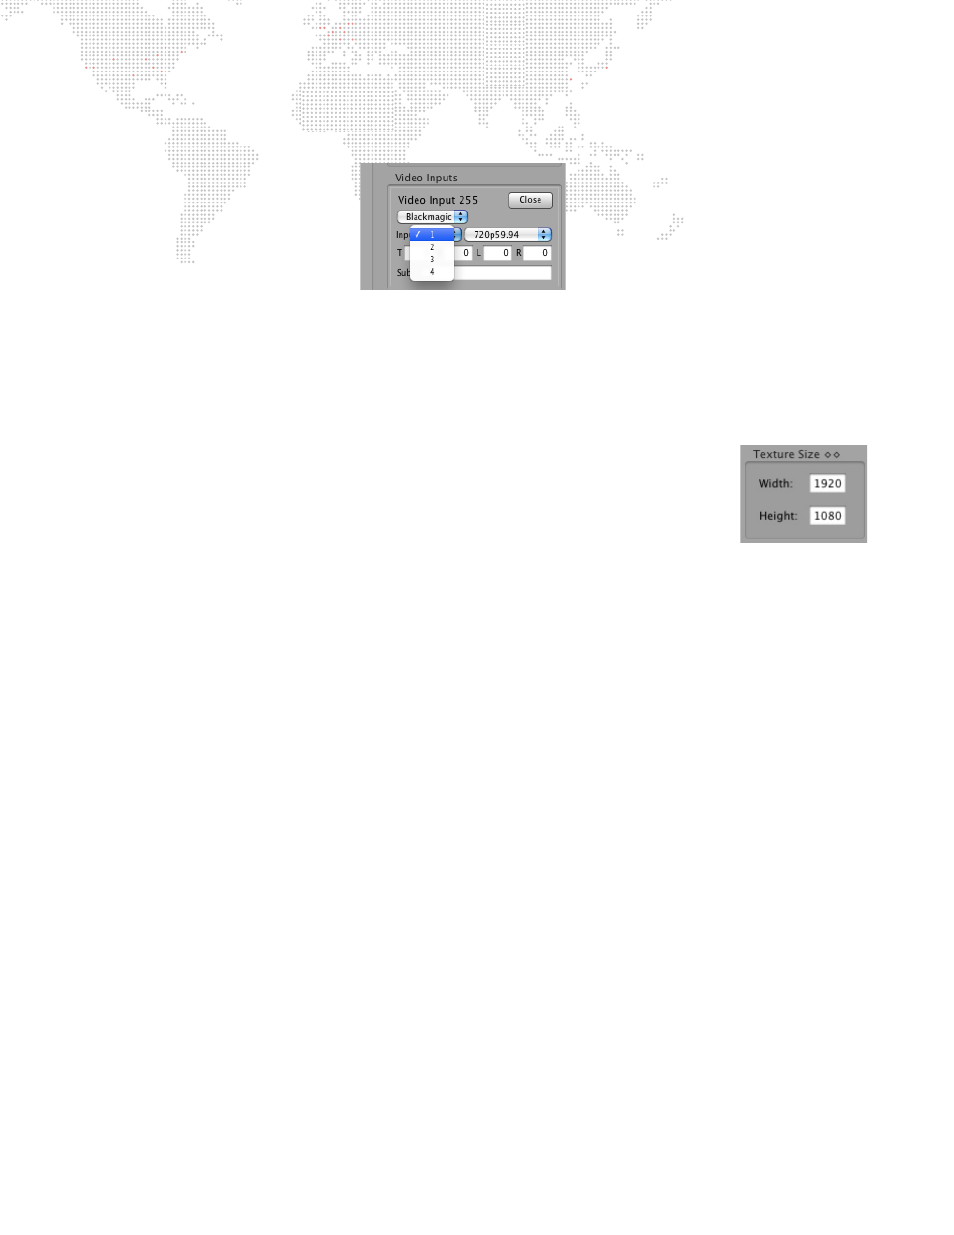
3. At Video Inputs window, set input type pop-up to "Blackmagic," then set input number pop-up to input 1.
Finally, set the input format pop-up to the correct type.
Step
4. The edit fields labeled T, B, R, and L can be used to enter a crop (in pixels) to the incoming video signal.
Step
5. When enabled, the Sub checkbox will cause Mbox to display a substitute image if a video input is not
available. The default substitute image is a blue rectangle with the input type number and format listed. You
can use a custom substitute still image by typing the Folder.File index (e.g. 004.001) or the full path for the
file (e.g. /Users/username/Documents/Raster.jpg) into the field next to the Sub checkbox.
Step
6. Once everything is set up correctly, click Close button to close setup window.
Step
7. Make sure Texture Size width and height settings are as large or larger than the
camera input resolution width and height. Failing to set the Texture Size correctly
will result in an unusable image when the video input is requested for display.
Texture Size is entered at the Setup tab of the Mbox Setup window.
Step
8. In some cases, you may need to restart the Mbox software after changing the video
input settings.