Installation instructions (continued) – Perfect Aire PASC12000 User Manual
Page 14
13
Installing Unit in a Sliding Window (Continued)
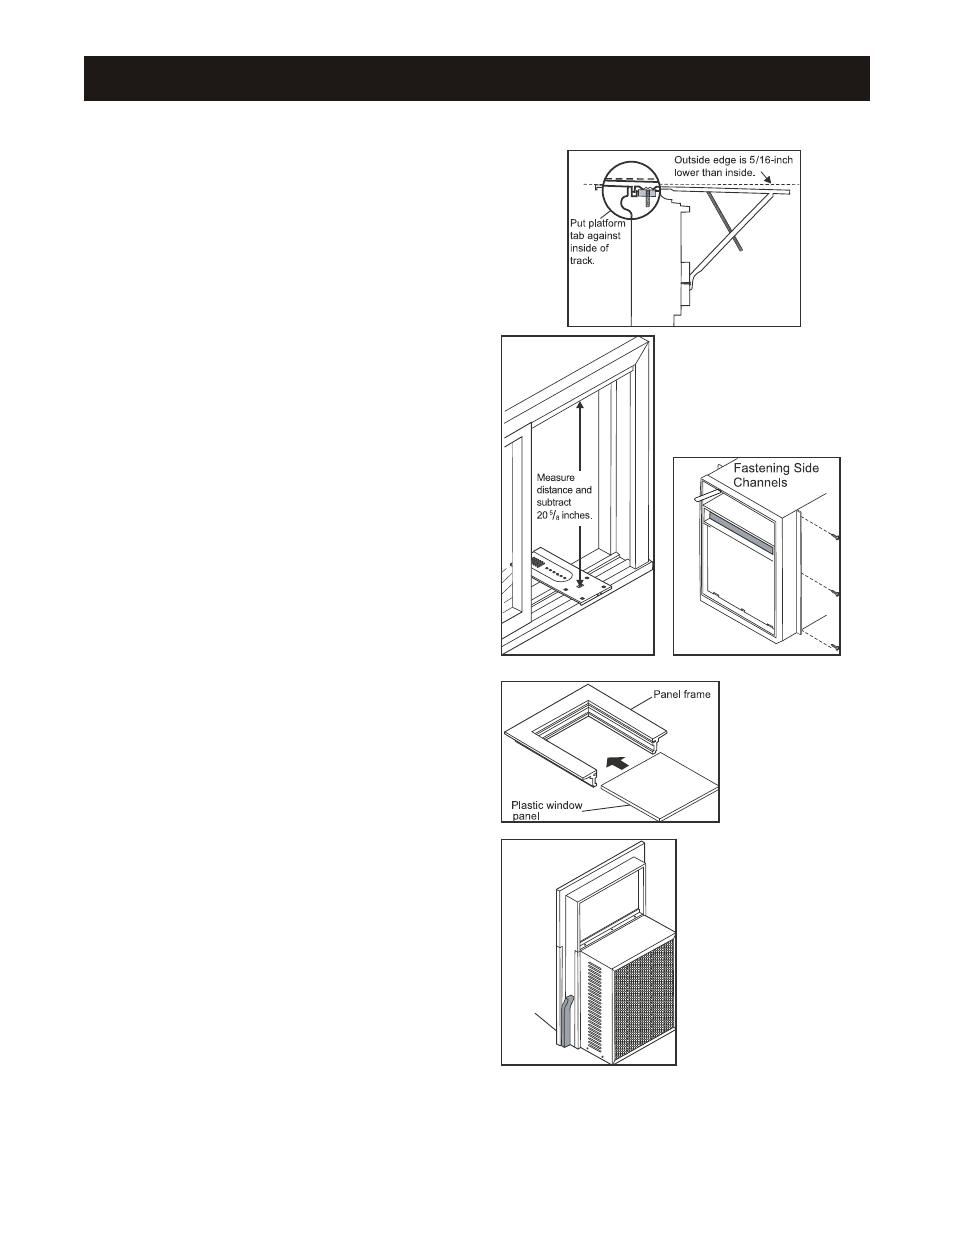
6. Place platform assembly. (Fig. 7)
With platform tab against inside of window track,
place platform assembly and attach it to window
jamb. Use appropriate length screws (Items 9-11
in Preparing For Installation).
7. Adjust platform assembly.
Adjust the platform assembly so that the outside
edge is 5/16 inches lower than inside edge. (Fig. 7)
This ensures proper water drainage from the air
conditioner.
8. Level platform assembly from side-to-side.
Also, make sure window track is level. Use leveling
shims as necessary to ensure unit is level from
side-to-side.
9. Measure height of window opening. (Fig. 8)
Begin measuring height of window opening
from top of platform assembly as shown right.
Subtract 20 5/8 inches. Mark this measurement
on plastic window panel, along the longer side.
10. Clamp plastic window panel.
Clamp the plastic window panel between a board
and a work table, and cut along cutting line with a
fine tooth saw. Remove any burrs with a file.
11.
Fasten side channels. (Fig. 9)
Fasten the side channels to the sides of the unit
using 3 screws (Item #17, page 10) per channel.
Start with first screw at top of channel. Make sure
hook ends of channels face toward back of unit.
12. Slide plastic window panel into panel frame.
(Fig. 10)Slide in the window panel, with the smooth
side to the room. Slide panel frame assembly into
side channels of the AC cabinet. Make sure plastic
window panel is firmly enclosed on all sides by
the retainer grooves.
13. Cut side channel seal. (Fig. 11)
Cut the side channel seal into 2 equal lengths.
Remove protective backing and apply it to the
rear side of cabinet side channels, starting just
below panel frame assembly. Pinch off excess
length so seal is even with the bottom of the
cabinet side channel.
Fig. 7
Fig. 8
Fig. 9
Fig. 10
Apply weather
seal to side
channels just
below edge
of panel frame
Fig. 11
INSTALLATION INSTRUCTIONS (CONTINUED)