Mount the engine – Great Planes Patriot XL Kit - GPMA0450 User Manual
Page 32
❏
2. Remove the tank and fuelproof the fuel tank
compartment with thinned out epoxy or fuelproof doping.
❏
3. Drill two 1/4" [6mm] holes in the firewall above the tank
floor as shown. Route the two 12" [300mm] lengths of fuel
tubing from the tank through these holes and into the tank
compartment. Pull the fuel tank into place with the fuel tubing.
Note: Some modelers may wish to wrap the tank in foam
prior to installing it. This is fine, but it will be a tight fit. Simply
bracing it with small balsa blocks after sliding it in will be
perfectly acceptable.
❏
1. Cut the “spreader bars” from the included Great Planes
engine mount, and then use a hobby knife to remove any
flashing leftover from the molding process so that the halves
fit together well.
❏
2. Temporarily attach the engine mount to the firewall with
four 6-32 x 1" socket head bolts and #6 flat washers but do
not tighten the screws all the way.
❏
3. Place the engine on the mount and slide the halves in
or out until the engine fits. When the engine mount is
adjusted and positioned, tighten the mounting screws.
❏
4. Position the engine on the mount so the drive washer (or
the back of the spinner) is 5-3/8" [137mm] from the firewall.
❏
5. Use the Great Planes Dead Center
™
Engine Mount
Hole Locator or another method to mark the locations of the
bolt holes. Remove the engine from the mount and drill four
#36 or 7/64" [2.8mm] holes. Tap the holes with a 6-32 tap.
❏
6. Bolt the engine to the mount with four 6-32 x 3/4"
[19mm] socket head screws, #6 washers, and lock washers.
❏
7. If installing retracts, proceed to “
Install the Servos
and Pushrods.”
❏
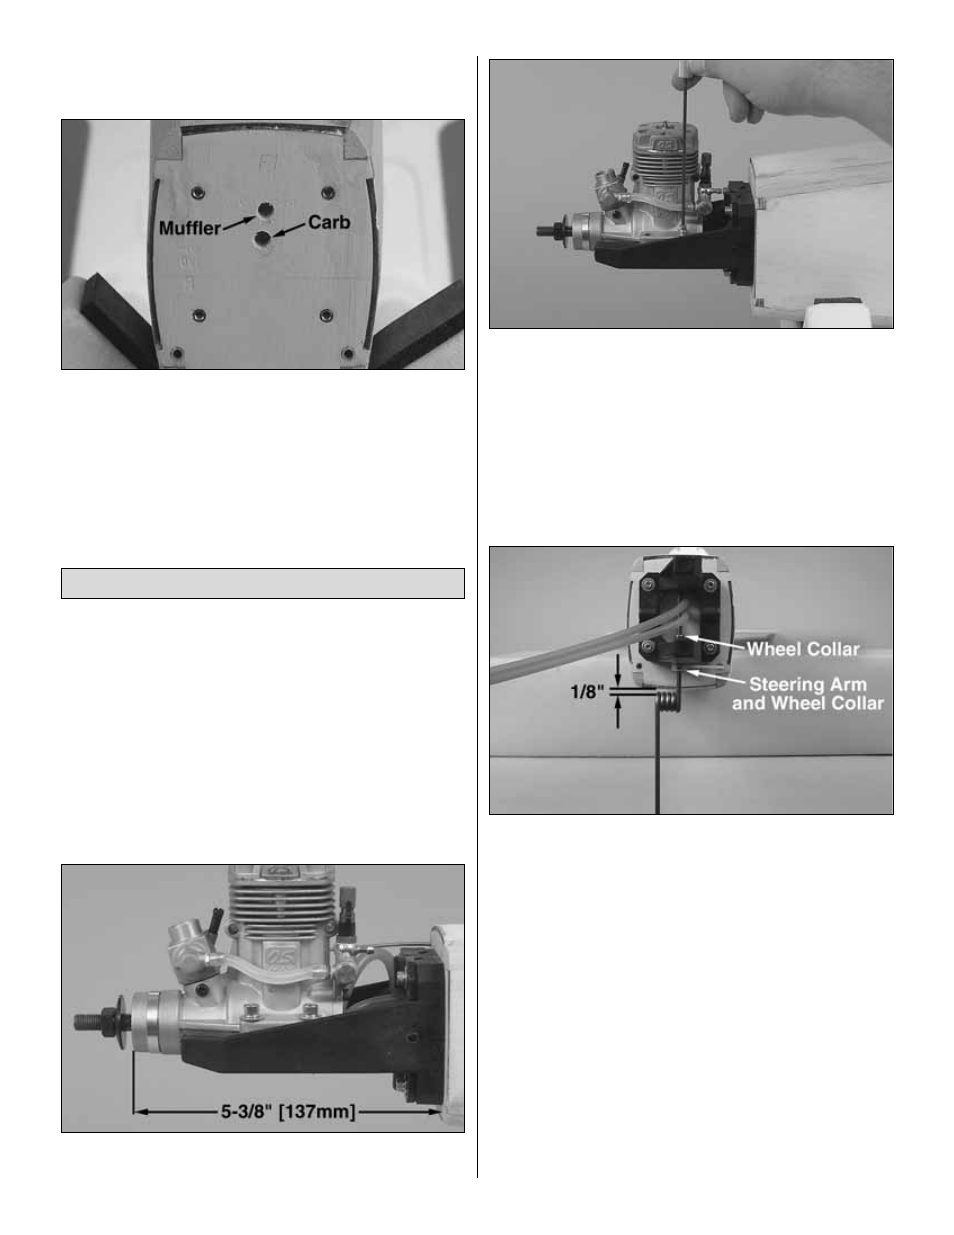
8. Mount the nose gear to the engine mount as shown
using a nylon steering arm with a 5/32" wheel collar and a
6-32 x 1/2" [13mm] socket head cap screw, another 5-32"
wheel collar and a 6-32 set screw. Position the wheel collars
so the gear will be positioned as shown (with the coil in the
wire approximately 1/8" [3mm] from the bottom of the
fuselage.) Be sure to grind flat spots on the nose gear wire
where the steering arm set screw and wheel collar set
screw will tighten.
Mount the Engine
32