Install the firewall – Great Planes Patriot XL Kit - GPMA0450 User Manual
Page 23
❏
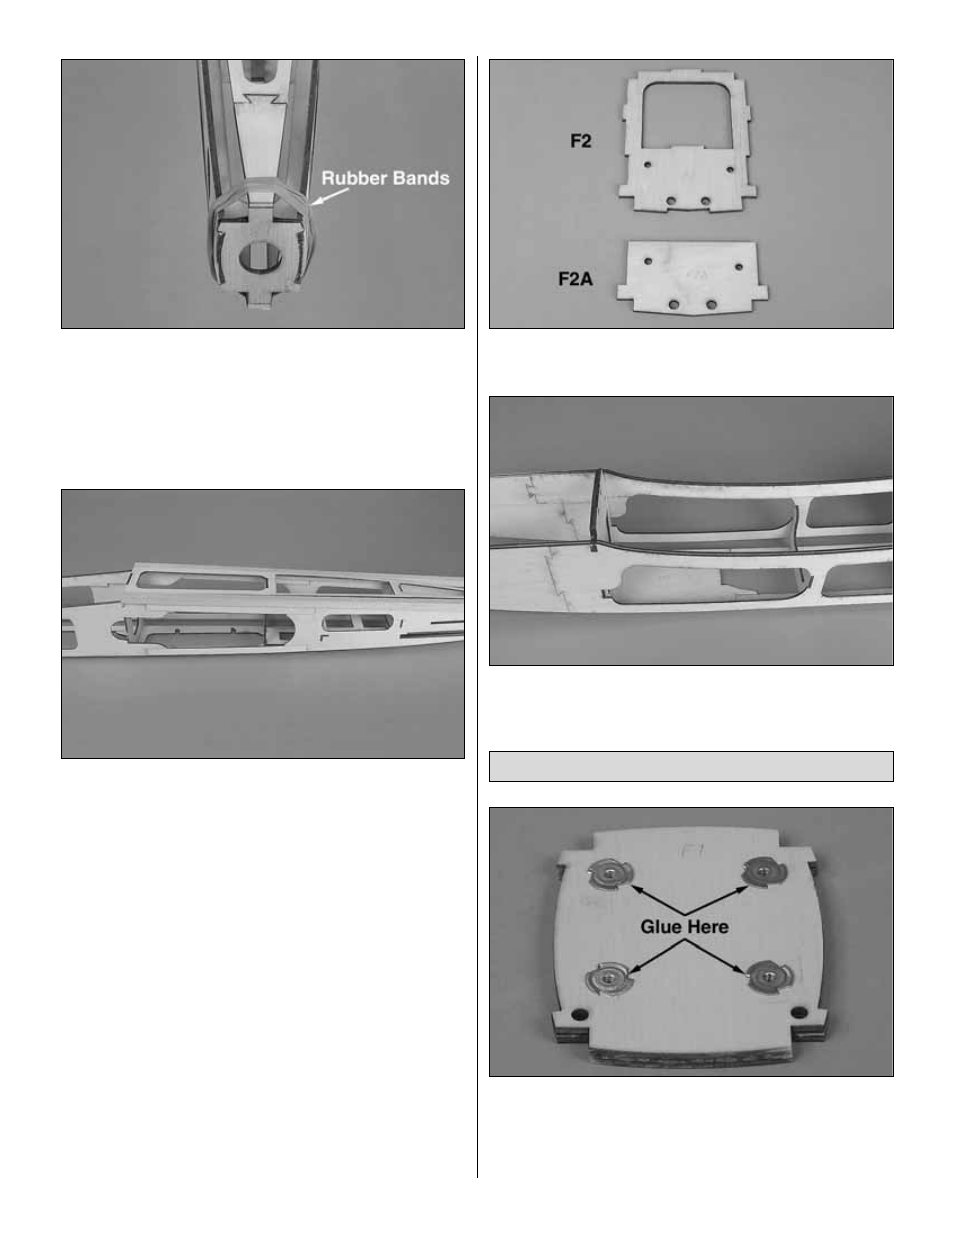
13. Test fit former F8. Notice the sides of the fuse will
need to bend slightly to conform to F8. Wet the ends of the
fuse sides and wrap F8 with rubber bands as shown. The
water will allow the fuse sides to conform to F8.
❏
14. Locate four (4) of the 1/2" x 1/2" x 30" [ 13 x 13 x 762mm]
balsa fuse corners. The span between F4 and F7 is flat.
Weight down the fuselage at F4 and F7. Working on the bottom
of the fuselage first, glue both fuse corners to F4 first, then glue
both corners to F7. This helps eliminate any tendancies to twist
the fuselage.
❏
15. Glue the sides of the fuse to the fuse corners between
F4 and F7.
❏
16. Once the sides and bottom corners are securely
glued in place between F4 and F7, you can then glue the
corners to F8. Lay a bead of medium CA where the corner
will sit in F8, then wrap your hand around the tail and both
corners and squeeze the corners into place. Allow the glue
to harden while holding it in place. Go back after gluing the
corners into F8 and glue the sides in place using thin CA.
❏
17. Glue F2A to the front of F2 with medium CA. Align the
pieces using the factory-cut holes. This assembly is now F2.
❏
18. Glue formers F2 and F3 in place using thin CA.
❏
1. Use 30-minute epoxy to glue together the two die-cut
1/8" plywood formers F1. From now on, this assembly will be
referred to as the firewall. Install four 6-32 blind nuts in F1.
Apply a small amount of epoxy or CA to the back of the blind
nuts to hold them in place.
Install the Firewall
23