Sheet the bottom of the wing – Great Planes Patriot XL Kit - GPMA0450 User Manual
Page 20
❏
3. Mix 1/4oz of 30-minute epoxy. Liberally coat the root rib
of one wing half, half of the wing joiner, and center web with
epoxy. Insert the joiner and clamp in place against the
center web (CW). Be sure there is plenty of epoxy coating
the wing joiner and center web; it should ooze out of
everywhere when the clamp is compressed.
❏
4. With one side of the joiner clamped in place, coat the
center web in the other wing half and the wing joiner. Twist
together the two wing halves.
❏
5. Clamp the wing joiner in place. Make sure the wing is
straight and the wing roots meet with little or no gap. Clean up
excess epoxy with a paper towel and denatured alcohol.
When the epoxy has fully cured, remove the clamps and fill in
any gaps with more epoxy.
❏
6. Cut a 2" x 6" [50 x 150mm] block from leftover 3/8"
[9.5mm] balsa from the wing tip blocks. This is the center
LE. Glue it to the LE center of the wing and shape it to
match the wing.
❏
7. Cut the shaped balsa bolt support to make two
supports. Trim each to match the plan and glue in place with
medium CA.
❏ ❏
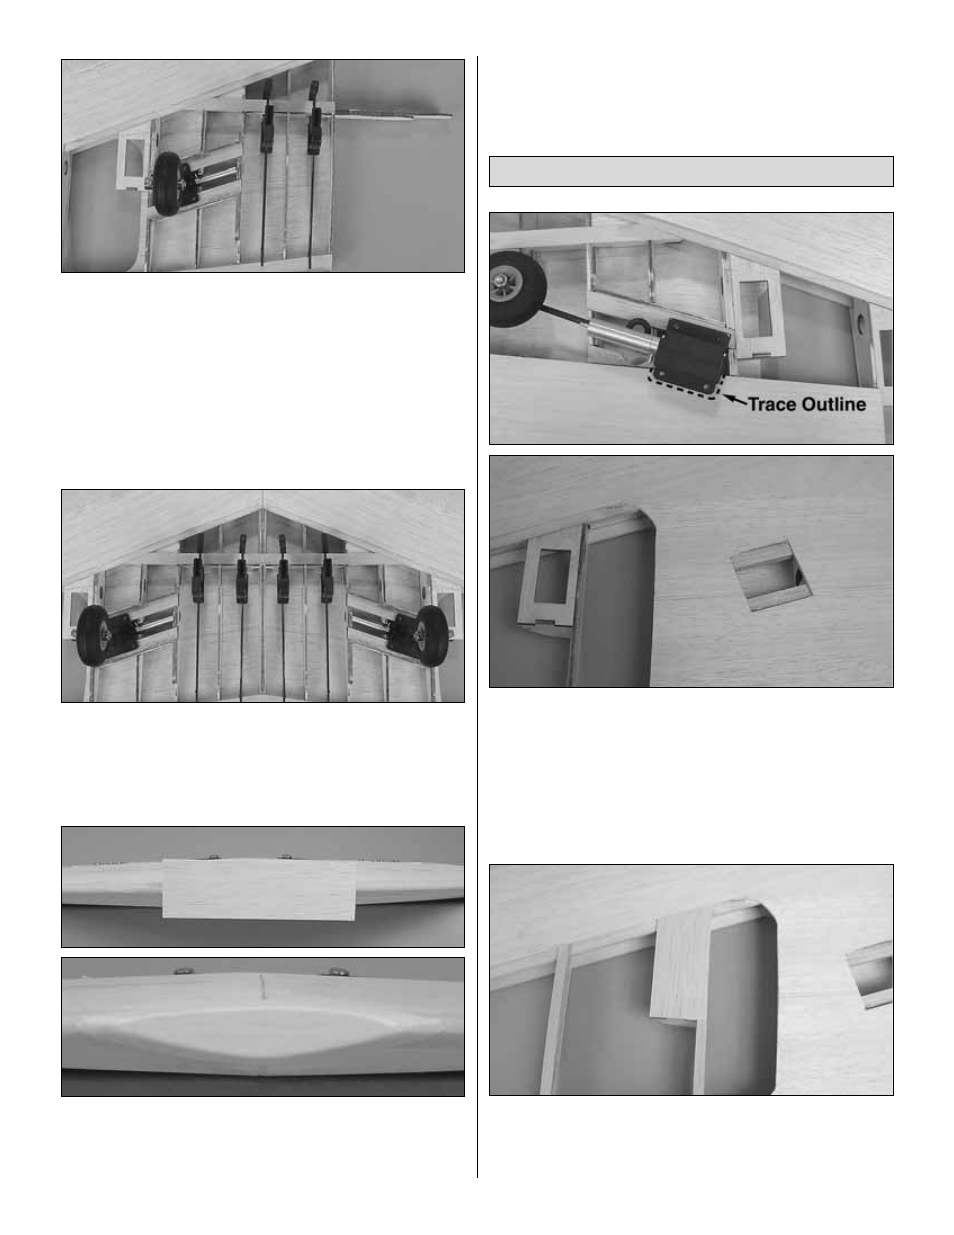
1. Sheet the bottom wing in the same manner as the
top, one half at a time. You will need to make a cutout for the
landing gear in the sheeting. The way we did this was to
install the first section of sheeting flush with the TE sheeting,
then position the gear. Trace the outline of the gear onto the
sheet. This way, you can align the plate with the outline when
the second sheet is glued and trace the remainder of the
cutout. Do not glue the sheeting to the areas to be cut out.
❏ ❏
2. If you installed the flap servo tray, sheet it at this
time. Cut a piece of sheeting flush with the LE sheeting that
covers the tray. Glue a cap strip from the bottom of the servo
tray to the TE sheeting as shown.
Sheet the Bottom of the Wing
20