Install the retracts – Great Planes Patriot XL Kit - GPMA0450 User Manual
Page 17
❏ ❏
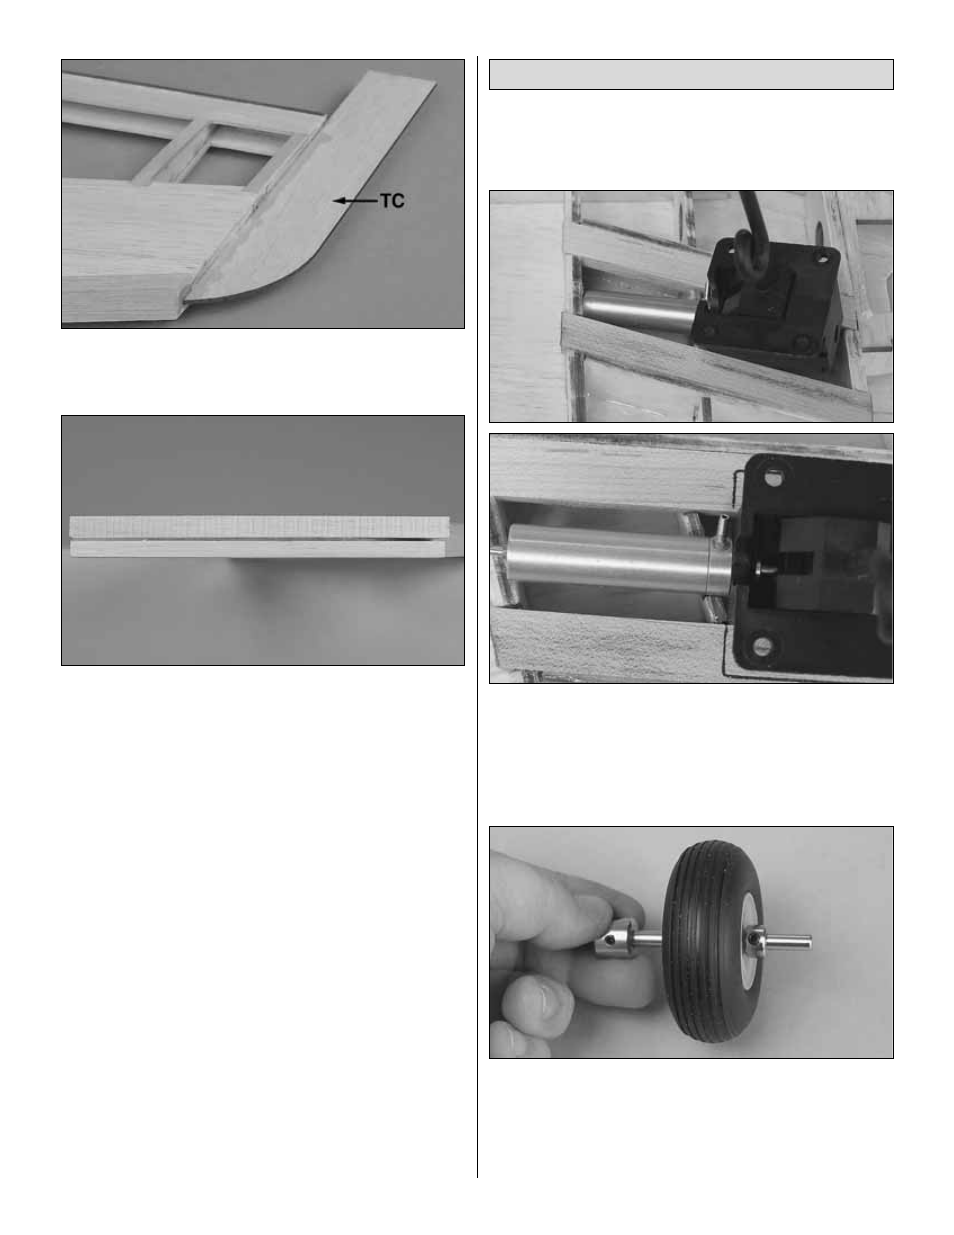
2. Glue the die-cut 3/32" [2.4mm] balsa wing tip
center (TC) into position. Be certain it is centered and
perpendicular to R10.
❏ ❏
3. Locate the 3/8" x 3" x 24" [9.5 x 75 x 610mm] balsa
wing tip stick and the 1/2" x 3" x 24" [13 x 75 x 610mm]
balsa wing tip stick. Cut a piece from each stick to match
the plan for the wing tips. Note: The 1/2" [13mm] stick will be
on the top of the wing; the 3/8" [9.5mm] stick will be glued to
the bottom of the wing tip. Trim to the approximate shape of
the wing tip and glue in place. Save all leftover balsa from the
3/8" [9.5mm] stick. You will need it after joining the wing.
❏ ❏
4. Shape the LE as shown on the plan.
Note: This section applies only to those modelers installing
pneumatic retracts. If you are installing fixed gear, proceed
to “
Install the Fixed Gear” on page 18.
❏ ❏
1. Test fit the retract between the landing gear rails.
You may have to trim R4 a little to allow the retract to seat
properly. The landing gear rails may also need a slight
sanding to allow the base of the retract to fit. Note how the
retract is inserted. This allows for the air fitting to be
accessed through the hole in R3.
❏ ❏
2. Slide a 2-1/4" wheel onto an axle followed by a
5/32" [4mm] wheel collar. Apply a small drop of general
purpose oil to the axle. Tighten the set screw on the wheel
collar to hold the wheel in place. Using a file or rotary tool,
grind a flat spot onto the axle where the set screw touches.
This helps reduce the chance of the wheel collar slipping.
Install the Retracts
17