Great Planes F4 Phantom - GPMA0440 User Manual
Page 36
3. Before painting the nacelles, fill the seams and other
imperfections with filler such as Squadron White Putty, or
resin filler such as Bondo. We use Bondo most of the time.
It cures quickly and is easy to sand. Squadron putty works
well, but it takes several hours to cure.
4. After the filler cures, wet sand the entire nacelles with
400-grit sandpaper in preparation for primer.
5. Temporarily attach the nacelles to the fuse with
masking tape.
1. Use epoxy to glue the 3/8" x 5/8" x 5/8" hardwood
2. Cut two 3/8" wide pieces of balsa from a leftover 3/32"
die-sheet. Trim and glue the balsa pieces between the tail
mounting blocks, 1/16" from the fuse sides.
tail mounting blocks in position inset 1/16" from the
fuselage sides.
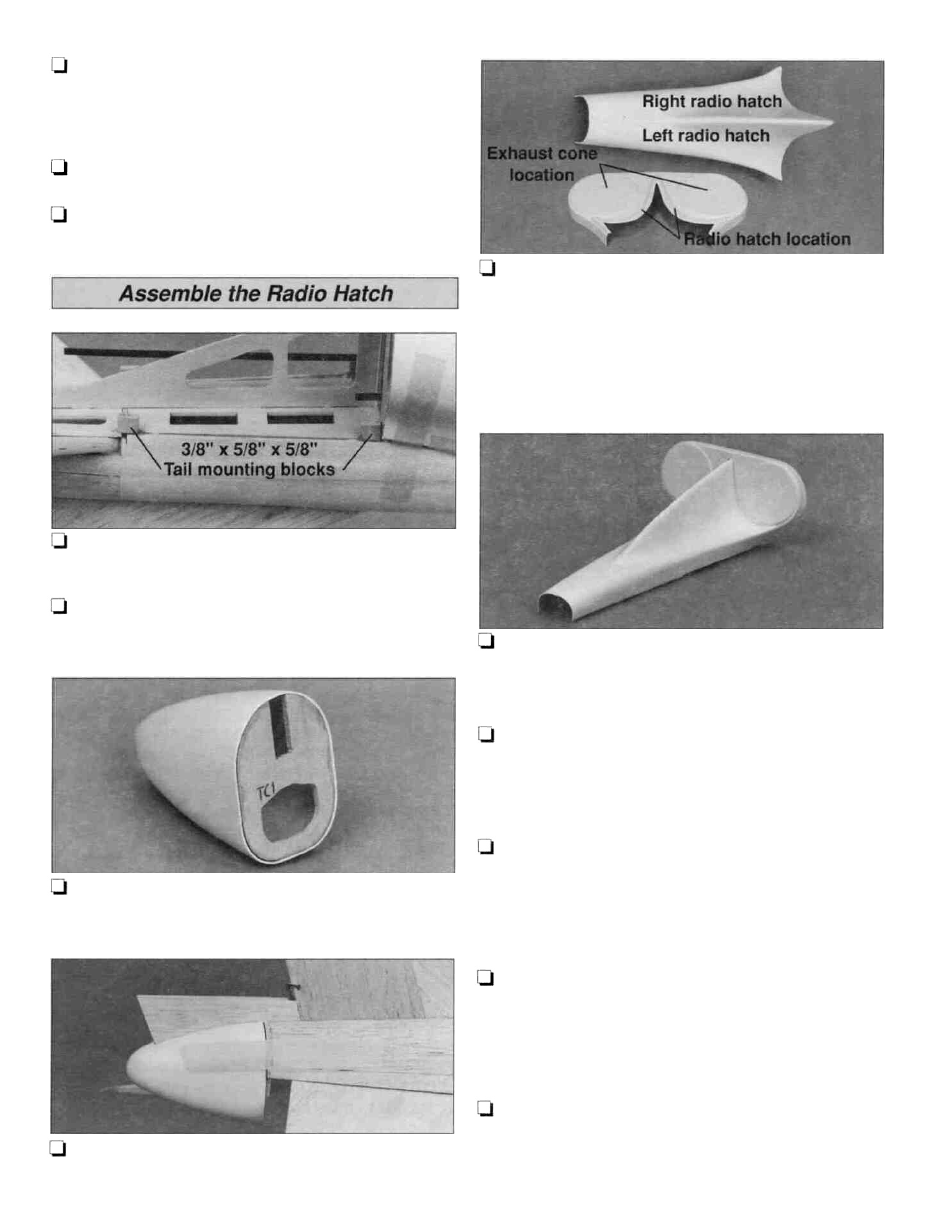
5. Trim the left and right plastic radio hatches and the
hatch front along the embossed cut lines. Tape the radio
hatches together and test fit them on the hatch front. Note
the raised area on the hatch front for the radio hatch. When
satisfied with the fit, roughen the lip and inside edges of the
left and right radio hatch and the raised area on the hatch
front. Glue the left and right radio hatches together.
6. Glue the radio hatch to the raised area on the
hatch front.
3. Trim the plastic tail cone along the embossed cut
lines and sand the inside edges. Glue the die-cut 1/8" tail
cone former to the inside of the tail cone.
7. Trim the two plastic exhaust cones along the
embossed cut lines. Sand the inside lips of the cones and
glue them to the raised area on the hatch front.
8. Use filler to fill the seams and blend the radio hatch
into the hatch front. Sand the filler smooth after it dries and
give the radio hatch assembly an overall sanding with
400-grit sandpaper.
4. Cut a slot in the top of the tail cone to allow it to slide
over the lower fin extension. Tape the cone in position.
9. Position the radio hatch over the radio tray. Drill 1/16"
pilot holes through the radio hatch and tail mounting blocks.
Attach the radio hatch to the fuselage with #2 x 3/8" sheet
metal screws and #2 washers.
10. At this stage, give the entire model a rough sanding.
Refer to the cross-section views often while sanding. The
bottom of the fuselage should be sanded flush with
the nacelles.
36