Great Planes F4 Phantom - GPMA0440 User Manual
Page 18
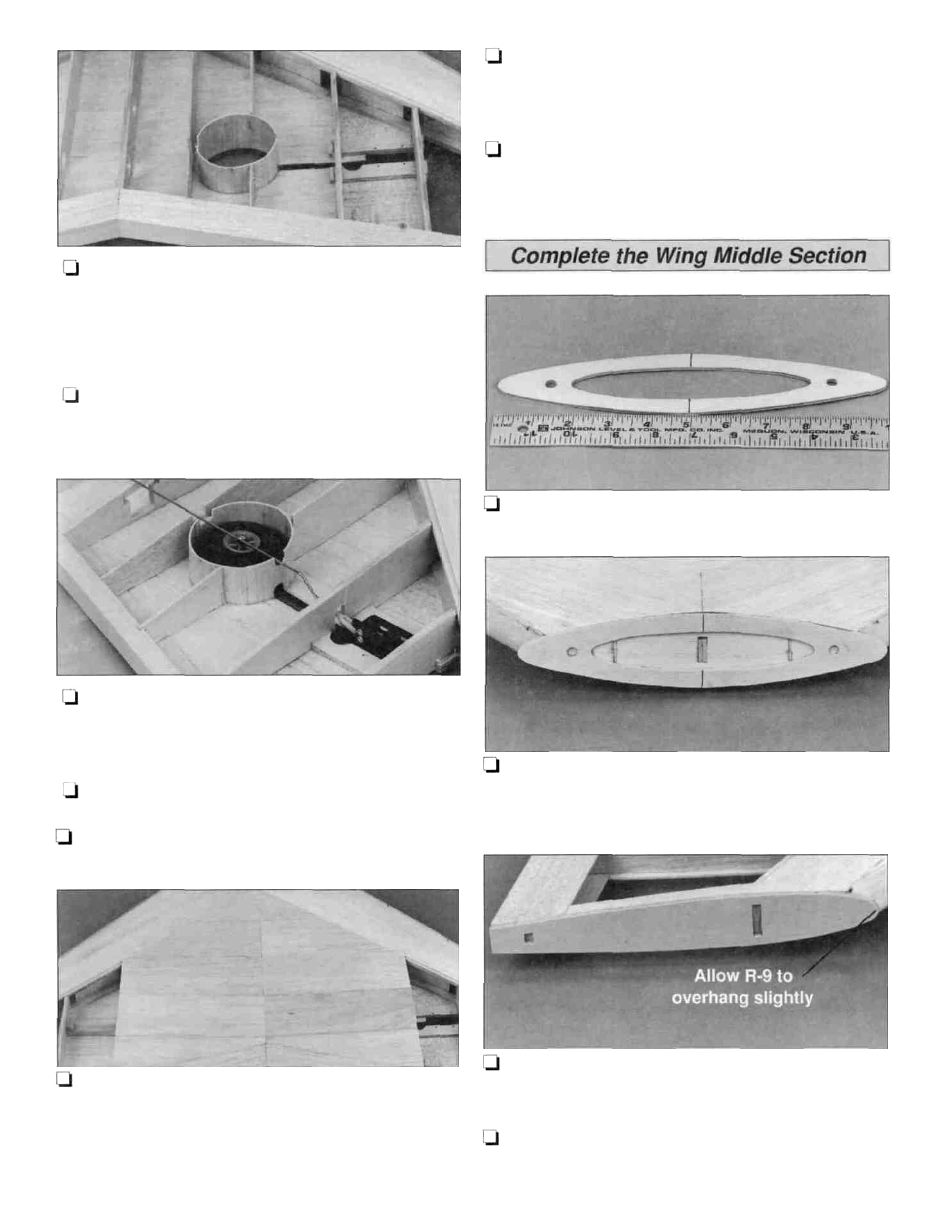
11. The wheel well liners can be made from foam or
17. From the 1/16" x 3/8" x 30" balsa stick, cut and glue
cap strips to the top of ribs R-5, R-6, R-7 and R-8. The
edge of the cap strip on R-8 should be flush with the side of
the rib.
18. Trim and sand the LE and TE sheeting flush with the
side of rib R-8.
paper cups of the proper size, or from vertical grain 1/16"
balsa sheeting wrapped around an appropriately sized
glass jar and glued to form a cylinder. Glue the wheel
wells in place and sand the edges flush with the top of
the ribs and the bottom sheeting.
12. Cut a groove in rib R-2 and the wheel well liner for
the retract actuating rod to pass through. Thread a nylon
clevis (not included, GPMQ3800) 13 turns onto the end
of a 2-56 x 12" wire pushrod (not included, GPMQ3750).
13. Connect the clevis to the retract. Bend the retract
pushrod to clear the wheel and be below the top of the
ribs. Avoid making sharp bends. Remember, the pushrod
will need to be installed after the top sheeting is installed.
1. Draw a centerline on the die-cut 1/8" plywood front cap.
2. Use 30-minute epoxy to glue the front cap to the front
sub cap. Use the centerlines on the front cap as guides to
center it on the front sub cap.
14. Remove the retracts from the wing.
15. Fit and glue the 1/16" x 1-1/2" x 24" TE sheet to the
TE, sub TE and the top of the ribs.
16. Sheet the right top center section of the wing from
3. Use 30-minute epoxy to glue the die-cut 1/8" plywood
the center of ribs R-1 to R-4 using 1/16" x 3" x 30" balsa
sheets. Before sheeting the top left center section, mark the
location for the aileron and retract servo trays on the top
right center sheeting.
4. Sand all the edges even on the center TE plate and
the TE of the wing.
18