Great Planes F4 Phantom - GPMA0440 User Manual
Page 30
triangle sticks only. Sand the sheeting flush with the front of
former F-6 and the back of F-8.
12. Disconnect and remove the steering and retract
inner pushrod.
6. Remove the engine from the engine mount. Drill a
hole at each mark with a 7/64" drill bit. If you have access
to a drill press, it is the best tool for the job. However, if you
are using a hand held electric drill, try to keep the bit
perpendicular to the rails.
7. Install the engine on the engine mount with four
#6 x 3/4" sheet metal screws.
1. Place your engine on the engine mount, adjusting the
mount to tit the engine. When the engine mount is adjusted,
tighten the mounting screws.
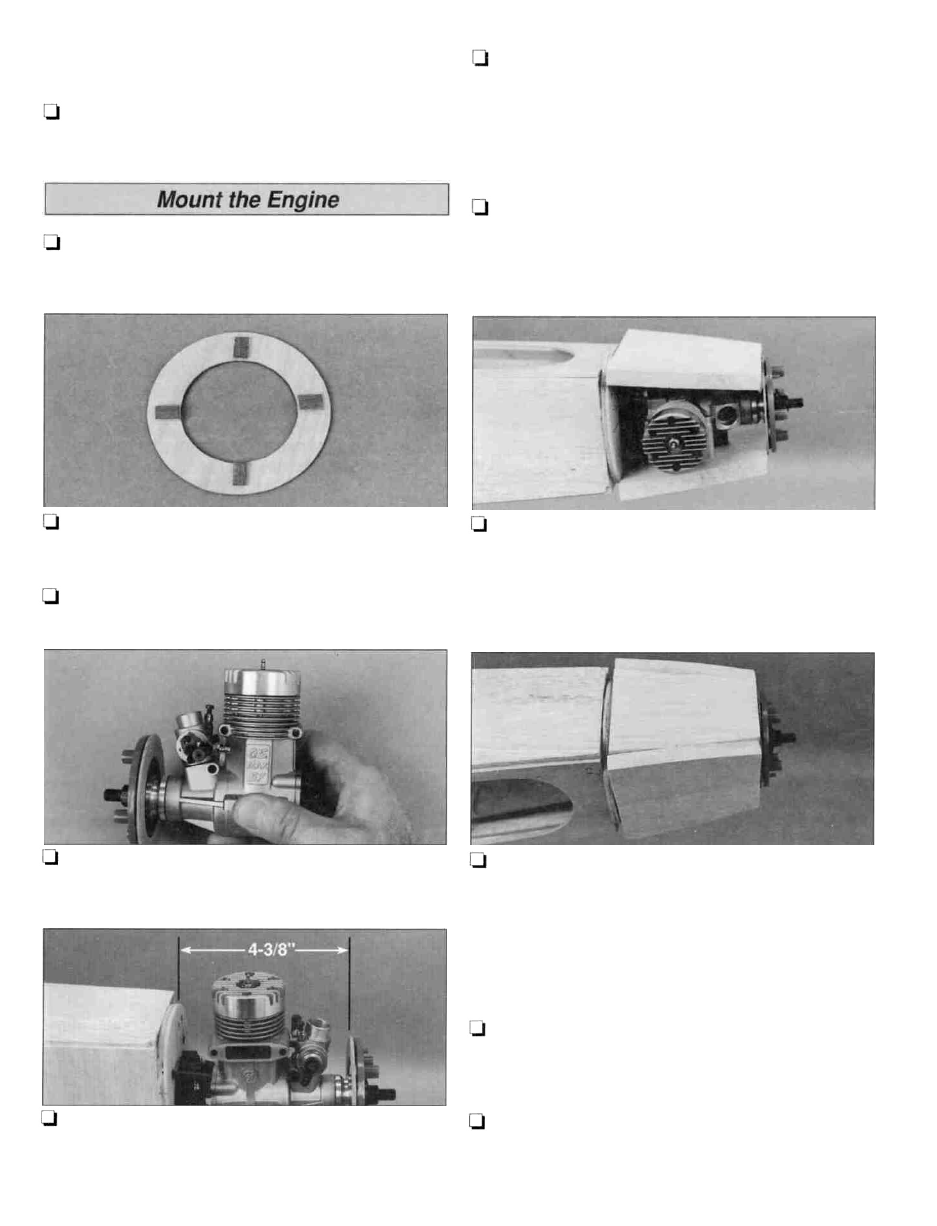
2. From a leftover piece of 1/16" plywood, cut four small
spacers and tack glue them to the die-cut 1/16" plywood
spinner ring.
8. Glue the shaped 1/2" balsa top and bottom nose
blocks to the firewall and the spinner ring. Make sure the
edges of the blocks are aligned with the fuse sides.
3. Center your Great Planes 3" spinner backplate over
the spinner ring and tack glue it to the plywood spacers.
4. Slide the spinner ring/backplate on the engine
9. The shaped 3/8" balsa side nose blocks come as
crankshaft and secure it with a couple of washers and the
prop nut.
two pieces. Glue the pieces together over the fuse plan to
make a left and right side nose block. Glue the left side
nose block to the left side of the top and bottom nose
blocks, firewall and spinner ring.
10. Carefully remove the spinner backplate from the
spinner ring and the engine from the engine mount.
5. Position the engine on the engine mount with the
back of the spinner ring 4-3/8" from the front of the firewall.
Carefully mark the engine mounting holes on the rails.
11. Glue 1/2" balsa triangle sticks in the corners
between the top and bottom nose blocks and the left side
nose block.
30