Install the aileron torque rods – Great Planes F-15 Eagle 40 Kit - GPMA0438 User Manual
Page 39
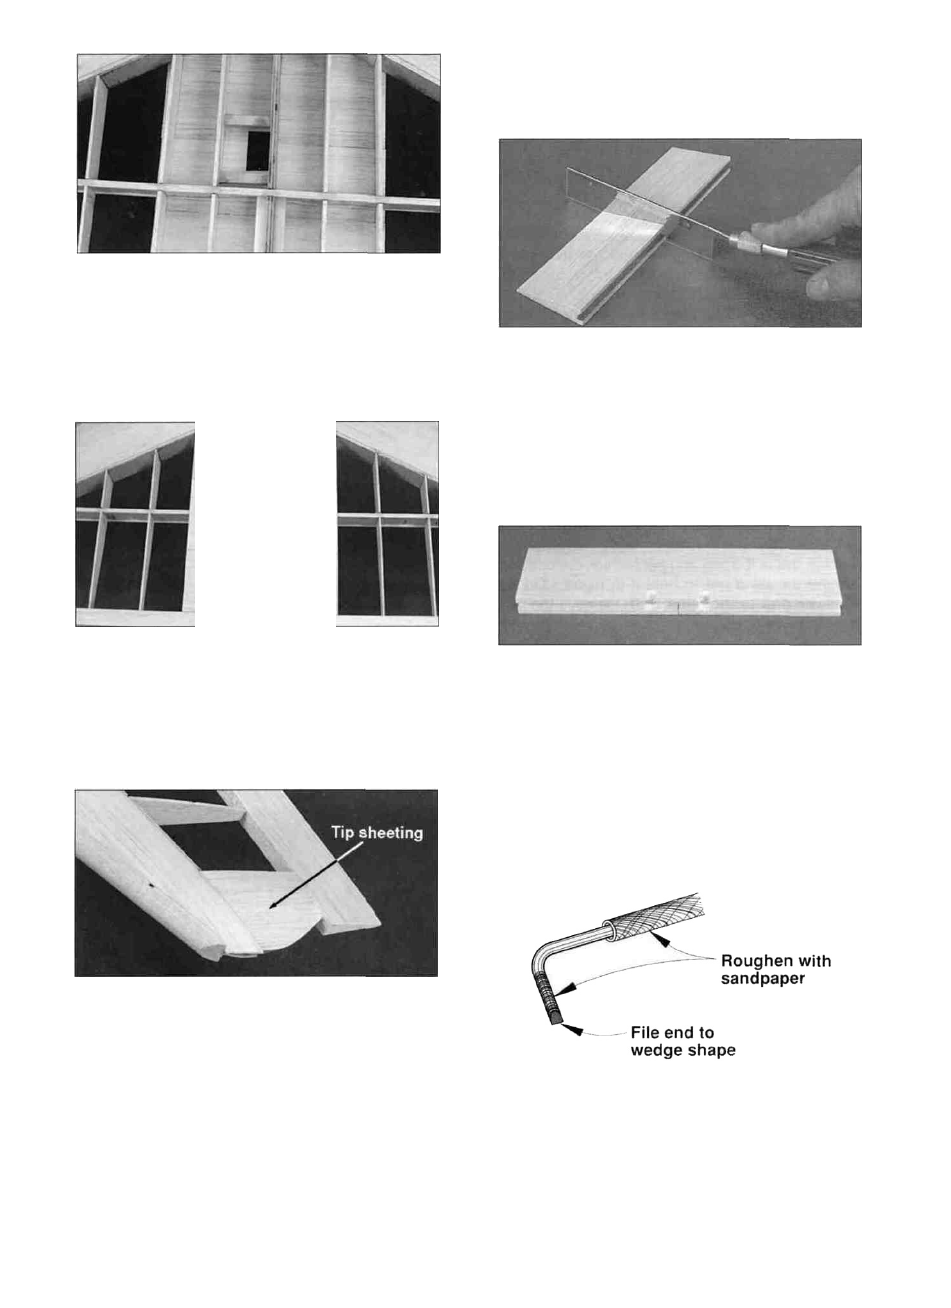
D 17. Using the servo rails as a guide, cut a 1"
wide rectangle in the center sheeting so you will
know where the rails are.
INSTALL THE AILERON
TORQUE RODS
D 18. Trim the jig-tabs off of the wing top surface
and use a sanding block to smooth out the ribs.
Install the 1/16" balsa wing center sheeting just
as you did on the bottom of the wing.
D 19. Cut four pieces of wing tip sheeting from
the remaining 1/16" wing sheeting using the
pattern on the wing plan as a template. Test fit the
pieces in place and trim them if needed to achieve
a good fit between the LE sheeting and the TE.
Glue the pieces to the LE sheeting first so they
overlap rib 10 about 3/16". Then glue the pieces to
rib 10, the TE, and the wing tip. Do not worry
about shaping the wing tip yet.
D 1. Measure to locate the middle of the
grooved balsa center TE (F154W17) and make a
perpendicular relief cut almost all the way through
(within 1/16") with a razor saw. Do not cut all the
way through! This cut is needed to allow the
center TE to conform to the dihedral angle of the
wing as shown in step 7 on the next page.
D 2. Place the center TE over the wing plan and
mark where to notch it for the torque rods. Notice
that the notches are on the opposite side of the
cut you just made. Cut a notch for each torque rod
as shown in the photo. Now hold the center TE in
place against the wing and mark where to cut
notches in the bottom of the wing TE. Cut similar
notches in the bottom of the wing TE.
D 3. Roughen the unthreaded end of the
aileron torque rods (WBNT188) with 100-grit
sandpaper, and file the same end to a wedge
shape. Roughen the surface of the plastic bearing
tubes with 100-grit sandpaper.
38