Finish up the fuselage – Great Planes F-15 Eagle 40 Kit - GPMA0438 User Manual
Page 27
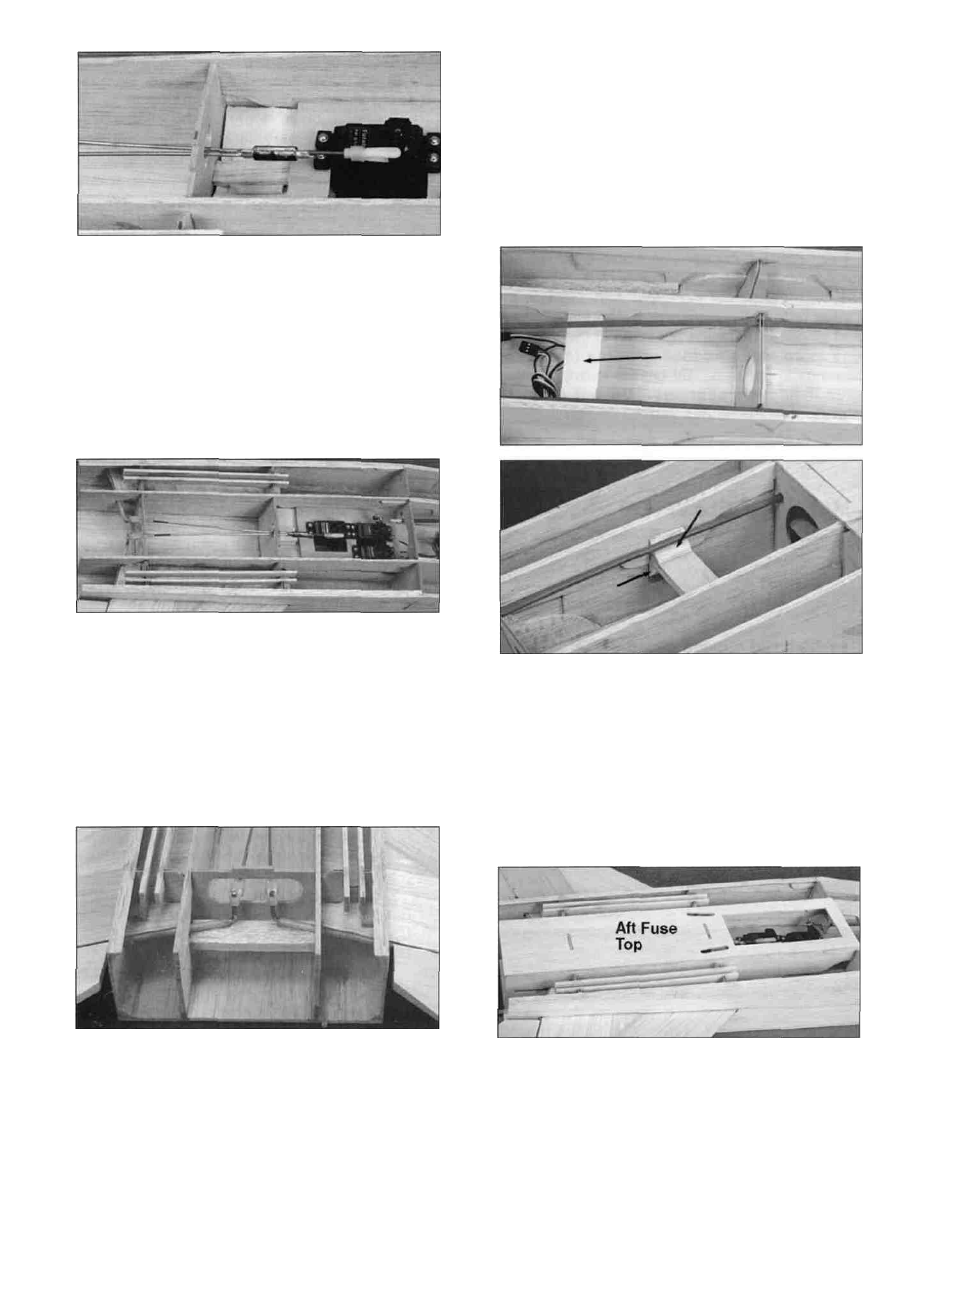
FINISH UP THE FUSELAGE
D 1. If you are going to install a receiver
antenna tube, now is a good time to do it. We
used an extra inner pushrod tube and routed it
along the inside of the left turbine and out the back
of the fuselage.
D 4. Remove the front clevis and clevis retainer
and completely solder the split coupler to the
wires. A piece of aluminum foil underneath the
coupler will keep the excess solder from burning
anything. Be careful not to move the wires while
soldering the coupler.
D 5. Allow the wires to cool and then replace
the clevis retainer and the nylon clevis. Attach the
clevis to the servo horn and check to make sure
the wires have not moved. Slide the clevis
retainers over the torque rod clevises. Make sure
the retainers do not hit former F7.
D 2. Securely glue the 1/4" x 1" x 3-1/8" ply
wing bolt block (F154F20) in place. Soak the
area around the block with thin CA to help harden
the wood there. Glue 1/2" triangle stock above
and below both ends of the bolt block.
D 6. Sand the 1/4" x 7/8" x 3-1/16" balsa torque
rod brace (F154F31)to fit between the fuse sides
just beneath the torque rods. Glue it in place
against the torque rods and securely glue the
nylon bearings to the torque rod brace. Be very
careful not to get glue inside the bearing tubes.
D 3. Sand the aft top edges of the fuselage with
a sanding block to remove any high spots. Glue
the die-cut 1/8" balsa aft fuse top (F154F09) in
place with the word "BOTTOM" down. NOTE: Do
not lose the hatch which is die-cut from the
fuse top.
26