Great Planes F-15 Eagle 40 Kit - GPMA0438 User Manual
Page 13
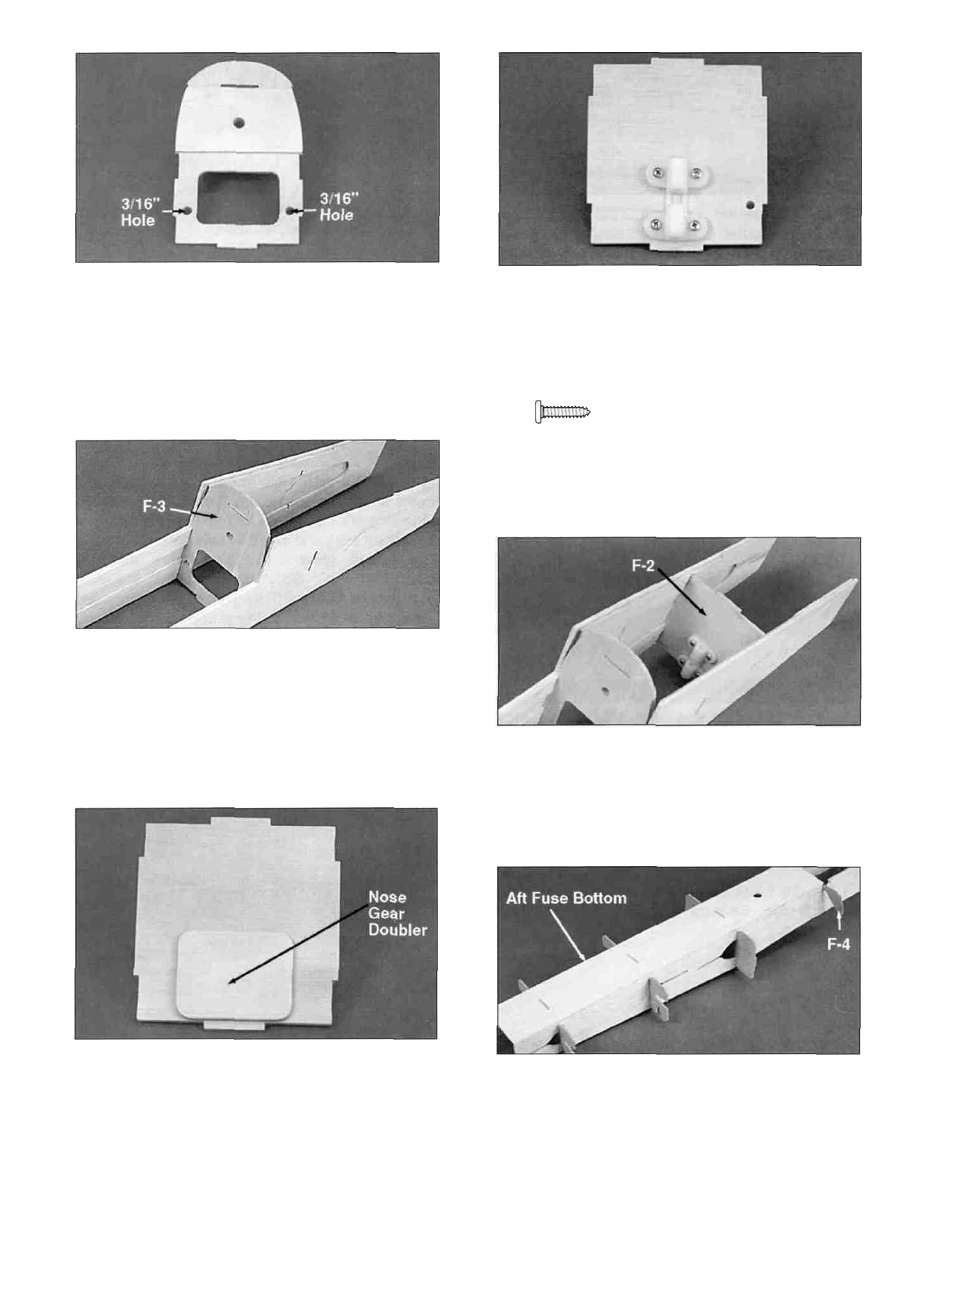
D 8. Securely glue die-cut 1/8" ply former F3B
to former F3A (F154F15). Align it with the hole
and the tabs in F3A as shown in the photo. Notice
that the nose gear doubler is the lightening
hole from F3. Save this piece. Drill 3/16" holes
at the two punch marks on F3A.
D 11. Flip former F2 over and drill a 5/64" hole at
each of the four nose gear bearing punch marks.
Also drill a 3/16" hole at the remaining punch mark
for the throttle pushrod. Attach the nylon nose
gear bearing (NYLON33) using four
#4 x 1/2" screws fSCRW004^.
D 9. Tack glue F3 in place in the fuselage with
F3B towards the nose of the plane. Only apply a
couple drops of thin CA on the bottom half of F3.
You will glue the top portion of the former later.
Apply a drop of thin CA to the
back side of each #4 screw to
keep them from vibrating loose.
D 12. Tack glue F2 into the fuse with a few drops
of thin CA. The nose gear bearing should be
towards the rear of the fuselage.
D 10. Glue the die-cut 1/8" ply nose gear
doubler (from f o r m e r F3A) to f o r m e r F2
(F154F16). Locate it on the side opposite the
nose gear bearing punch marks and just above the
bottom of the former (not the tab) as shown.
D 13. Lay the die-cut 1/8" balsa aft fuse bottom
(F154F05) in place and allow the formers to key
into the notches in the bottom. Center the aft fuse
bottom on former F4 and tack glue it in place with
thin CA.
12