Great Planes F-15 Eagle 40 Kit - GPMA0438 User Manual
Page 38
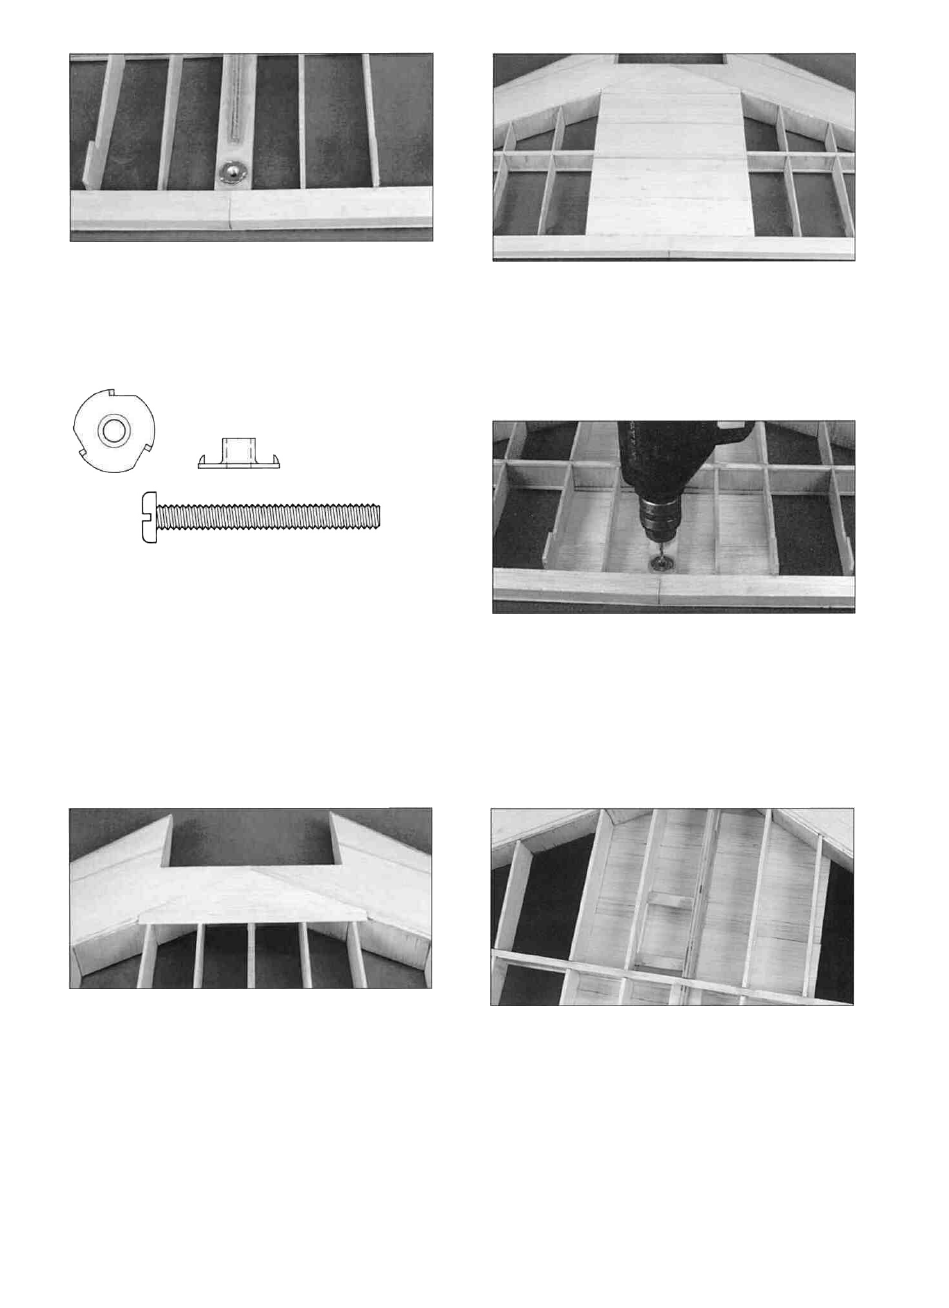
D 12. Remove the wing and enlarge the hole in
the wing only to 5/16". Flatten out or cut off the
three "teeth" on the 1/4" blind nut (NUTS020). If
you have a 1/4-20 tap, run it through the blind nut
a couple of times from the unflanged end to
clean up the threads. Firmly press the blind nut
into the wing from the top. Install the wing on the
fuselage using the
1/4-20 nylon bolt
inserted through the
die-cut hole in the
bottom of the fuse.
Tighten the bolt down and apply thick CA or epoxy
around the blind nut to hold it in place. Do not
glue the bolt to the blind nut! Remove the wing
from the fuselage.
D 14. Glue four more 1/16" balsa wing center
sheets in place behind the first one. The last one
will have to be cut to fit.
D 15. Flip the wing over (wing right-side-up) and,
using the blind nut as a guide, drill a 1/8" hole in
the center sheeting to mark where the bolt should
go.
D 13. Place the wing back on the work surface
with the jig-tabs down (wing upside-down). Cut
one piece of 1/16" x 2-5/8" x 8" balsa wing center
sheeting (F154W16) to fit up against the leading
edge sheeting. Glue it in place as shown in the
photo. Do not worry about the slight bumps that
are caused by the 1/32" ply wing spar joiner, the
sheeting will be sanded smooth later.
D 16. Twist the 3/16" x 3/8" x 2" basswood
aileron servo rails (F154W10) into place on either
side of the #1 ribs. Position the aft rail at the back
of the slot and use your aileron servo to determine
where the forward rail should go. Allow enough
room between the rails to get the servo in and out,
then securely glue the rails in place.
37