Make the elevator pushrod – Great Planes F-15 Eagle 40 Kit - GPMA0438 User Manual
Page 26
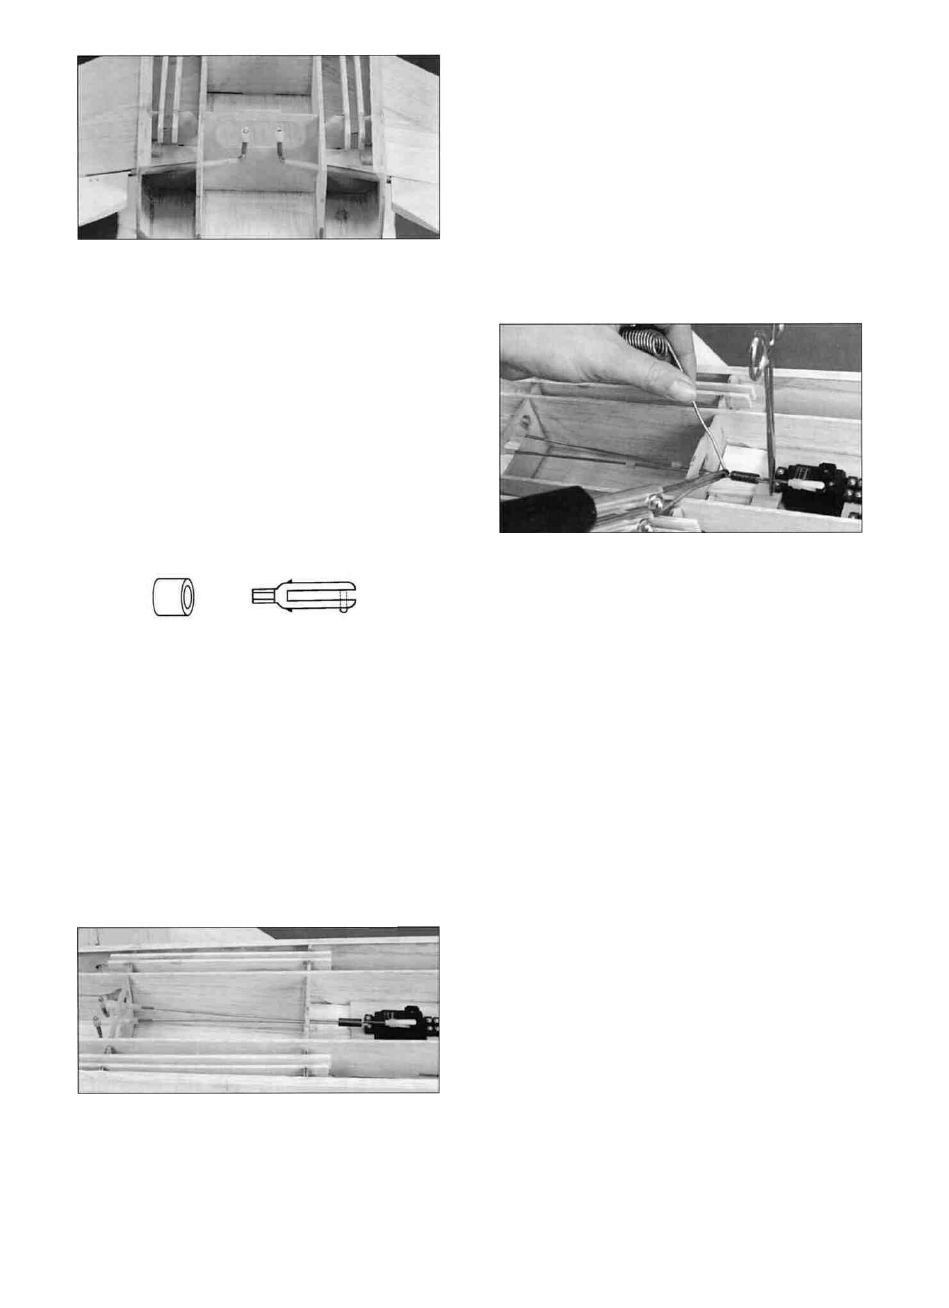
(METAL057) over the two wires. Slide the third
wire (2-3/4" long) into the split coupler from the
other direction and then attach the clevis to the
elevator servo horn. Operate the elevators to
make sure the formers do not interfere with the
movement of the rods. If they do, carve away the
former or lower the nylon torque rod horns a twist
or two.
D 6. Screw a threaded horn onto each elevator
torque rod until the hole in the horn is 3/4" above
the horizontal part of the torque rod. Replace the
torque rods in the plane along with the elevators
and hinges. Check the operation of the elevators
one more time and then glue the torque rod
bearings to the stab. Be careful to avoid getting
glue inside the bearings. Do not glue the
elevators or the hinges yet!
MAKE THE ELEVATOR PUSHROD
D 1. Thread a nylon clevis (NYLON17) onto
two 12" threaded rods (WIRES16) and a 4"
threaded rod (WIRES72) until the threads are
exposed inside the clevis. Slip a clevis retainer
(PLTB021) onto each clevis. Cut the two 12" rods
so they are 8-1/2" long from the clevis pin to the
end of the wire. Cut the 4" wire to 2-3/4" long from
the clevis pin to the end of the wire. NOTE: If you
positioned your elevator servo other than where
shown on the plan, you may have to alter the
length of these pushrod wires.
D 2. Position the two 8-1/2" rods in the fuselage
as shown above and snap the clevises onto the
torque rods. Slide the 1/4" split wire coupler
D 3. Adjust the elevator servo horn and both
elevators so they are in their neutral position and
the split coupler is centered on the overlapping
wires. Tape the elevators in position. Tack solder
the three wires together being careful not to melt
the clevis. Hint: A pair of hemostats or a small
pair of vise-grips clamped on the wire between the
coupler and the clevis will act as a heatsink to help
prevent the clevis from melting.
HINT: The following steps will help you
achieve a good solder joint.
A. Roughen the area to be soldered with fine
sandpaper, then thoroughly clean the
items to be soldered with alcohol or
degreasing solvent.
B. Assemble the items to be soldered.
C. Apply a small dab of soldering flux.
D. Heat the metal with a soldering gun or
iron, and apply solder to the metal. The
metal must get hot enough to melt the
solder, and the solder must freely flow into
the joint.
E. Do not move the parts until the solder has
cooled.
F. Clean off the excess flux with alcohol or
solvent.
G. Test the joint by pulling hard.
25