Great Planes F-15 Eagle 40 Kit - GPMA0438 User Manual
Page 14
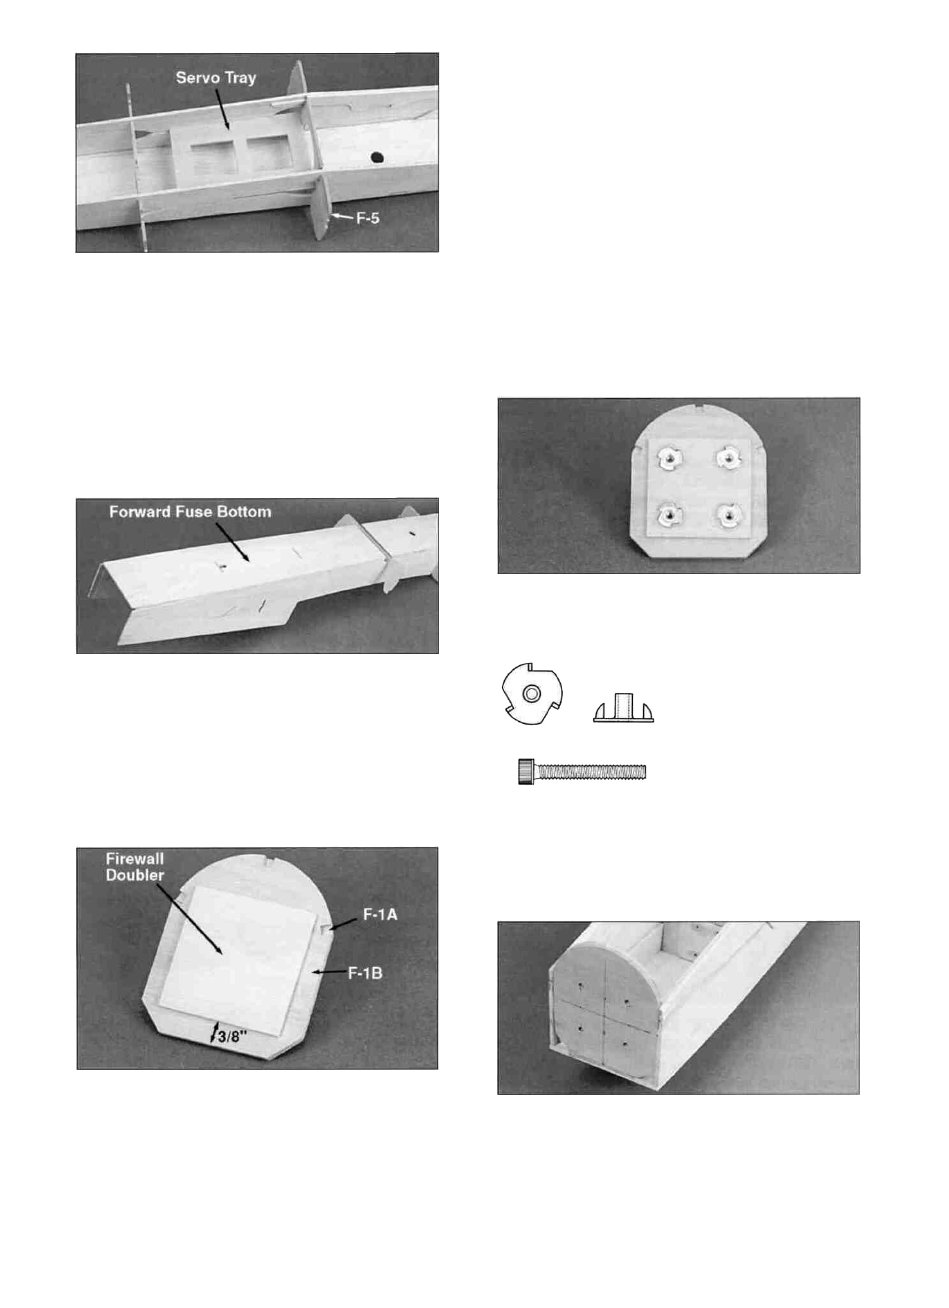
D 14. Slide the die-cut 1/8" ply servo tray
(F154F15) down into the slot through which F5
was inserted. It is a tight fit, but insert one tab into
the slot and then twist the other tab into place.
Slide the tray up against F-5 and glue it in place.
Now that the aft half of the fuselage is held
straight, add glue to F4, F5, F6, F7 and the aft fuse
bottom to securely hold everything together. We
recommend applying thin CA to all joints, followed
by medium CA.
D 15. Lay the die-cut 1/8" balsa forward fuse
bottom (F154F04) in place and allow formers F2
and F3 to key into it. Center the forward fuse
bottom at the LG block and tack glue the fuse
bottom to the fuse sides between F-2 and the LG
block. Do not glue forward of F-2 at this time.
D 16. Locate the die-cut 1/8" ply F-1A and F1B
(F154F15) and use a fine sanding block to remove
any fuzzy edges. Use epoxy to glue the two
pieces together making a 1/4" thick firewall. Make
sure they are accurately lined up with one another
and the side of F1A with the punch marks is
showing. Wipe off any excess glue before it
cures. Glue the 1/8" x 2-3/8" x 2-3/8" plywood
firewall doubler (F154F30) to F1B. It should be
positioned approximately 3/8" above the bottom of
the firewall and centered side to side.
D 17. If you are using the supplied Great Planes
Adjustable Engine Mount (EM4070), drill a 5/32"
hole at each of the four punch marks on the face of
the firewall. If you are using another mount, center
it on the embossed center lines to determine
where to drill the holes.
D 18. Lay the firewall down with F1A against the
work surface. Use a hammer to gently tap a 6-32
blind nut (NUTS003)mto each 5/32" hole.
Temporarily attach the
engine mount to the
firewall with the 6-32 x 1"
socket head bolts
(SCRW078) to make sure
the holes are in the
correct position. Adjust
the holes if necessary
and then add a bead of thick CA or epoxy around
each blind nut to hold them in place. Do not allow
the glue to get on the threads.
D 19. Use epoxy to securely glue the firewall into
place making sure it is centered on the forward
13