GME TX4600 User Manual
Page 18
PAGE 18
INSTRUCTION MANUAL
TX4600
SETTING THE FREQUENCY STEP
The extra frequencies can be programmed in
12.5 kHz or 25 kHz steps. The step rate is preset
and can be toggled as follows.
1. Switch the radio OFF.
2. Hold the key while switching the radio ON.
3. 12.5k or 25.0k will be displayed indicating the
select frequency step is 12.5 kHz or 25.0 kHz.
ACTIVATING LISTENING CHANNELS
By default, the Receive–Only channels are
disabled and only the standard 80 UHF CB
channels can be accessed. To make use of
the extra channels you must activate the
programming mode and program frequencies
into the channels you wish to use. Those channels
will then become available.
To activate the programming mode
1. Switch the radio off.
2. Hold the MENU key while switching the radio
ON again.
Using the or keys you will now be able to
select additional channels between 81 and 99.
Once you have enabled and programmed your
additional Listening channels, switch the radio off
to end the programming mode. When you switch
it on again, normal operation will be restored
and any Listening channels you have enabled will
now be available above channel 80.
PROGRAMMING THE FREQUENCIES
Before programming channel frequencies, make
sure the radio is in the NUMERIC mode. If it is in
the ALPHA mode press F (Function) followed by
ALPHA . ‘NUMER’ will be displayed.
To program a frequency into a channel
1. Activate the Programming mode (hold MENU
then switch ON).
2. Press the or keys to select the required
channel number (81 – 99).
3. Press and hold the MENU key until the
radio beeps. If the channel has never been
activated, ‘OFF’ will be displayed, otherwise a
frequency will be displayed.
4. Press the or keys to adjust the flashing
digit value.
5. Press the CALL button to advance to the
next digit.
• Advancing above 9 or below 0 causes the
adjacent digit to change accordingly.
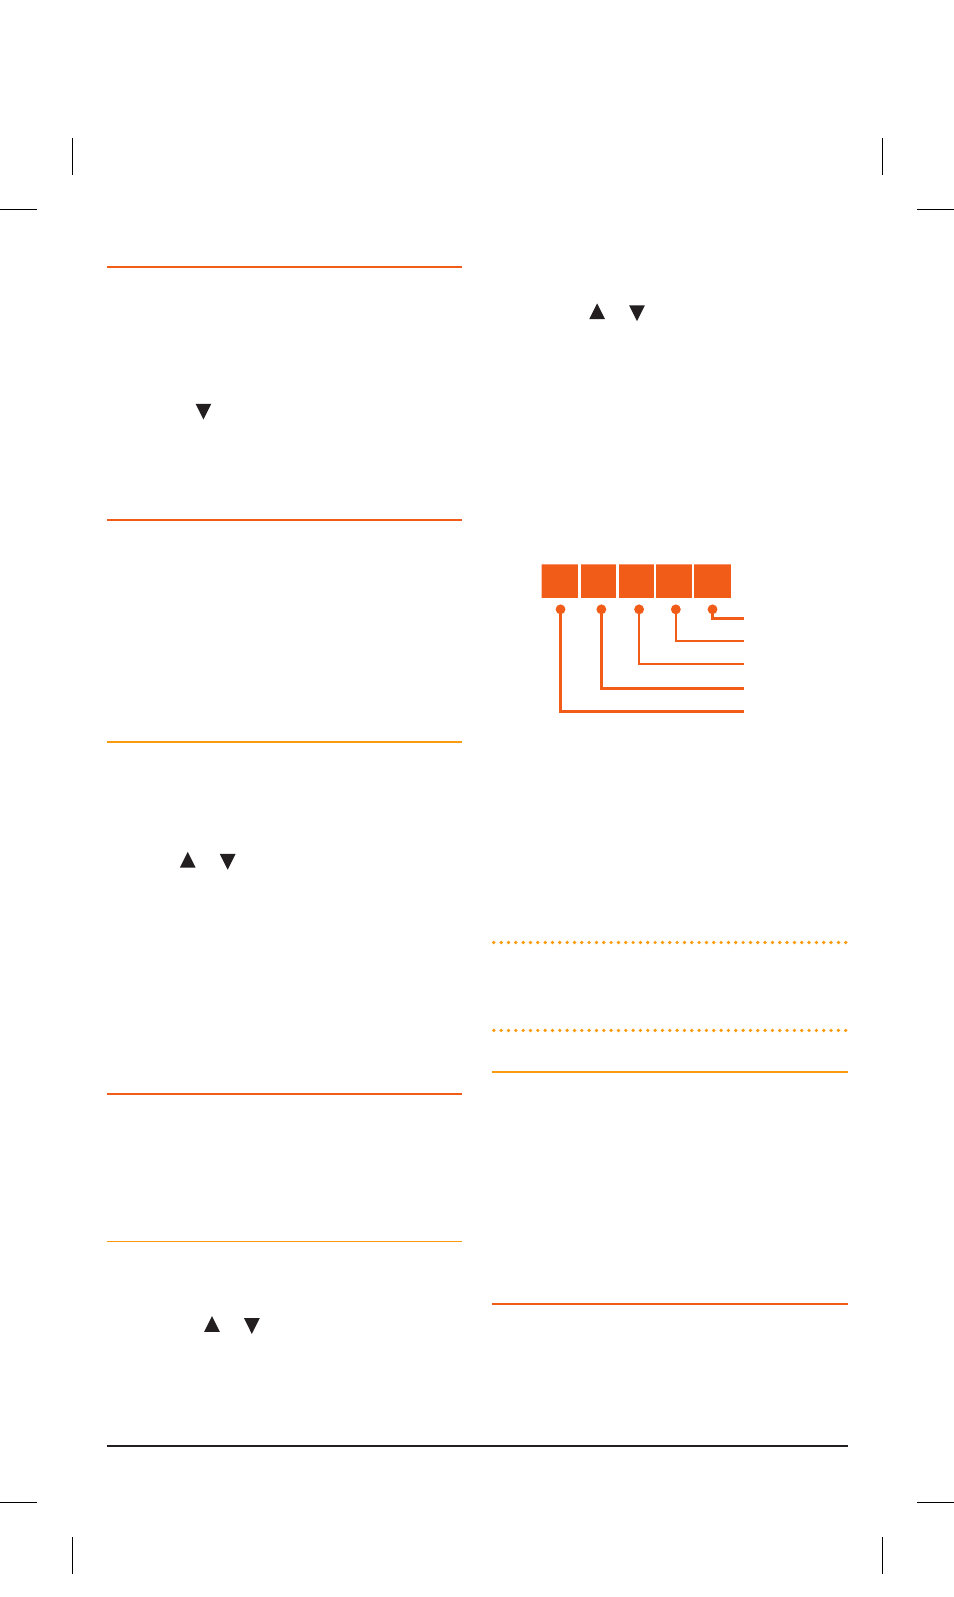
• The display only indicates to 10 kHz
resolution. The kHz digit is not displayed.
eg. 468.425 MHz will display as:
• While you are selecting the frequency, the
receiver is live and will receive signals on the
frequency being displayed. You can use this
feature to manually identify active frequencies
and store them.
6. Once you have the correct frequency
displayed, press and hold the MENU key to
store it.
TIP:
To remove a listening frequency from a
channel, rotate the channel selector until the
display reads ‘–off–’.
To program additional frequencies
Repeat steps 2 – 6 above.
When you have finished programming your
channels, switch the radio off. When you switch it
on again, normal operation will be restored and
the Listening channels you programmed will now
be available above channel 80.
SETTING ALPHA LABELS FOR YOUR
LISTENING CHANNELS.
Your extra listening channels can be set to
display either the channel Frequency or a
meaningful label that you choose. Please refer to
the Frequency/ALPHA Adjustment function in the
MENU settings on page 21.
4
6
8
4
2
12.5 / 25 kHz
100 kHz
1 MHz
10 MHz
100 MHz
42333-8_TX4600 IM.indd 18
28/08/13 11:21 AM