3 node ids and multi-node panels, 6 kickstart modules – ebm-papst Kickstart User Manual
Page 30
30
6 Kickstart Modules
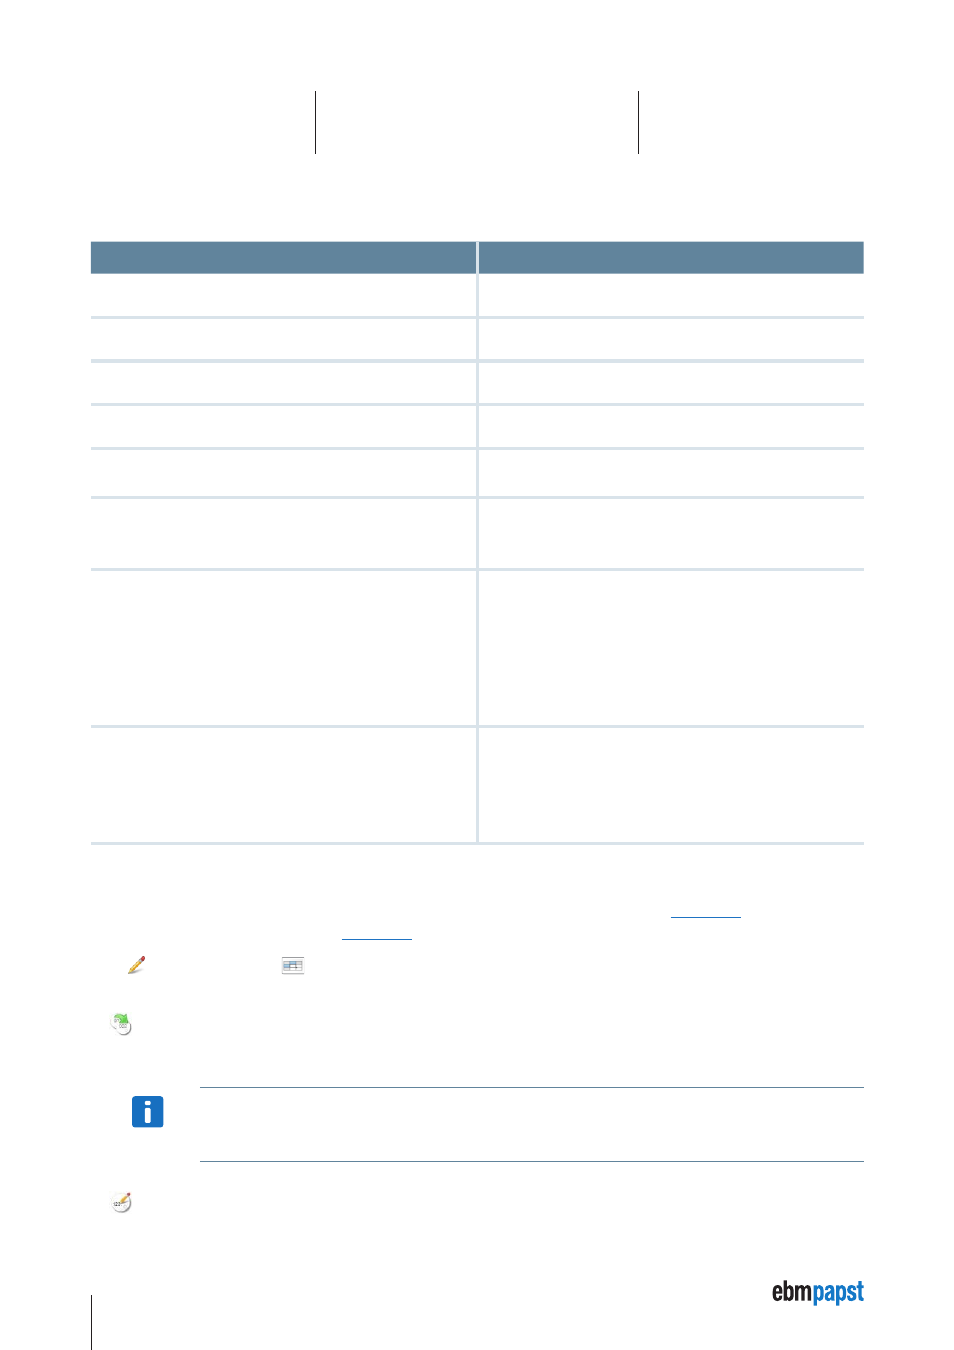
example UI Format Definitions
UI Format
Description
shape:label; updates:r
A read-only label. The control’s value will be read from the device only upon
initialization.
shape:label; updates:r200
A read-only label. The control’s value will be read from the device upon
initialization and then periodically, every 200 milliseconds.
shape:text; updates:r,w
A user-modifiable textbox, value is read from the device upon initialization.
Once the user edits the value, it will be written to the device.
shape:slider; range:0,100; updates:r,w
A user-modifiable slider, with the range between 0 and 100 and the step
size 1.
shape:dial; range:-200,200; step:10;
updates:r,w
A user-modifiable dial, with the range between -200 and 200, all selectable
values being multiples of 10.
shape:radio;
options:0,Off|1,On;
updates:r,w
Two user-selectable radio buttons: Off and On, corresponding to the values
0 and 1.
shape:bitfield; fieldsize:8; updates:rw
A list of 8 digital output bits that can be toggled by clicking on them. For a
data object that has the Name “Digital Output”, the elements would be
labeled
Digital Output 0
Digital Output 1
...
Digital Output 7
shape:bitfield;
options:2,2 - Limit Switch Left|
5,5 - Limit Switch Right|
7,7 - Start;
updates:r1000;
A list of input bits, where only three bit indexes (2, 5 and 7) are
shown / used:
2 – Limit Switch Left
5 – Limit Switch Right
7 – Start
6.6.3 Node IDs and Multi-Node Panels
The basic UI Panel examples provided are set to Node ID = 001. Resp., if you drag
Data Objects from the
previously, they will use the Node ID from the
Using
Design Mode and with
Show Data Objects activated, you can change Node IDs or duplicate a set of UI controls for a
different Node ID or a second CANopen Device. Use the following functions, available from the toolbar:
Clone
After selecting one or several rows of the
Data Objects table, use Clone to duplicate these elements and paste them into the UI Panel
canvas using a different
Node ID.
NOTICe
The cloned elements will receive the same
Name text as the original elements. You can edit the text of the Name column
in the
Data Objects table so your UI elements show to which Node ID they belong. You can also use an application
specific name, e.g. “print format adjustment 1”.
Change ID
Select one or several rows in the
Data Objects table, then use Change ID to change the Node ID to a different value.