Button sewing – Kenmore 17922 User Manual
Page 36
Attention! The text in this document has been recognized automatically. To view the original document, you can use the "Original mode".
LEFT HOLE
OF
BUTTON
= +î
PRESSER
FOOT
STRAIGHT
SEAMLINE
I
BUTTON
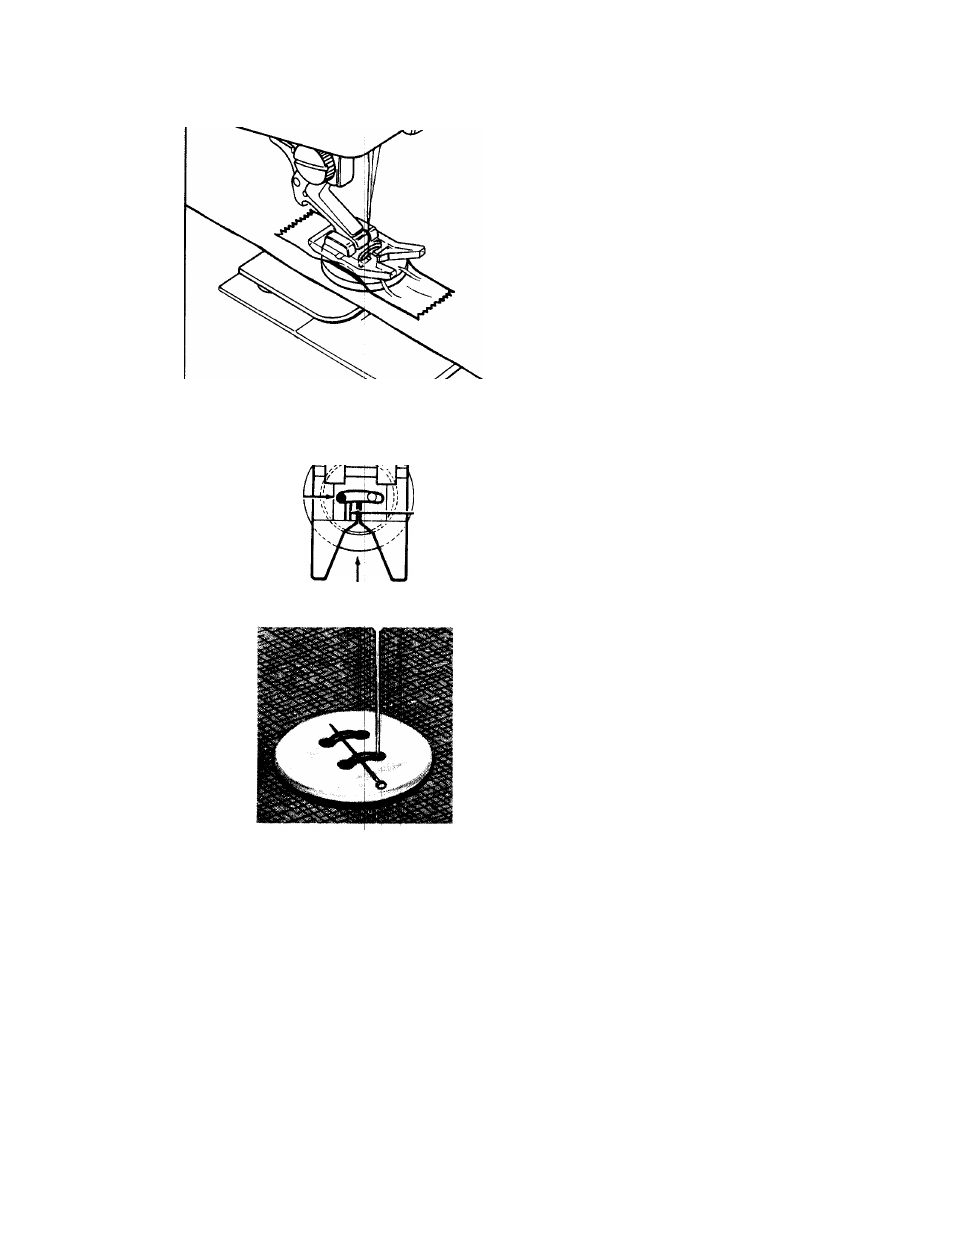
BUTTON SEWING
3iitch Selector -
AAAAA
flitch Width - Adjust to Button Size
Use Feed Cover Plate and Clear Plastic
Satin Stitch Foot.
1i Position the button on fabric with clear
tape.
2 , Center the left hole of button between
straight seamline and the left edge of
needle slot of foot and lower foot to hold
the button securely.
3| Turn hand wheel manually until needle
point is just above button.
4j Adjust stitch width control so needle will
enter right hole of the button.
5. Turn hand wheel again by hand so needle
enters second hole. Readjust stitch width
if necessary. Stitch a number of times.
6^ Finish sewing with an extra two inches of
thread remaining. Draw these threads to
reverse side of garment and tie.
When sewing a flat button, place needle or
pin
between
holes
of
button
as
shown
to
Orovide flexibility for buttoning.
35