S installing the anti-tip device, When all hookups are completed, Installation instructions – GE JGBP27DEMWW User Manual
Page 46: Awarning anti-tip device, Warning
Attention! The text in this document has been recognized automatically. To view the original document, you can use the "Original mode".
Installation Instructions
E
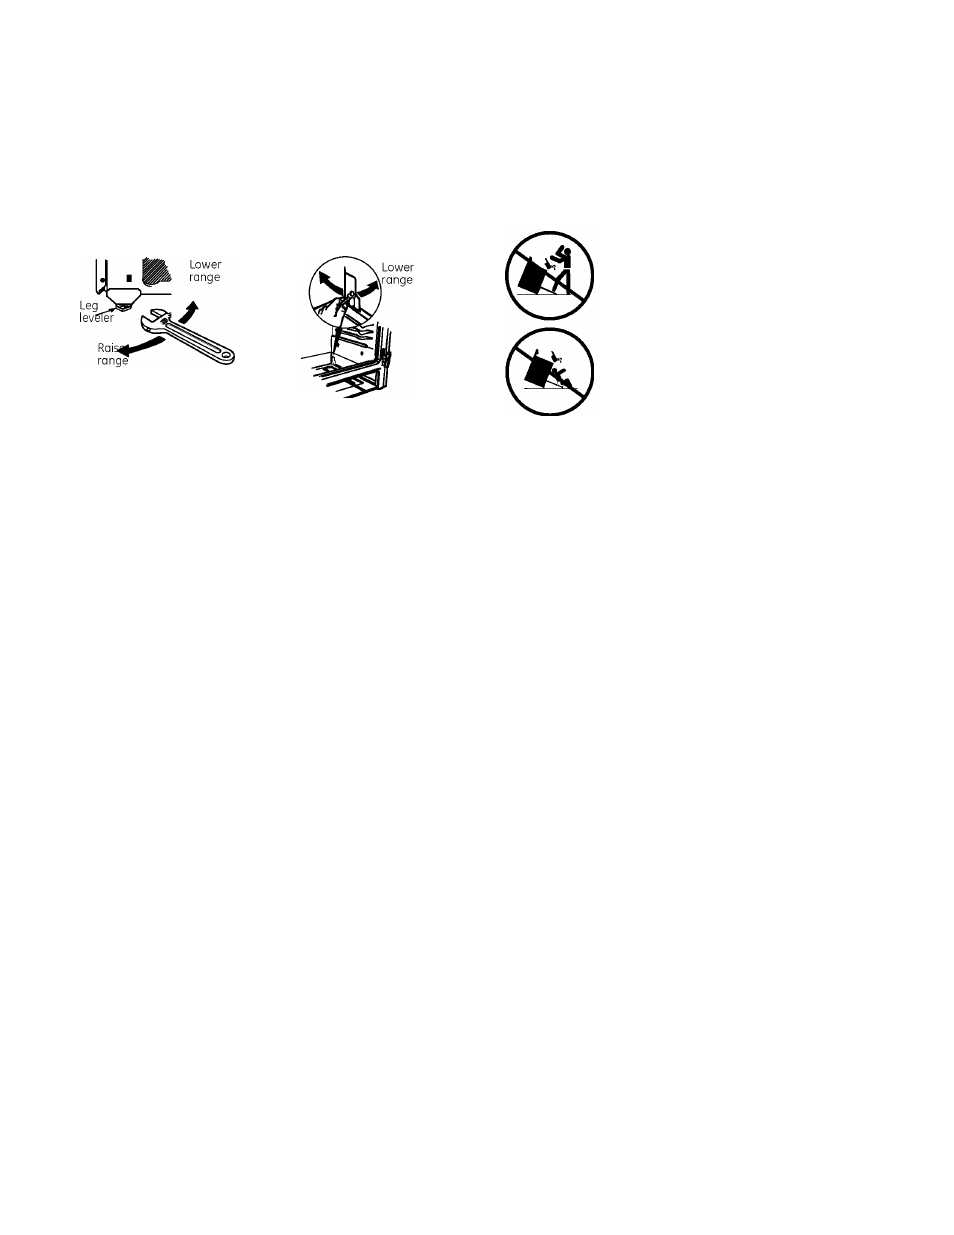
levelingthe
range
A.
Install the oven shelves in the oven and position the
range where it will be installed with front access to
front leveling legs and rear access to rear leveling
legs. All legs must be leveled BEFORE the product is
installed.
Raise
range
(on some models)
(on some models)
B.
Check for levelness by placing a spirit level or a cup,
partially filled with water, on one of the oven shelves.
If using a spirit level, take two readings—with the level
placed diagonally first in one direction and then the other.
C.
Remove the drawer (on some models). See the
Care and
cleaning of the range
section. The front leveling legs can
be adjusted from the bottom and the rear legs can be
adjusted from the top (on some models) or the bottom.
D.
Use an open-end or adjustable wrench to adjust the
leveling legs until the range is level.
A
warning
Never completely remove
;he leveling leg as the rangé will not be secured to the
anti-tip device properly.
E.
After leveling the unit, slide it into final position and
verify levelness.
F.
After the range is level, slide the range away from the
wall so that the Anti-Tip device can be installed.
S INSTALLING THE ANTI-TIP DEVICE
AWARNING
ANTI-TIP DEVICE
• All ranges can tip.
• BURNS or other SERIOUS INJURIES can
result.
INSTALL and CHECK the anti-tip bracket
following the instructions supplied with
the bracket.
To reduce the risk of tipping the range, the range must be
secured by a properly installed anti-tip bracket. Follow the
instructions packaged with the bracket.
To check if the bracket is installed and engaged
properly, look underneath the range to see that the
rear leveling leg is engaged in the bracket. On some
models, the storage drawer or kick panel can be
removed for easy inspection. If visual inspection is not
possible, slide the range forward, confirm the anti-tip
bracket is securely attached to the floor or wall, and
slide the range back so the rear leveling leg is under the
anti-tip bracket.
If the range is pulled from the wall for any reason, always
repeat this procedure to verify the range is properly
secured by the anti-tip bracket.
If your range has no anti-tip bracket, call 1.800.626.8774 to
receive one at no cost.
WHEN ALL HOOKUPS ARE COMPLETED
Make sure all controls are left in the off position. Make
sure the flow of combustion and ventilation air to the
range is unobstructed.
46