Carl Goldberg GBGA1092 User Manual
Page 14
14
6.
Attach the two pieces of 5mm tubing to
the two tank outlets. Use different colors
so you can tell which is the vent and
which is the fuel pickup after the tank is
installed. Make a note of which color you
attach to which tube. The short brass
with the clunk is the fuel pickup and must
go to the carburetor. The long brass tube
is the vent and should go to the pressure
outlet on the muffler.
Set tank aside till ready to install.
5.
Install the assembly into the tank so the
vent tube is turned up to the top of the
tank and is positioned on the right side of
the tank. Tighten the screw to expand
the rubber cap. Don’t over tighten or you
could split the tank.
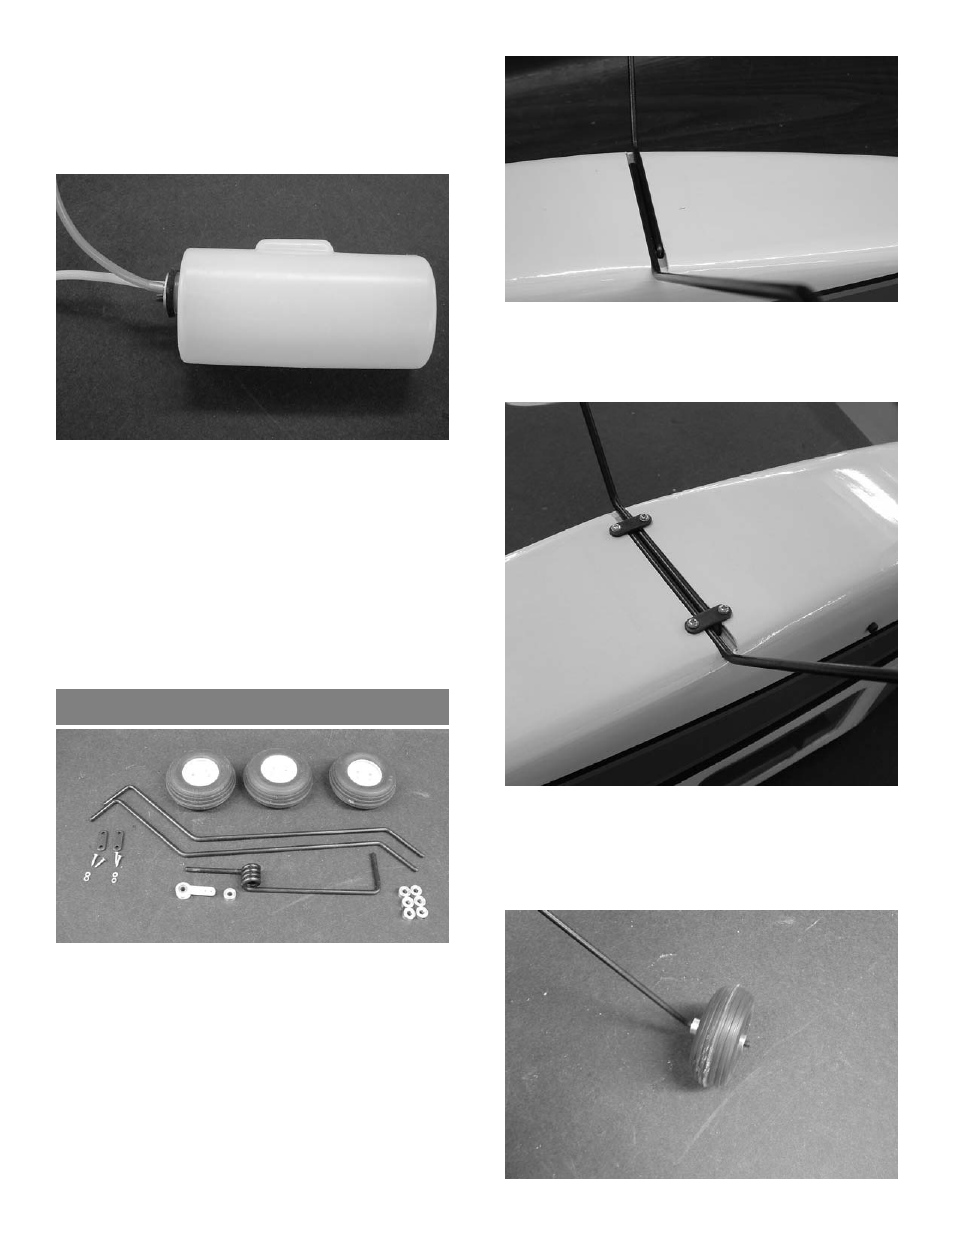
3.
Position the two metal straps over the gear
legs where they turn up into the fuselage on
both sides.
Drill a 1/16” hole through each gear strap
and install the 2mm screw and flat washer.
1.
Gather the following items:
(4) 2mm x 12mm screws
(4) 2mm washer
(2) Metal gear straps
(2) Main gear wire
(1) Nose Gear Wire
(6) 4mm wheel collar
(1) Nylon steering arm
(1) set screw for steering arm
(3) 2-1/2” wheels
LANDING GEAR INSTALLATION
2.
Insert the main gear wires in the pre-cut
holes and slots in the bottom of the fuse-
lage.