5300_4_5.pdf, Programming user settings – Braeburn 5300 3H-2C User Manual User Manual
Page 3
2
PROGRAMMING
USER SETTINGS
cont.
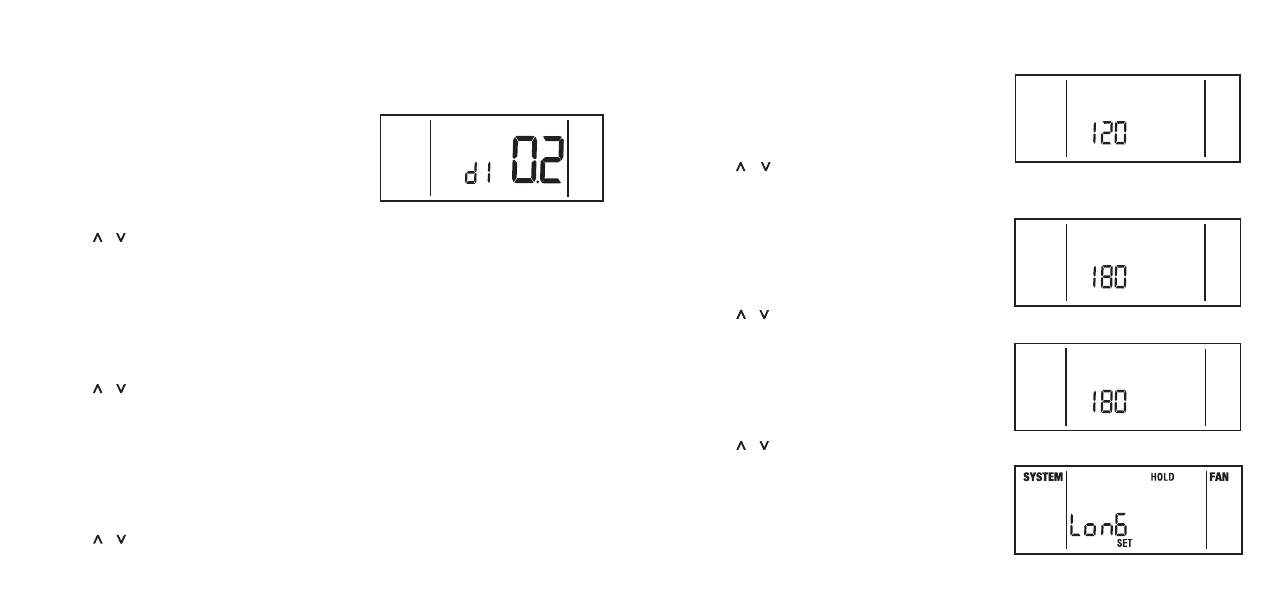
2.4.1
Setting the First, Second and Third Stage Differentials
First Stage Differential
The default setting is 0.2˚ F (0.1˚ C). The room temperature must
change 0.2˚ F (0.1˚ C) from the set point temperature before the
thermostat will initiate the system in heating or cooling.
1. In normal mode, press and hold the RETURN button for four
seconds. The LCD display will show “
d1 SET X” where “X”
equals the ˚F / ˚C differential setting. This is the current
temperature differential setting.
2. Press the or button to set the temperature differential to your
desired setting of 0.2˚, 0.5˚ or 1˚ F(0.1˚, 0.3˚ or 0.5˚ C).
Second Stage Differential – Only Available on 2 or 3 Stage Systems
The default setting is 2˚ F (1.0˚ C). This means that the room temperature must change 2˚ F (1.0˚ C) in addition to
the first stage differential setting before the thermostat will initiate the second stage of the system in heating
or cooling.
3. Press the RETURN button again and the LCD display will show “d2 SET X” where “X” equals the ˚F / ˚C
differential setting. This is the current second stage differential setting.
4. Press the or button to set the second stage differential to your desired setting of 1˚, 2˚, 3˚, 4˚, 5˚, or 6˚ F
(0.5˚, 1.0˚, 1.5˚, 2.0˚, 2.5˚ or 3.0˚ C).
Third Stage Differential – Only Available on 3 Stage Systems
The default setting is 2˚ F (1.0˚ C). This means that the room temperature must change 2˚ F (1.0˚ C) in addition
to the first and second stage differential setting before the thermostat will initiate the third stage of the system
in heating.
5. Press the RETURN button again and the LCD display will show “d3 SET X” where “X” equals the ˚F / ˚C
differential setting. This is the current third stage differential setting.
6. Press the or button to set the third stage differential to your desired setting of 1˚, 2˚, 3˚, 4˚, 5˚, or 6˚ F
(0.5˚, 1.0˚, 1.5˚, 2.0˚, 2.5˚ or 3.0˚ C).
4
2
PROGRAMMING
USER SETTINGS
cont.
5
2.4.2 Setting the Filter Check Monitor (see also section 3.7)
The default setting is 0 days (monitor disabled).
7. Press and hold the RETURN button for four seconds. Press
RETURN repeatedly until “FILTER SET” is displayed where
“
XXX” is the Filter Monitor interval.
8. Press the or button to change the Filter Monitor Interval to
the desired value of 0 (disabled), 30, 60, 90, 120, 180 or
365 days.
2.4.3 Setting the UV Light Monitor (see also section 3.8)
The default setting is 0 days (monitor disabled).
9. Press and hold the RETURN button for four seconds. Press
RETURN button repeatedly until “UV SET” is displayed where
“XXX” is the UV Light Monitor interval.
10. Press the or button to change the UV Light Monitor Interval
to the desired value of 0 (disabled), 180 or 365 days.
2.4.4 Setting the Humidifier Pad Monitor (see also section 3.9)
The default setting is 0 days (monitor disabled).
11. Press and hold the RETURN button for four seconds. Press
RETURN button repeatedly until “SET HUMID PADS” is
displayed where “
XXX” is the Humidifier Pad Monitor interval.
12. Press the or button to change the UV Light Monitor Interval
to the desired value of 0 (disabled), 180 or 365 days.
2.4.5 Setting the Extended Hold (Vacation) Mode (see section 3.6)
The default setting is Long (indefinite) Hold. If the
HOLD feature
is activated, the current set point will be held until
HOLD is released.
SYSTEM
FAN
SET
SYSTEM
FAN
SET
FILTER
SYSTEM
FAN
SET
UV
SYSTEM
FAN
SET HUMID PADS