4 setting the gap width, Ä chapter 6.4 ‘setting the gap width, Using the device – FRITSCH PULVERISETTE 13 premium line User Manual
Page 27
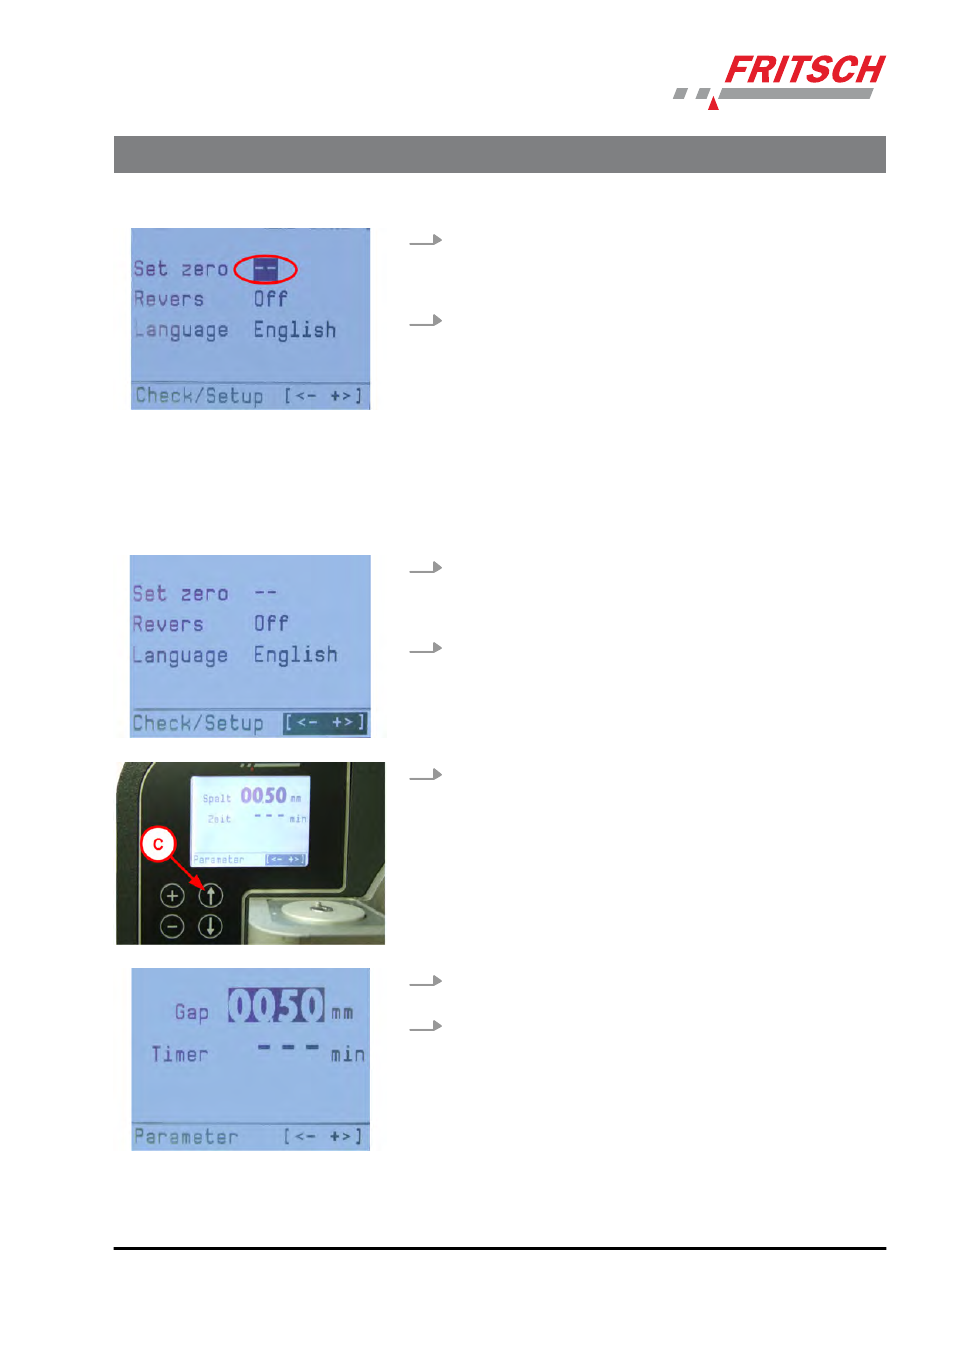
6.
Once the smallest gap width has been set and a minimal friction of
the disks can be felt, this can be defined as the zero point. Only
when the zero point has a black background, can the zero point be
set by pressing the Stop (f) - and + (a) keys simultaneously.
7.
Put the grinding stock container back in.
6.4 Setting the gap width
Setting the gap width is done automatically in the Parameter menu item.
First the zero point needs to be set (see Ä Chapter 6.3 ‘Setting the zero
point’ on page 25) to prevent damage to the grinding disks.
Set the gap width as follows:
1.
To switch from the "Check/Setup" menu to the "Parameter"
menu, press the arrow keys (c,d) until the - and + symbols on the
bottom right of the display have a black background. Switch to the
Parameter menu then by pressing the keys + (a) or - (b).
2.
Close the grinding chamber.
3.
Press the arrow-up key (c) in the Parameter menu until the line for
entering the gap dimension is marked.
4.
Use the +/- keys on the control panel to enlarge (+) the gap dimen-
sion or reduce (-) it.
5.
The gap dimension between the disks sets itself automatically
when:
☞
the menu item is exited or
☞
the grinding process is started by the Start button (e).
Using the device
- 27 -