Removal, inspection and assembly of the end cap – Cub Cadet P Series User Manual
Page 34
29
PC Series
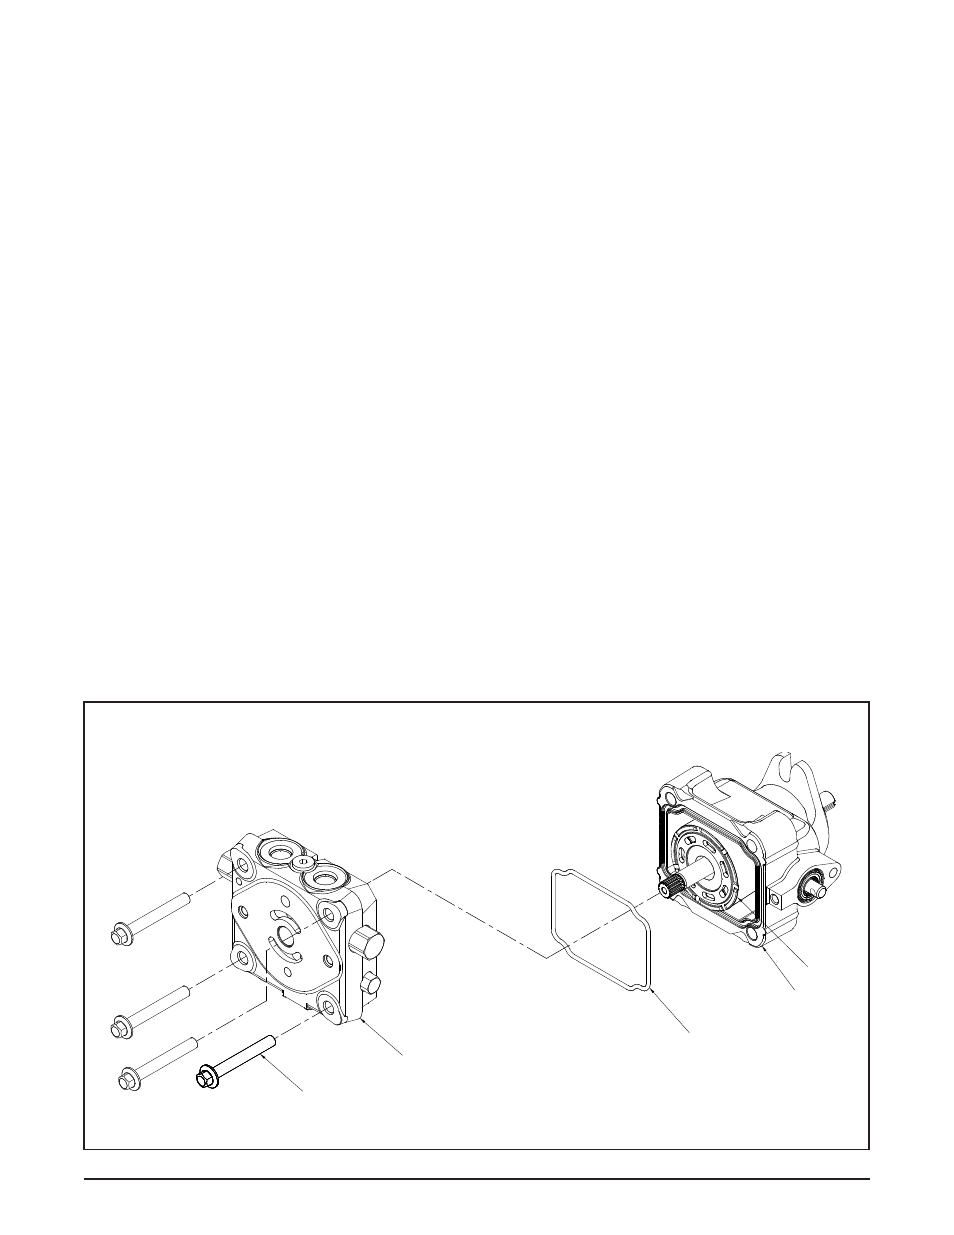
Refer to Figure 10.
Disassembly
1. Remove charge pump. (See page 27).
2. Using a 10 mm wrench, loosen the end cap bolts
(4) evenly.
3. Hold the end cap (2) in place and remove the
four end cap bolts (4).
4. Slowly remove the end cap (2).
5. Remove housing gasket (5).
Inspection
1. Inspect the end cap (2) body for damage, nicks
or unusual wear patterns. Replace if necessary.
2. Inspect the running surface (side that contacts
the cylinder block) (31). The running surface
may show evidence of minor abrasive rings, this
is normal.
Grooving in the plate, or material transfer that is
evident when the surface is checked by dragging
a fingernail across it, would be cause for
replacement of the end cap (2).
3. Replace the housing gasket (5) with a new
gasket before assembly.
Assembly
1. Install housing gasket (5) into housing gasket
seat of housing (1).
2. Lubricate the mating surface of the cylinder
block (31) to end cap (2) with clean oil prior to
installation.
3. Install end cap (2). Before installing the four
end cap bolts (4), push down on end cap (2)
verifying alignment and insuring that the
cylinder block pistons spring back and forth.
Install end cap bolts (4). Tighten to the correct
torque value. See Table 2, page 22 (Torque
Values)
4. Install the charge pump. (See page 27).
REMOVAL, INSPECTION AND
ASSEMBLY OF THE END CAP
Figure 10. PC Pump End Cap
4
2
5
1
31