Cub Cadet P Series User Manual
Page 118
113
PW Series
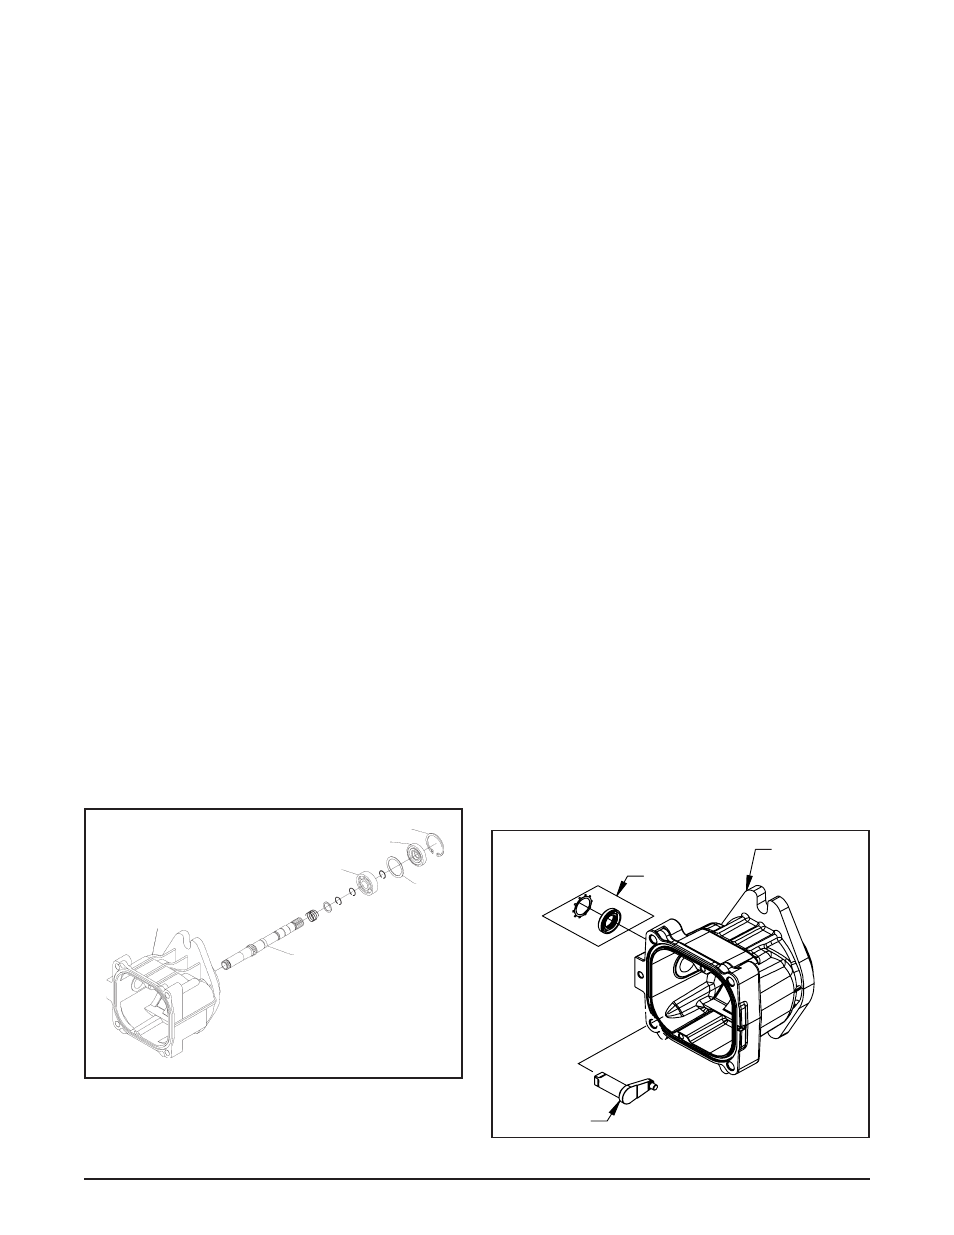
Refer to Figure 4.
Disassembly
1. Remove retaining ring (3) from housing (15).
2. Remove lip seal (6). Care must be taken to
prevent damage to the housing bore, shaft,
sealing surface, or bearing. Once removed, the
seal is not reusable.
Inspection
1. With the lip seal (6) removed, inspect the spacer
(4), shaft bearing (5) and housing (15) bore.
Assembly
1. Lubricate the new lip seal (6) with petroleum
jelly.
2. Wrap the input shaft (1) with plastic wrap to
prevent damage to the inner surface of the lip
seal (6).
3. Slide the seal (6) over shaft (1) so that lettering
on the seal (6) faces out.
4. Press the lip seal (6) into the housing (15) bore.
Insure seal (6), shaft (1) or housing (15) bore
do not become damaged. Remove the plastic
wrap.
5. Install the retaining ring (3) into the housing (15)
bore groove.
REMOVAL, INSPECTION AND/OR
REPLACEMENT OF INPUT SHAFT
SEAL
Figure 4. PW Pump Input Shaft Seal
REMOVAL, INSPECTION AND/OR
REPLACEMENT OF TRUNNION
ARM (CONTROL ARM) SEAL
Figure 5. PW Pump Trunnion Arm Seal
Refer to Figure 5.
Disassembly
1. Remove the retainer and lip seal (12). Care
must be taken to prevent damage to the housing
trunnion bore, trunnion arm (13) and sealing
surface. Once removed the retainer and lip seal
(12) is not reusable.
Inspection
1. With the lip seal (12) removed, inspect the area
for corrosion and wear. Inspect the trunnion bore
area sealing surface for damage or wear.
Assembly
1. Lubricate the new lip seal (12) with petroleum
jelly.
2. Wrap the trunnion arm (13) with plastic wrap to
prevent damage to the inner surface of the lip
seal (12).
3. Slide the lip seal (12) over the trunnion arm (13)
so that the lettering on the seal (12) faces out.
4. Press the lip seal (12) into the housing bore
(15). Insure the seal (12), trunnion arm (13),
and housing bore do not become damaged.
Remove the plastic wrap.
5. Install the retainer over the trunnion arm (13) on
top of the lip seal (12). Press into the trunnion
seal bore in the housing (15).
12
15
13
15
1
5
4
6
3